> ## Documentation Index
> Fetch the complete documentation index at: https://docs.lindy.ai/llms.txt
> Use this file to discover all available pages before exploring further.
# Step by Step Onboarding
> Create form-style onboarding flows that make your agent templates easy to configure and use.
## Quick Overview
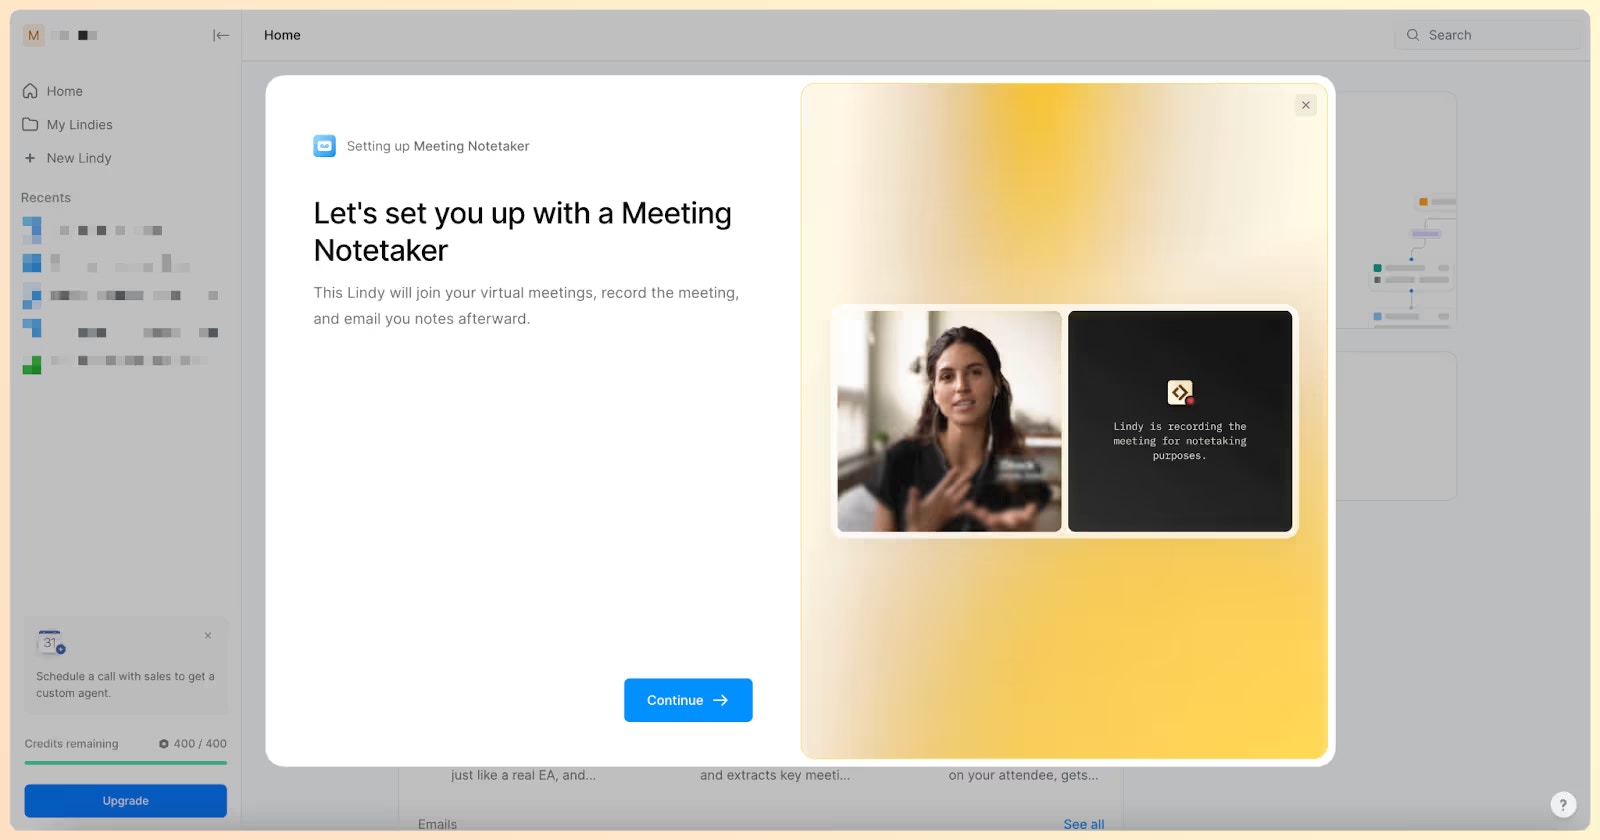
Step-by-Step Onboarding enables you to easily onboard others to an agent template. Instead of requiring template users to navigate a complex flow editor, build a simple form-style onboarding that allows your template users to easily configure and start using the agent!
Try it yourself: [Meeting Notetaker Step by Step Onboarding template](https://chat.lindy.ai/home?templateId=670444478279e010c572da9a)
 Key benefits:
* **Simplified setup** — Form-style interface instead of complex flow editor
* **Guided configuration** — Step users through only the essential settings
* **Professional experience** — Clean, intuitive onboarding flow
* **Automatic auth handling** — User authorizations collected automatically
* **Template sharing** — Easy distribution with built-in onboarding
## Creating a Step by Step Onboarding
This is the high-level process for creating a Step by Step Onboarding:
### Step 1: Plan Your Requirements
**Input Collection**
Figure out what input you need to collect from your users to configure the agent template.
*Example: Meeting Notetaker Template*
* Required: Calendar selection (required field)
* Optional: 'Restrict by attendee type' configuration
**Output Display**
Determine what output you need to show users so they can use the template.
*Example: Meeting Scheduler Template*
* Output: User's Lindy Mail address for CC'ing to email threads
### Step 2: Build the Onboarding Flow
Build the onboarding flow in the Flow Editor using:
* **Form Actions** — Show information and collect input
* **Lindy Configuration Actions** — Configure template steps
All Step by Step Onboardings start with an `Onboarding trigger` from Lindy Configuration Actions (located under `Lindy Utilities`).
Key benefits:
* **Simplified setup** — Form-style interface instead of complex flow editor
* **Guided configuration** — Step users through only the essential settings
* **Professional experience** — Clean, intuitive onboarding flow
* **Automatic auth handling** — User authorizations collected automatically
* **Template sharing** — Easy distribution with built-in onboarding
## Creating a Step by Step Onboarding
This is the high-level process for creating a Step by Step Onboarding:
### Step 1: Plan Your Requirements
**Input Collection**
Figure out what input you need to collect from your users to configure the agent template.
*Example: Meeting Notetaker Template*
* Required: Calendar selection (required field)
* Optional: 'Restrict by attendee type' configuration
**Output Display**
Determine what output you need to show users so they can use the template.
*Example: Meeting Scheduler Template*
* Output: User's Lindy Mail address for CC'ing to email threads
### Step 2: Build the Onboarding Flow
Build the onboarding flow in the Flow Editor using:
* **Form Actions** — Show information and collect input
* **Lindy Configuration Actions** — Configure template steps
All Step by Step Onboardings start with an `Onboarding trigger` from Lindy Configuration Actions (located under `Lindy Utilities`).
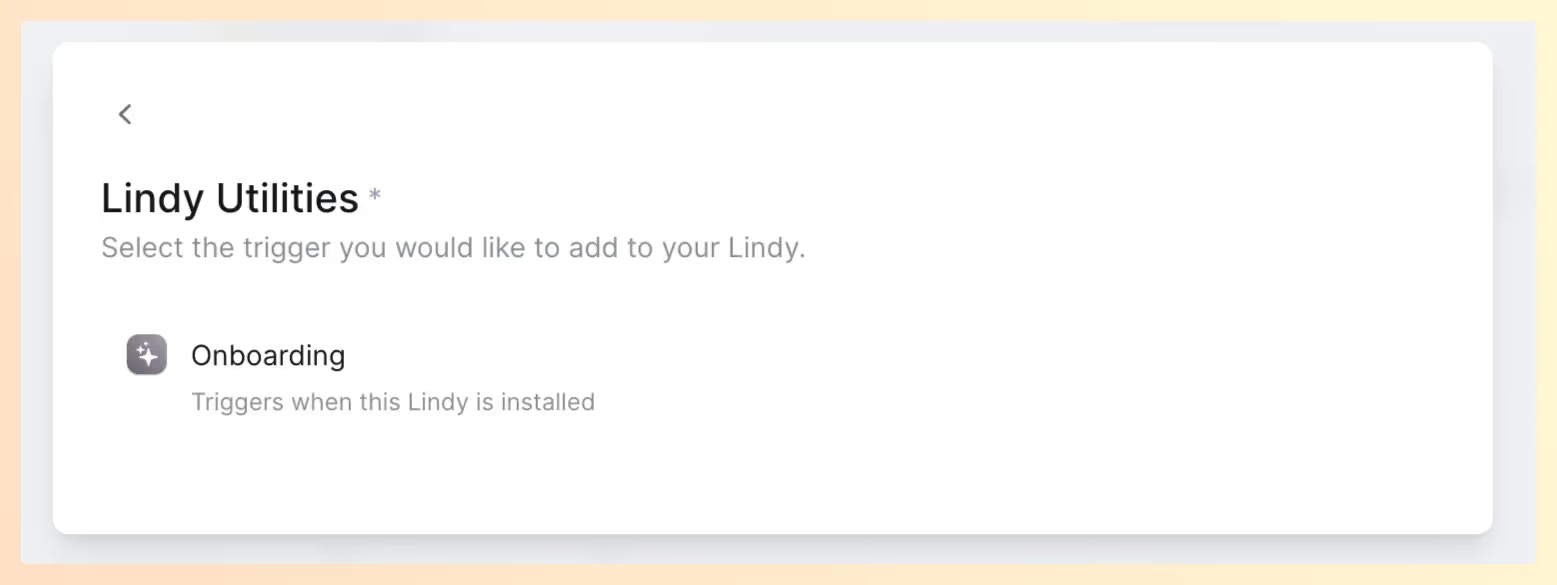 User authorizations are automatically collected at the beginning of onboarding. You do not need to collect user auths as an onboarding step.
### Step 3: Test and Share
User authorizations are automatically collected at the beginning of onboarding. You do not need to collect user auths as an onboarding step.
### Step 3: Test and Share
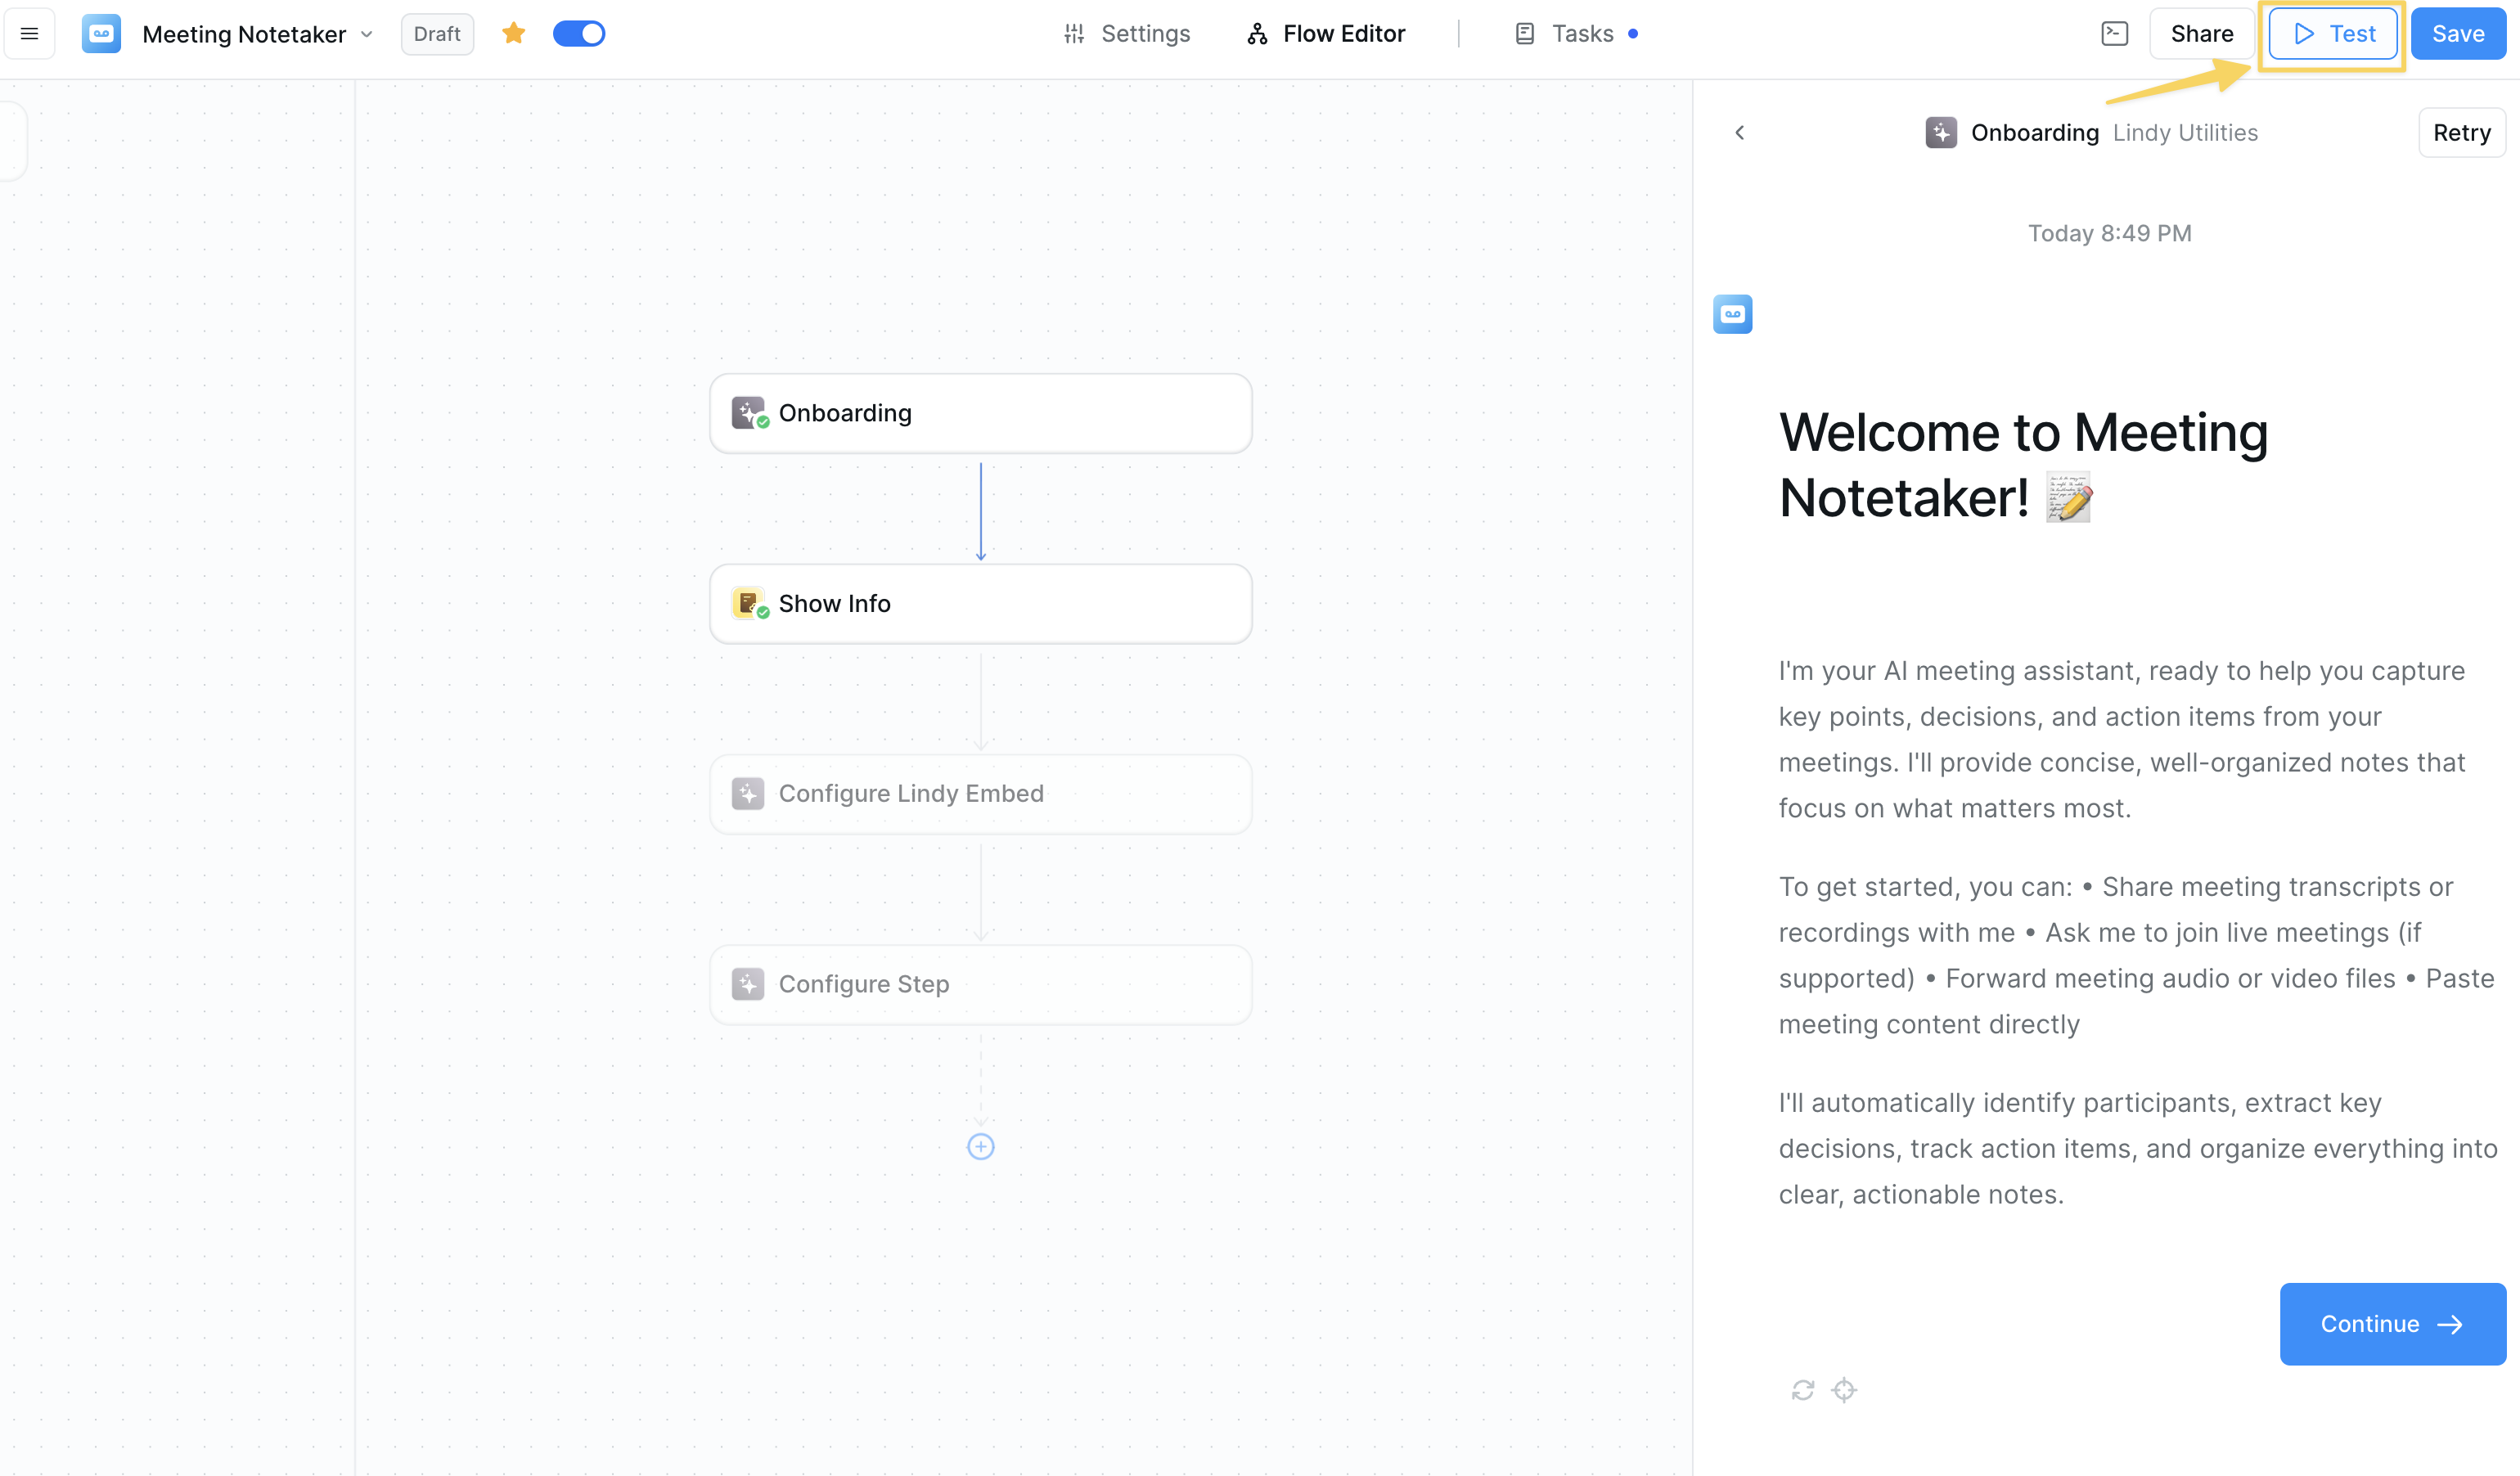 1. Click **Test** in the upper right corner
2. Select the onboarding trigger
3. Make changes if necessary
4. Share your template
## Form Actions
Form Actions enable you to show information and collect input from users:
| Action | Purpose |
| ---------------------------- | --------------------------------------------------------------- |
| **Show Multiple-Choice** | Shows a multiple choice question to users and collects input |
| **Show Copyable Content** | Shows a piece of text ready to copy |
| **Show Info Step** | Shows information to template users |
| **Show Text Input** | Shows a question to users and collects long or short text input |
| **Show Copyable Embed Code** | Shows the code snippet of a Lindy embed to copy |
Each step has an 'illustration' field. If no file is uploaded, there will be a default illustration.
## Lindy Configuration Actions
Located within Lindy Utilities in the action modal, these actions allow you to collect input from users while configuring template steps:
### Collect User Input to Configure Step
Collects input from a user for a specific field and uses the values to update the configuration of the fields in a step.
You cannot configure AI Agents or condition steps. Use Configure Step for these instead.
### Configure Step
Collects input from a user for a step and updates the configuration of any step. Use this over "Collect User Input to Configure Step" if:
* There are multiple fields in a step that you want to configure
* You need to configure AI Agents or condition steps
### Configure Lindy Embed
Configures the Lindy embed trigger node.
### Configure Knowledge Base
Collects data sources for a knowledge base node.
### Get User Info
Gets a user's information, including:
* Name
* Email
* Time Zone
* Lindy Mail Suffix
## The Step by Step Onboarding Experience
### User Flow
* **Incomplete onboarding**: Users who click out without completing will land on the Flow Editor for the template and can resume onboarding
* **Completed onboarding**: Users are redirected to the Task View for the agent they just configured
### Harmonious Experience
To ensure a smooth experience, add a `Message Received trigger` to your template with a greeting message that introduces your user to the Lindy.
## Best Practices
Begin with an Info Step introducing your user to the agent they will be onboarded to and what it does.
In the last step, let the user know that the agent can be configured further in the Flow Editor.
Add a Message Received trigger to your template with a greeting message. Users will see this after completing onboarding.
If the agent consists of only a Message Received trigger and an agent state, onboarding may not be needed. Consider using a Show Info step to tell the user how to use the agent.
When thinking of inputs and outputs, consider what is required for the user to configure to ensure the agent can run, and critical steps that the user might want to configure.
Template users will not be able to see the onboarding flow in their template's Flow Editor after sharing.
## Next Steps
Enhance your template sharing with these concepts:
Learn about creating and sharing agent templates
Test your onboarding flows thoroughly
Embed Lindy chat widgets in websites
Configure knowledge bases for support templates
1. Click **Test** in the upper right corner
2. Select the onboarding trigger
3. Make changes if necessary
4. Share your template
## Form Actions
Form Actions enable you to show information and collect input from users:
| Action | Purpose |
| ---------------------------- | --------------------------------------------------------------- |
| **Show Multiple-Choice** | Shows a multiple choice question to users and collects input |
| **Show Copyable Content** | Shows a piece of text ready to copy |
| **Show Info Step** | Shows information to template users |
| **Show Text Input** | Shows a question to users and collects long or short text input |
| **Show Copyable Embed Code** | Shows the code snippet of a Lindy embed to copy |
Each step has an 'illustration' field. If no file is uploaded, there will be a default illustration.
## Lindy Configuration Actions
Located within Lindy Utilities in the action modal, these actions allow you to collect input from users while configuring template steps:
### Collect User Input to Configure Step
Collects input from a user for a specific field and uses the values to update the configuration of the fields in a step.
You cannot configure AI Agents or condition steps. Use Configure Step for these instead.
### Configure Step
Collects input from a user for a step and updates the configuration of any step. Use this over "Collect User Input to Configure Step" if:
* There are multiple fields in a step that you want to configure
* You need to configure AI Agents or condition steps
### Configure Lindy Embed
Configures the Lindy embed trigger node.
### Configure Knowledge Base
Collects data sources for a knowledge base node.
### Get User Info
Gets a user's information, including:
* Name
* Email
* Time Zone
* Lindy Mail Suffix
## The Step by Step Onboarding Experience
### User Flow
* **Incomplete onboarding**: Users who click out without completing will land on the Flow Editor for the template and can resume onboarding
* **Completed onboarding**: Users are redirected to the Task View for the agent they just configured
### Harmonious Experience
To ensure a smooth experience, add a `Message Received trigger` to your template with a greeting message that introduces your user to the Lindy.
## Best Practices
Begin with an Info Step introducing your user to the agent they will be onboarded to and what it does.
In the last step, let the user know that the agent can be configured further in the Flow Editor.
Add a Message Received trigger to your template with a greeting message. Users will see this after completing onboarding.
If the agent consists of only a Message Received trigger and an agent state, onboarding may not be needed. Consider using a Show Info step to tell the user how to use the agent.
When thinking of inputs and outputs, consider what is required for the user to configure to ensure the agent can run, and critical steps that the user might want to configure.
Template users will not be able to see the onboarding flow in their template's Flow Editor after sharing.
## Next Steps
Enhance your template sharing with these concepts:
Learn about creating and sharing agent templates
Test your onboarding flows thoroughly
Embed Lindy chat widgets in websites
Configure knowledge bases for support templates