

Quick Overview
Set up a central document processing hub that:- Receives documents via a dedicated email inbox
- Identifies document types automatically (invoices, contracts, forms, etc.)
- Extracts key information based on document type
- Logs data to organized spreadsheets for easy access
- Notifies relevant teams when action is needed
Setting Up Your Document Hub
Step 1: Create Your Document Inbox
Set up a dedicated email address to serve as the central entry point for all documents requiring processing.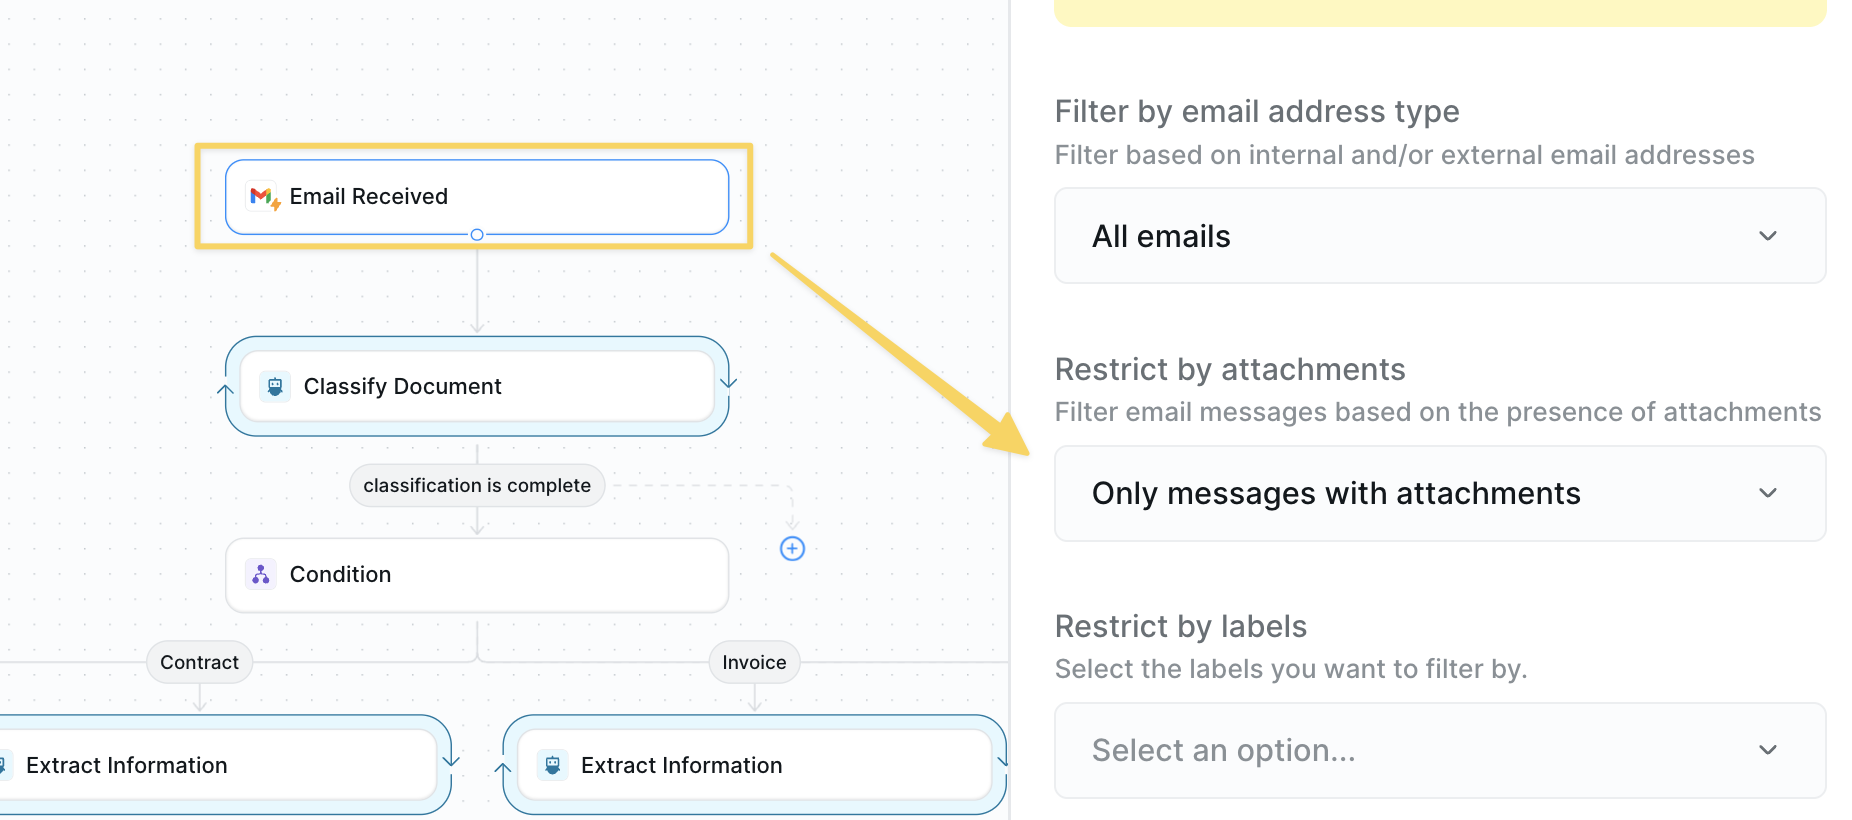
- Set up a dedicated Gmail account (e.g., docs@yourcompany.com)
- Configure
Gmail – Email Receivedas your trigger - Add filter: “Has attachment” = Yes
- Share this email with teams who need document processing
Step 2: Identify Document Type
Automatically classify incoming documents to determine the appropriate processing workflow for each type.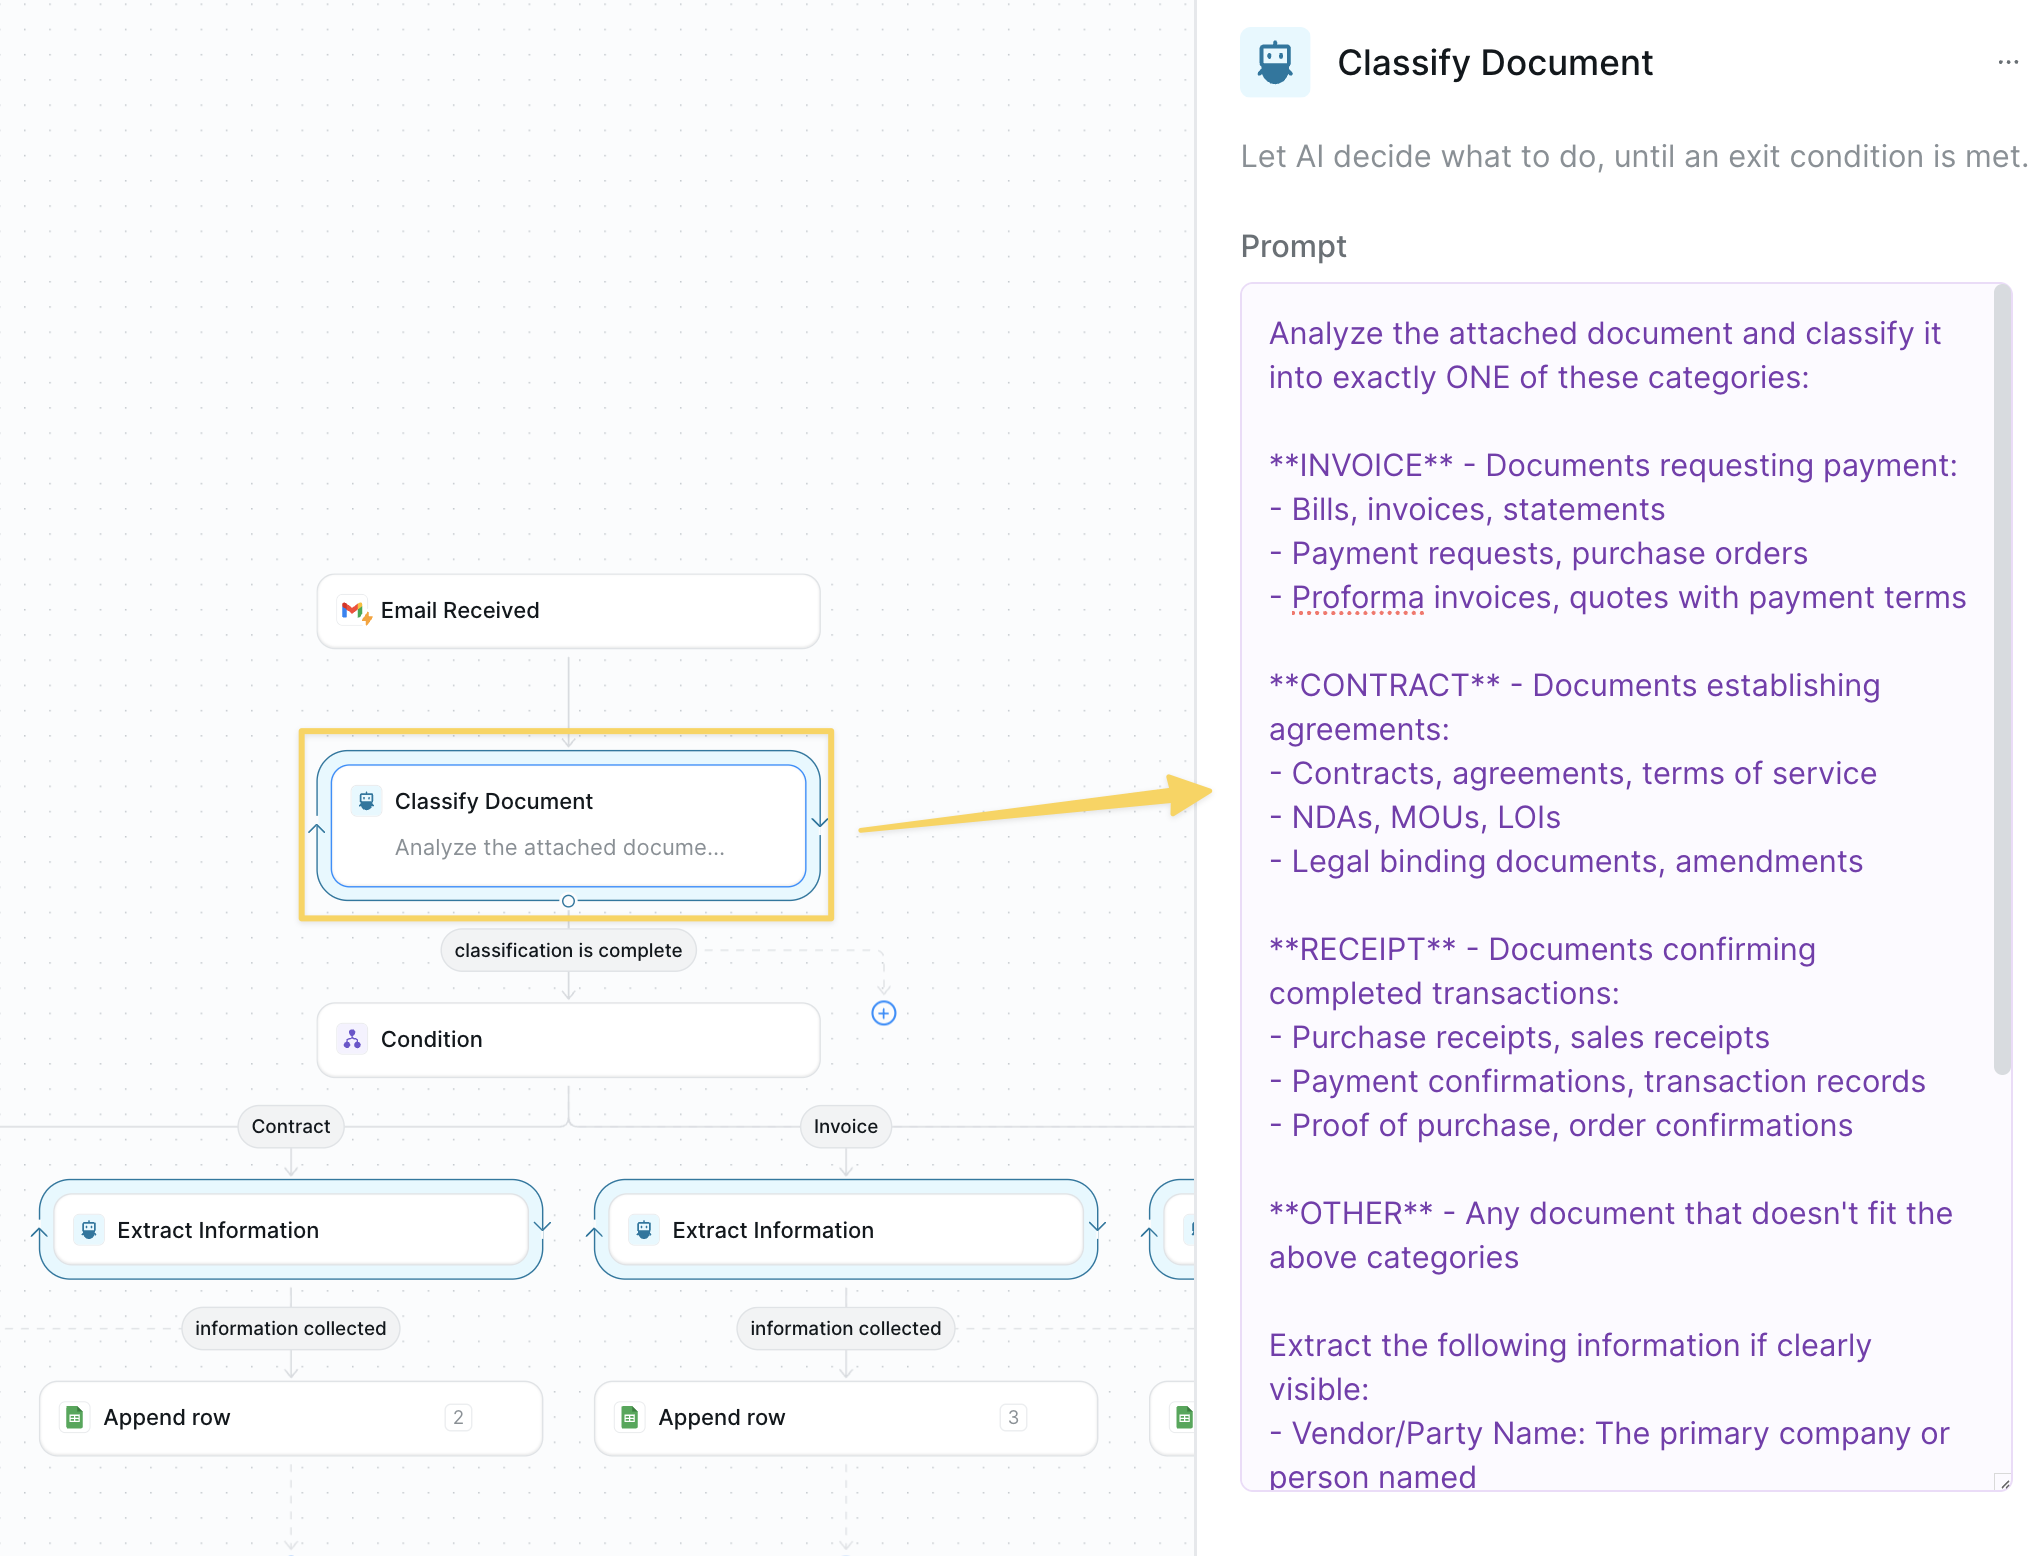
AI Agent with prompt:
Step 3: Route to Correct Document Processing
Use conditional routing based on the document classification to send each document type down the appropriate processing path.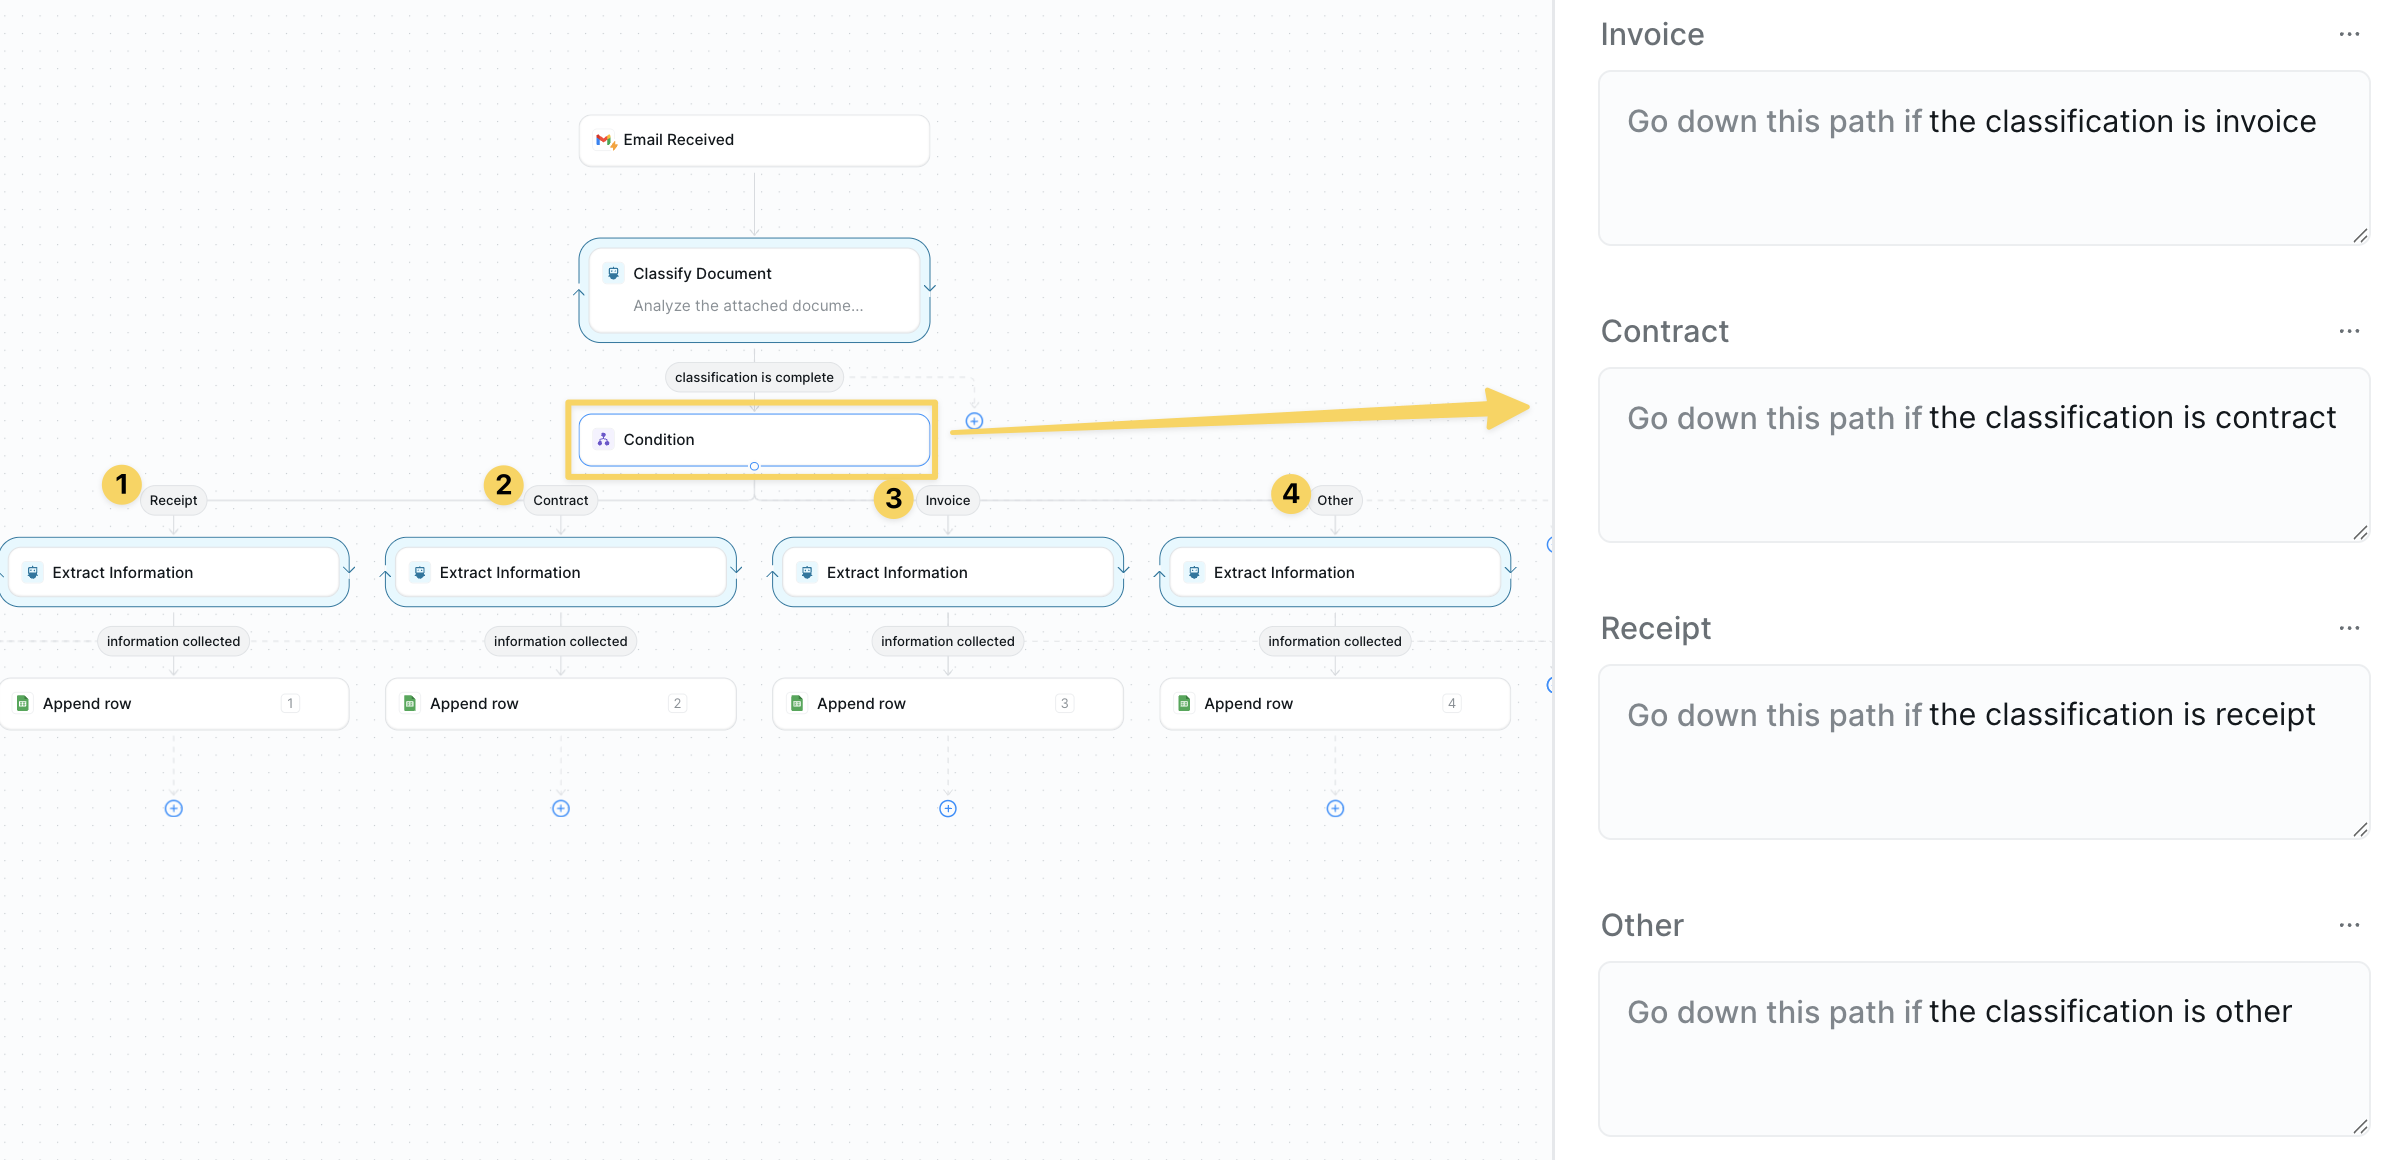
Condition nodes to route based on document type:
- If type = “INVOICE” → Invoice processing branch
- If type = “CONTRACT” → Contract processing branch
- If type = “RECEIPT” → Receipt processing branch
- If type = “OTHER” → General document processing branch
Step 4: Extract Specific Type Data for Those Categories
Pull out the relevant information fields based on the document type with specialized AI agents for each category.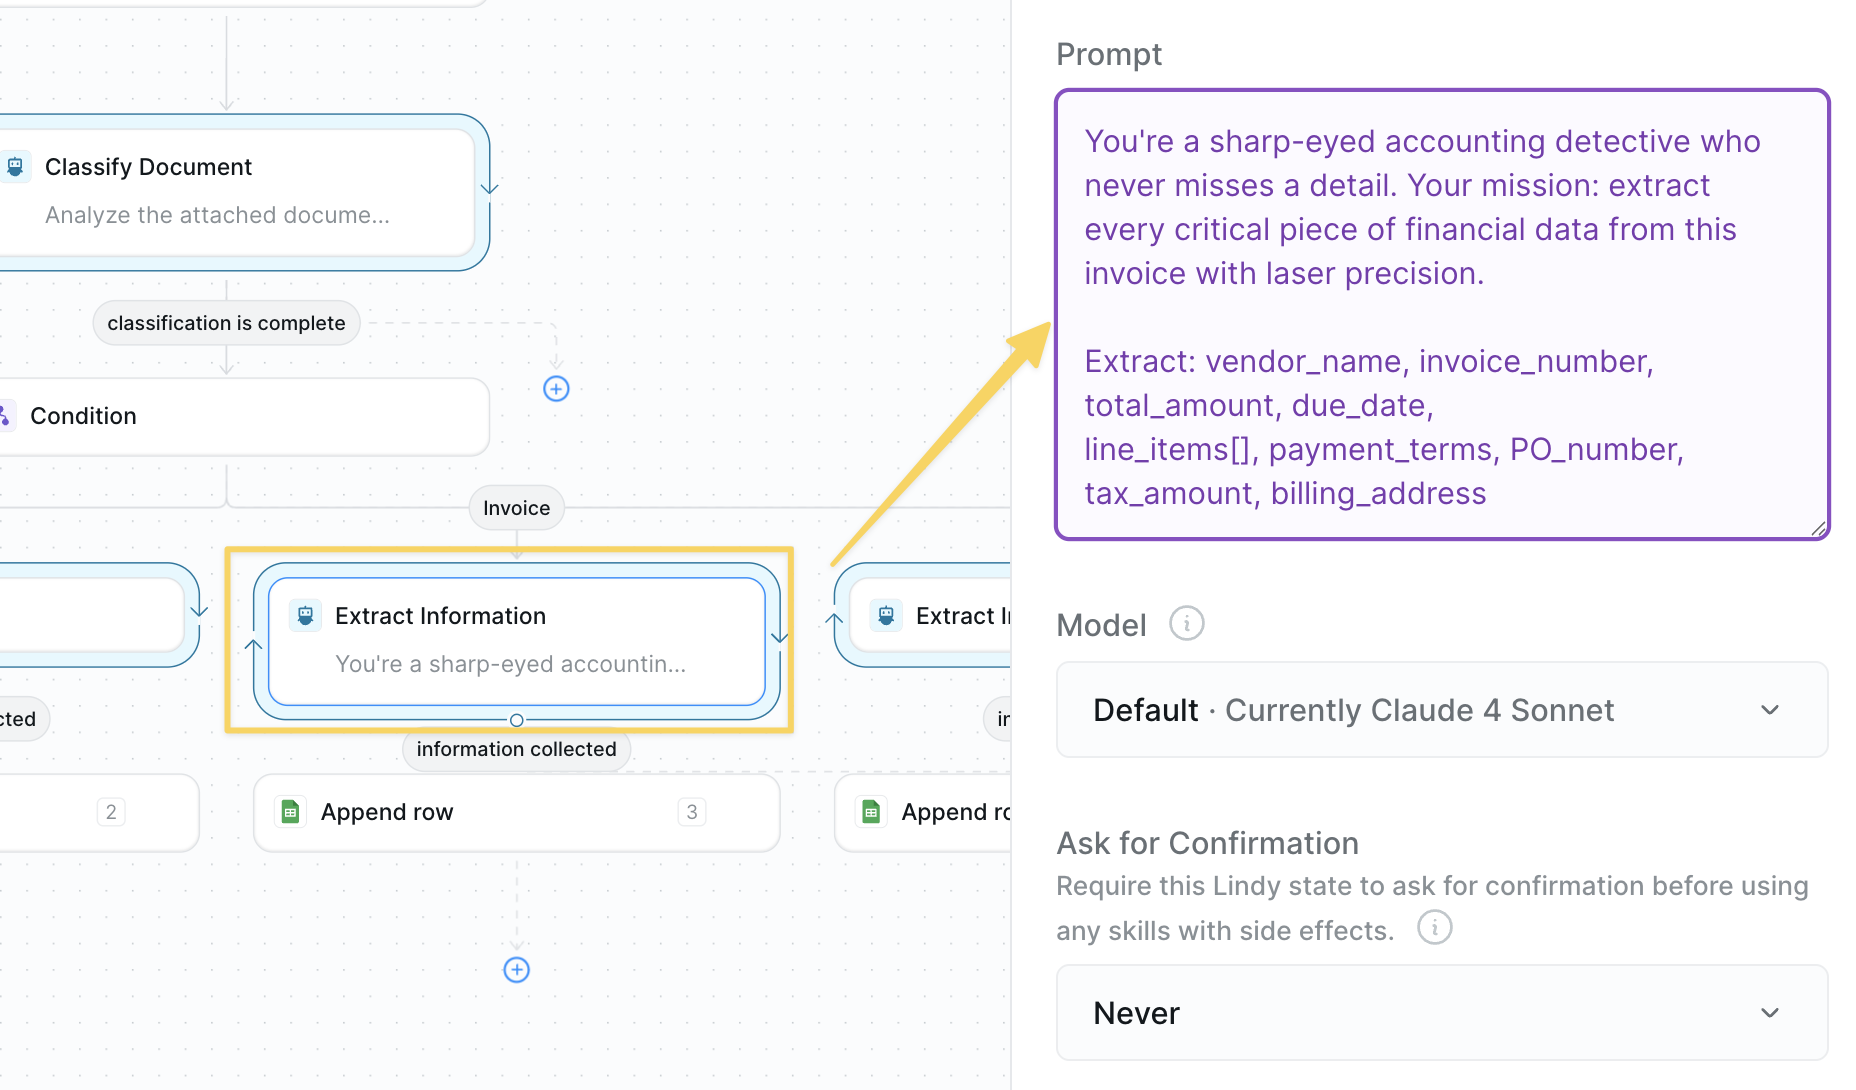
Step 5: Log to an Appropriate Spreadsheet
Organize extracted data into your preferred system — spreadsheets are just the starting point.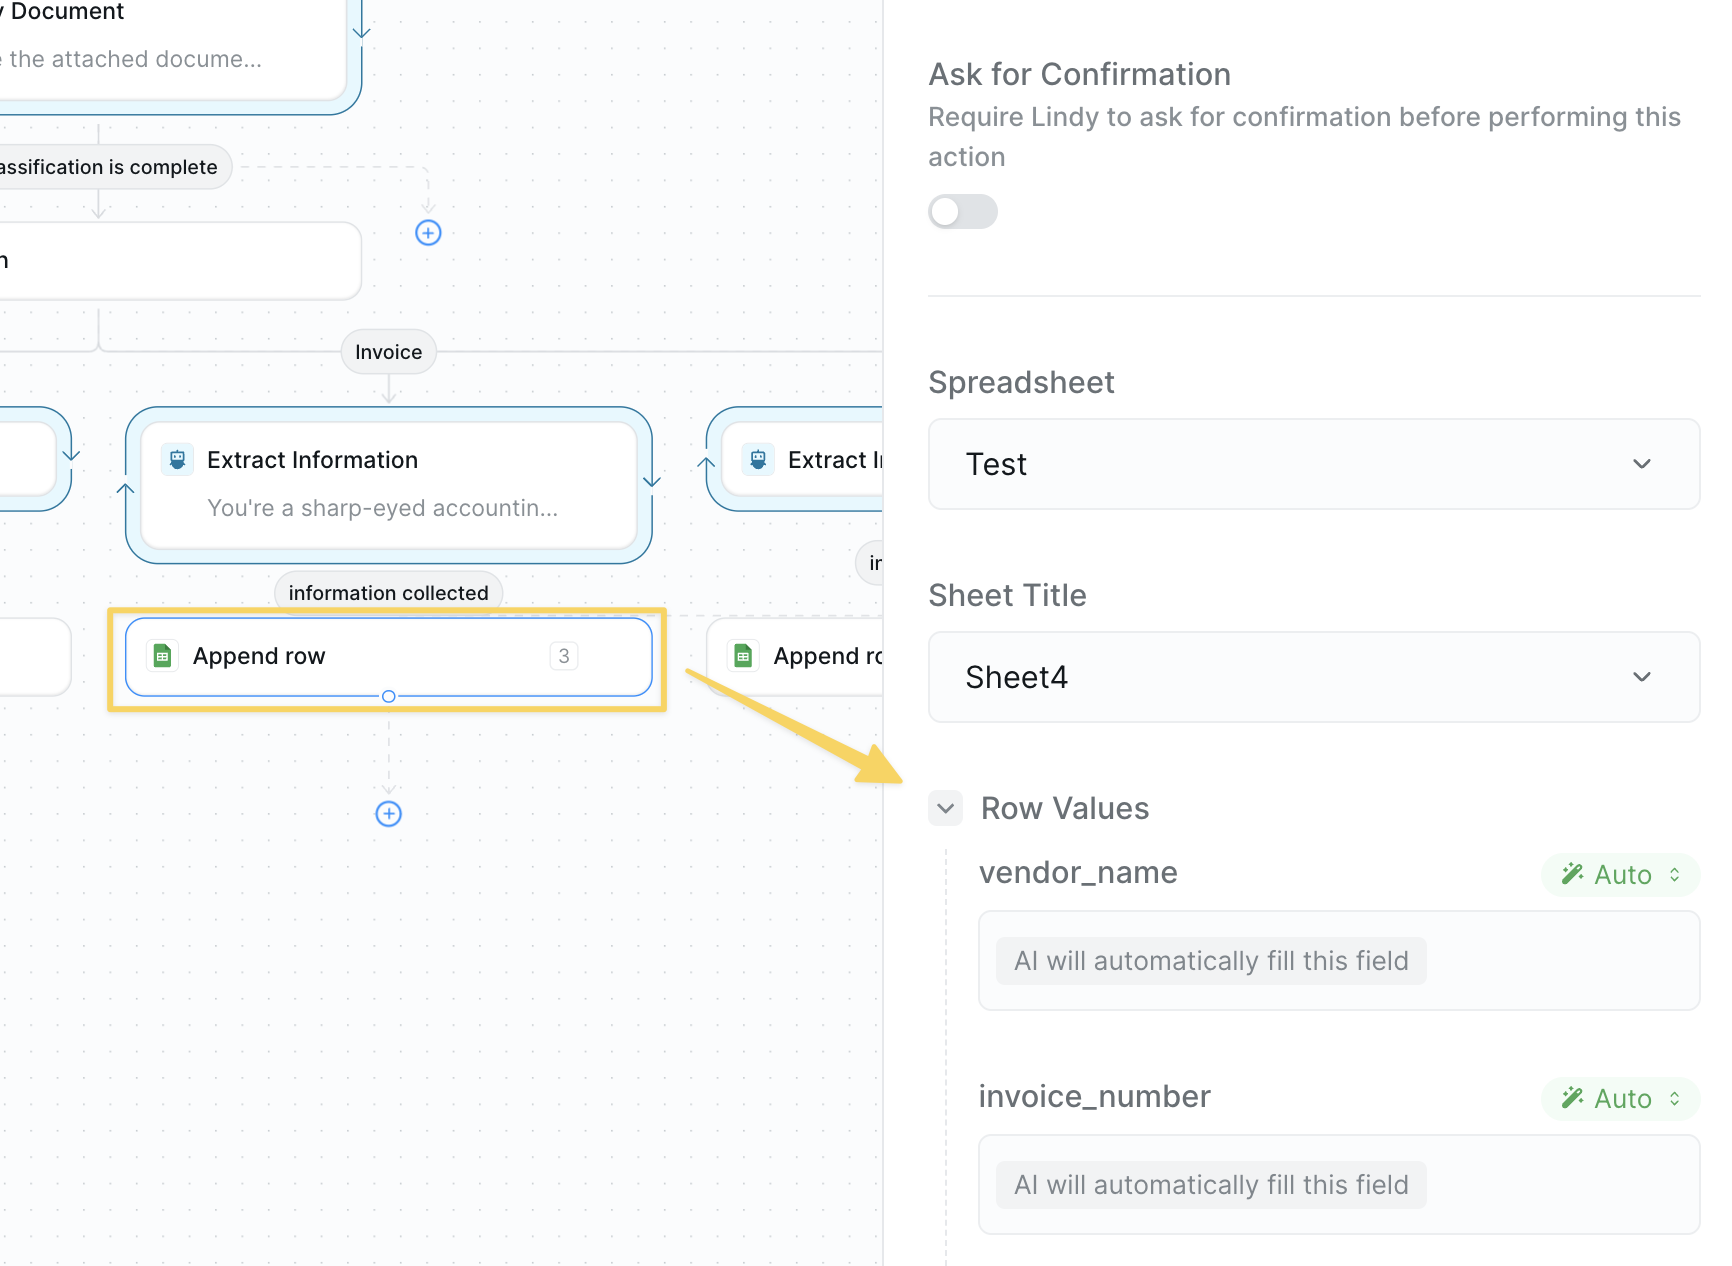
Google Sheets – Append Row to log data by document type.
Advanced Integrations: You can post this information anywhere using:
HTTP Requestactions to send data to your ERP, CRM, or custom databases- Direct integrations with Airtable, Notion, or other platforms
- Webhook endpoints for real-time processing
- API calls to accounting software like QuickBooks or Xero
Advanced Features
Best Practices
Start with High-Volume Doc Types
Start with High-Volume Doc Types
Focus on the documents that eat the most time — usually invoices and receipts.
Create Clear Naming Conventions
Create Clear Naming Conventions
Standardize how documents are named and filed from day one.
Set Up Error Handling
Set Up Error Handling
Route failed extractions to a manual review queue rather than losing them.
Regular Accuracy Audits
Regular Accuracy Audits
Spot-check 10% of processed documents weekly to refine extraction prompts.
Next Steps
Invoice Processing
Deep dive into AP automation
Agent Steps
Build intelligent document analysis workflows
Knowledge Base
Store extracted document data
Human in the Loop
Add approval steps for critical documents