Time to complete:
Difficulty:
What you’ll build:
5 minutesDifficulty:
BeginnerWhat you’ll build:
An AI email assistant that automatically responds to inquiriesBuilding Your First Agent
In this guide, you’ll learn how to build your first AI email assistant. This will take less than five minutes, and after you’re done, you’ll have an email responder (because no one loves to answer emails themselves). You’ll create an AI agent that:- Monitors your Gmail for incoming emails
- Filters emails intelligently using conditions to identify business inquiries
- Searches your knowledge base (your website) for relevant information
- Automatically responds with helpful, accurate information
- Keeps you in the loop by BCC’ing you on all responses
Overview
Here’s exactly what we’ll do:1
Create agent & add trigger
Create a new Lindy agent and add a Gmail trigger to monitor incoming emails
2
Add condition
Add a condition to filter for business inquiries
3
Add knowledge base & actions
Add your website as a knowledge base and configure Gmail actions for automated replies
4
Test & monitor
Test your agent with a real email and monitor its performance
Step 1: Create a New Lindy & Add a Trigger
Click the “New Lindy” button below Home in the top left of your workspace to begin building your AI agent.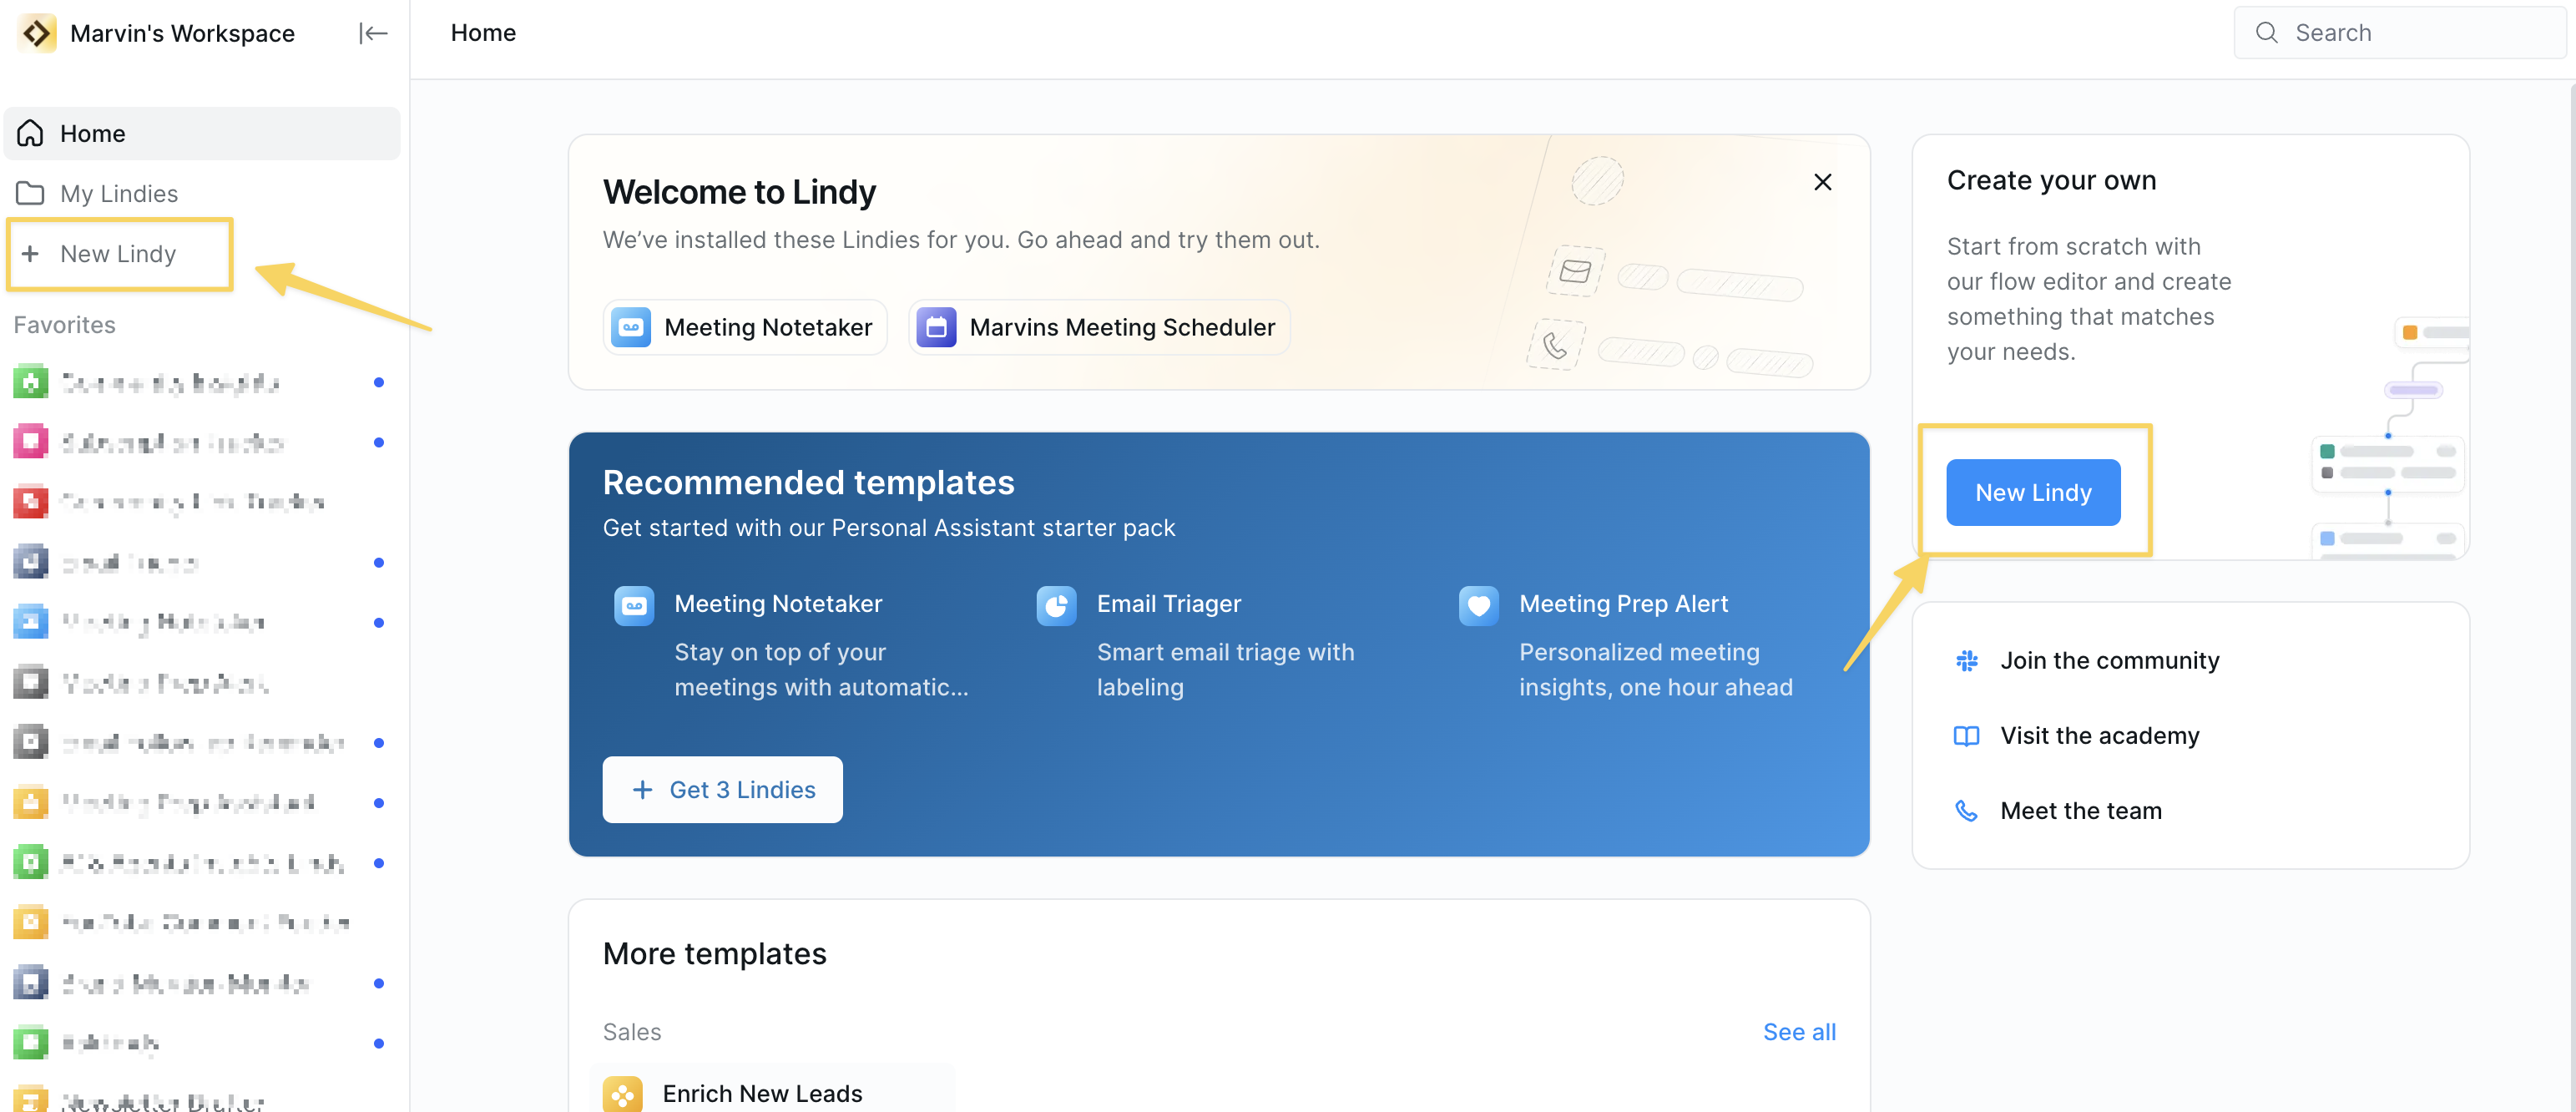
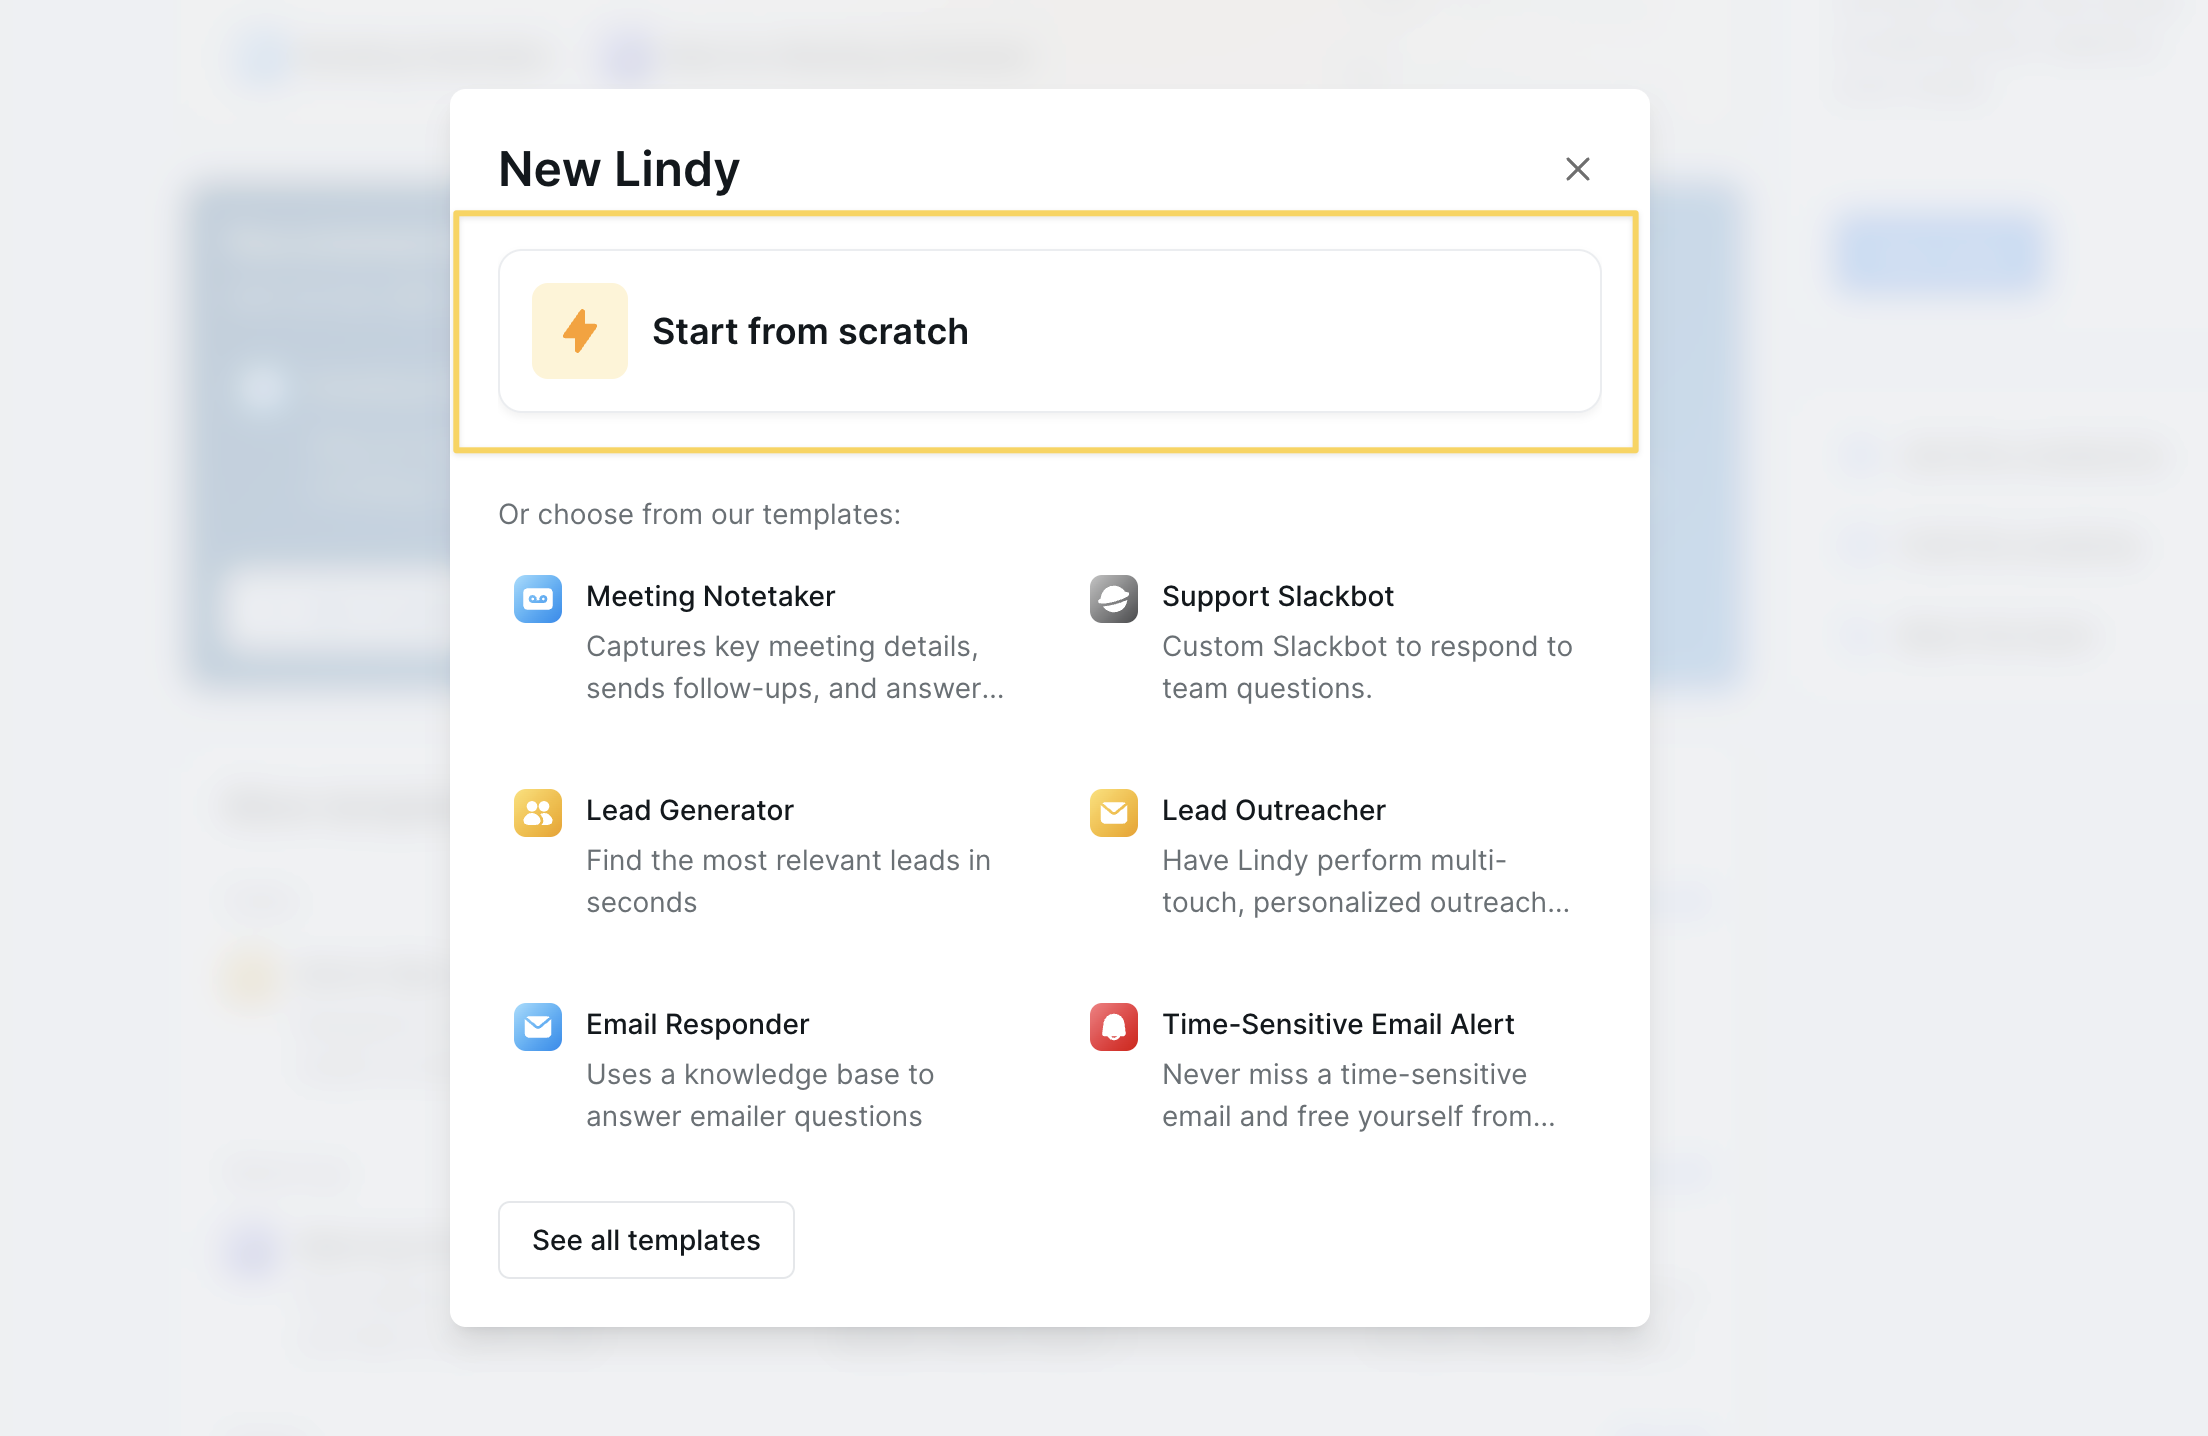
Setting up the Email Trigger
Steps:
- Click “Select Trigger”
- Click Gmail
- Add the Email Received trigger
- Connect the Gmail account you want your AI agent to monitor
Step 2: Add a Condition
What are conditions?
Conditions let you define different paths in your automation based on specific criteria. They help your AI agent make smart decisions about which emails to respond to.
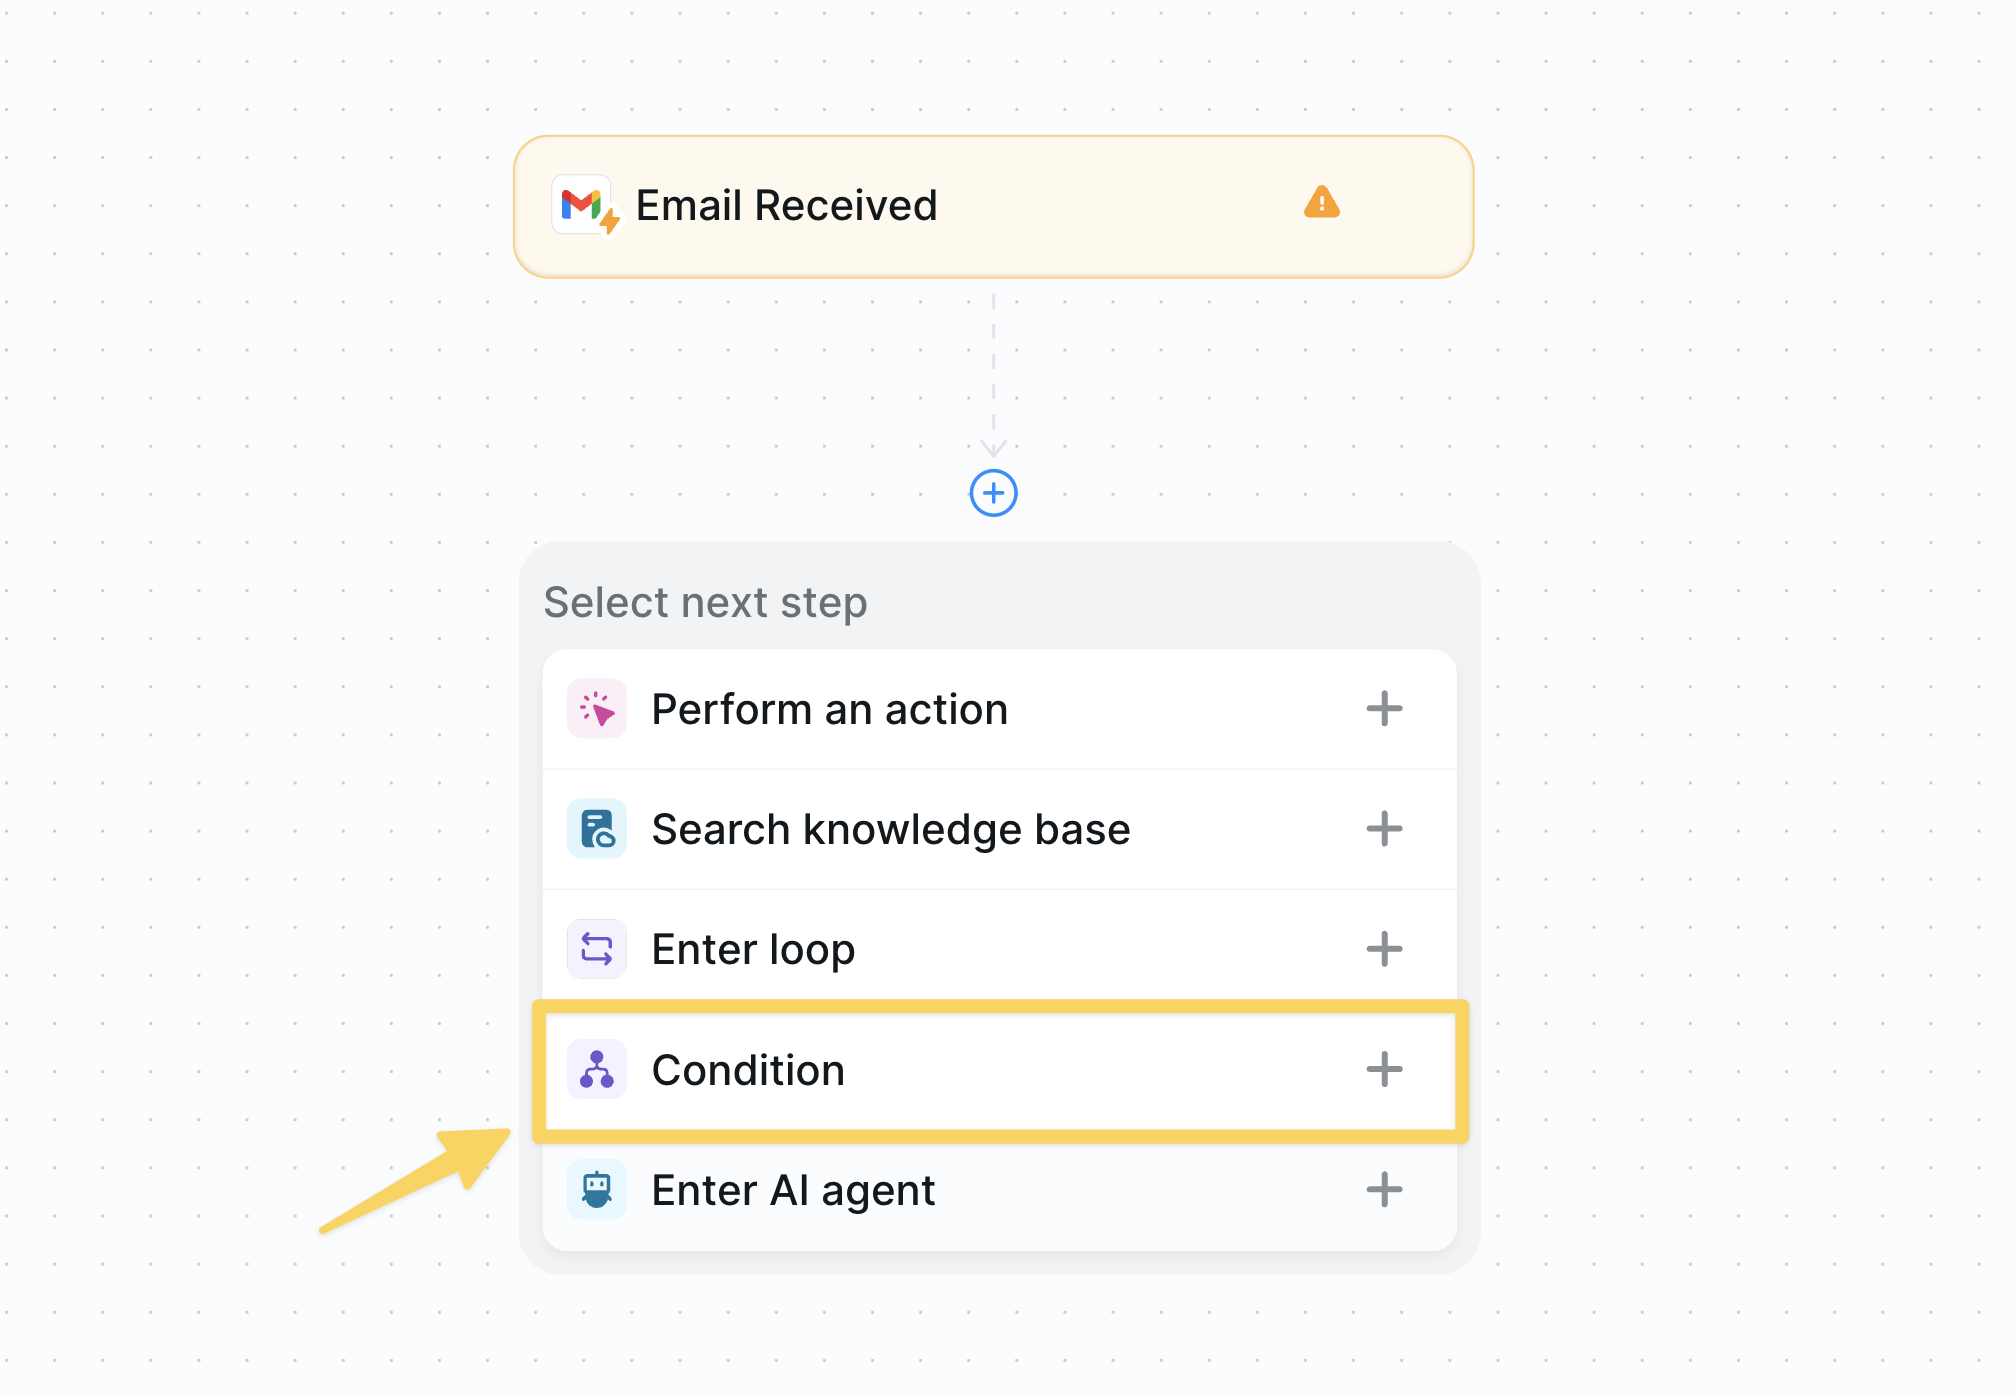
Condition step under Perform an action and Search knowledge base.
Configure Your Condition
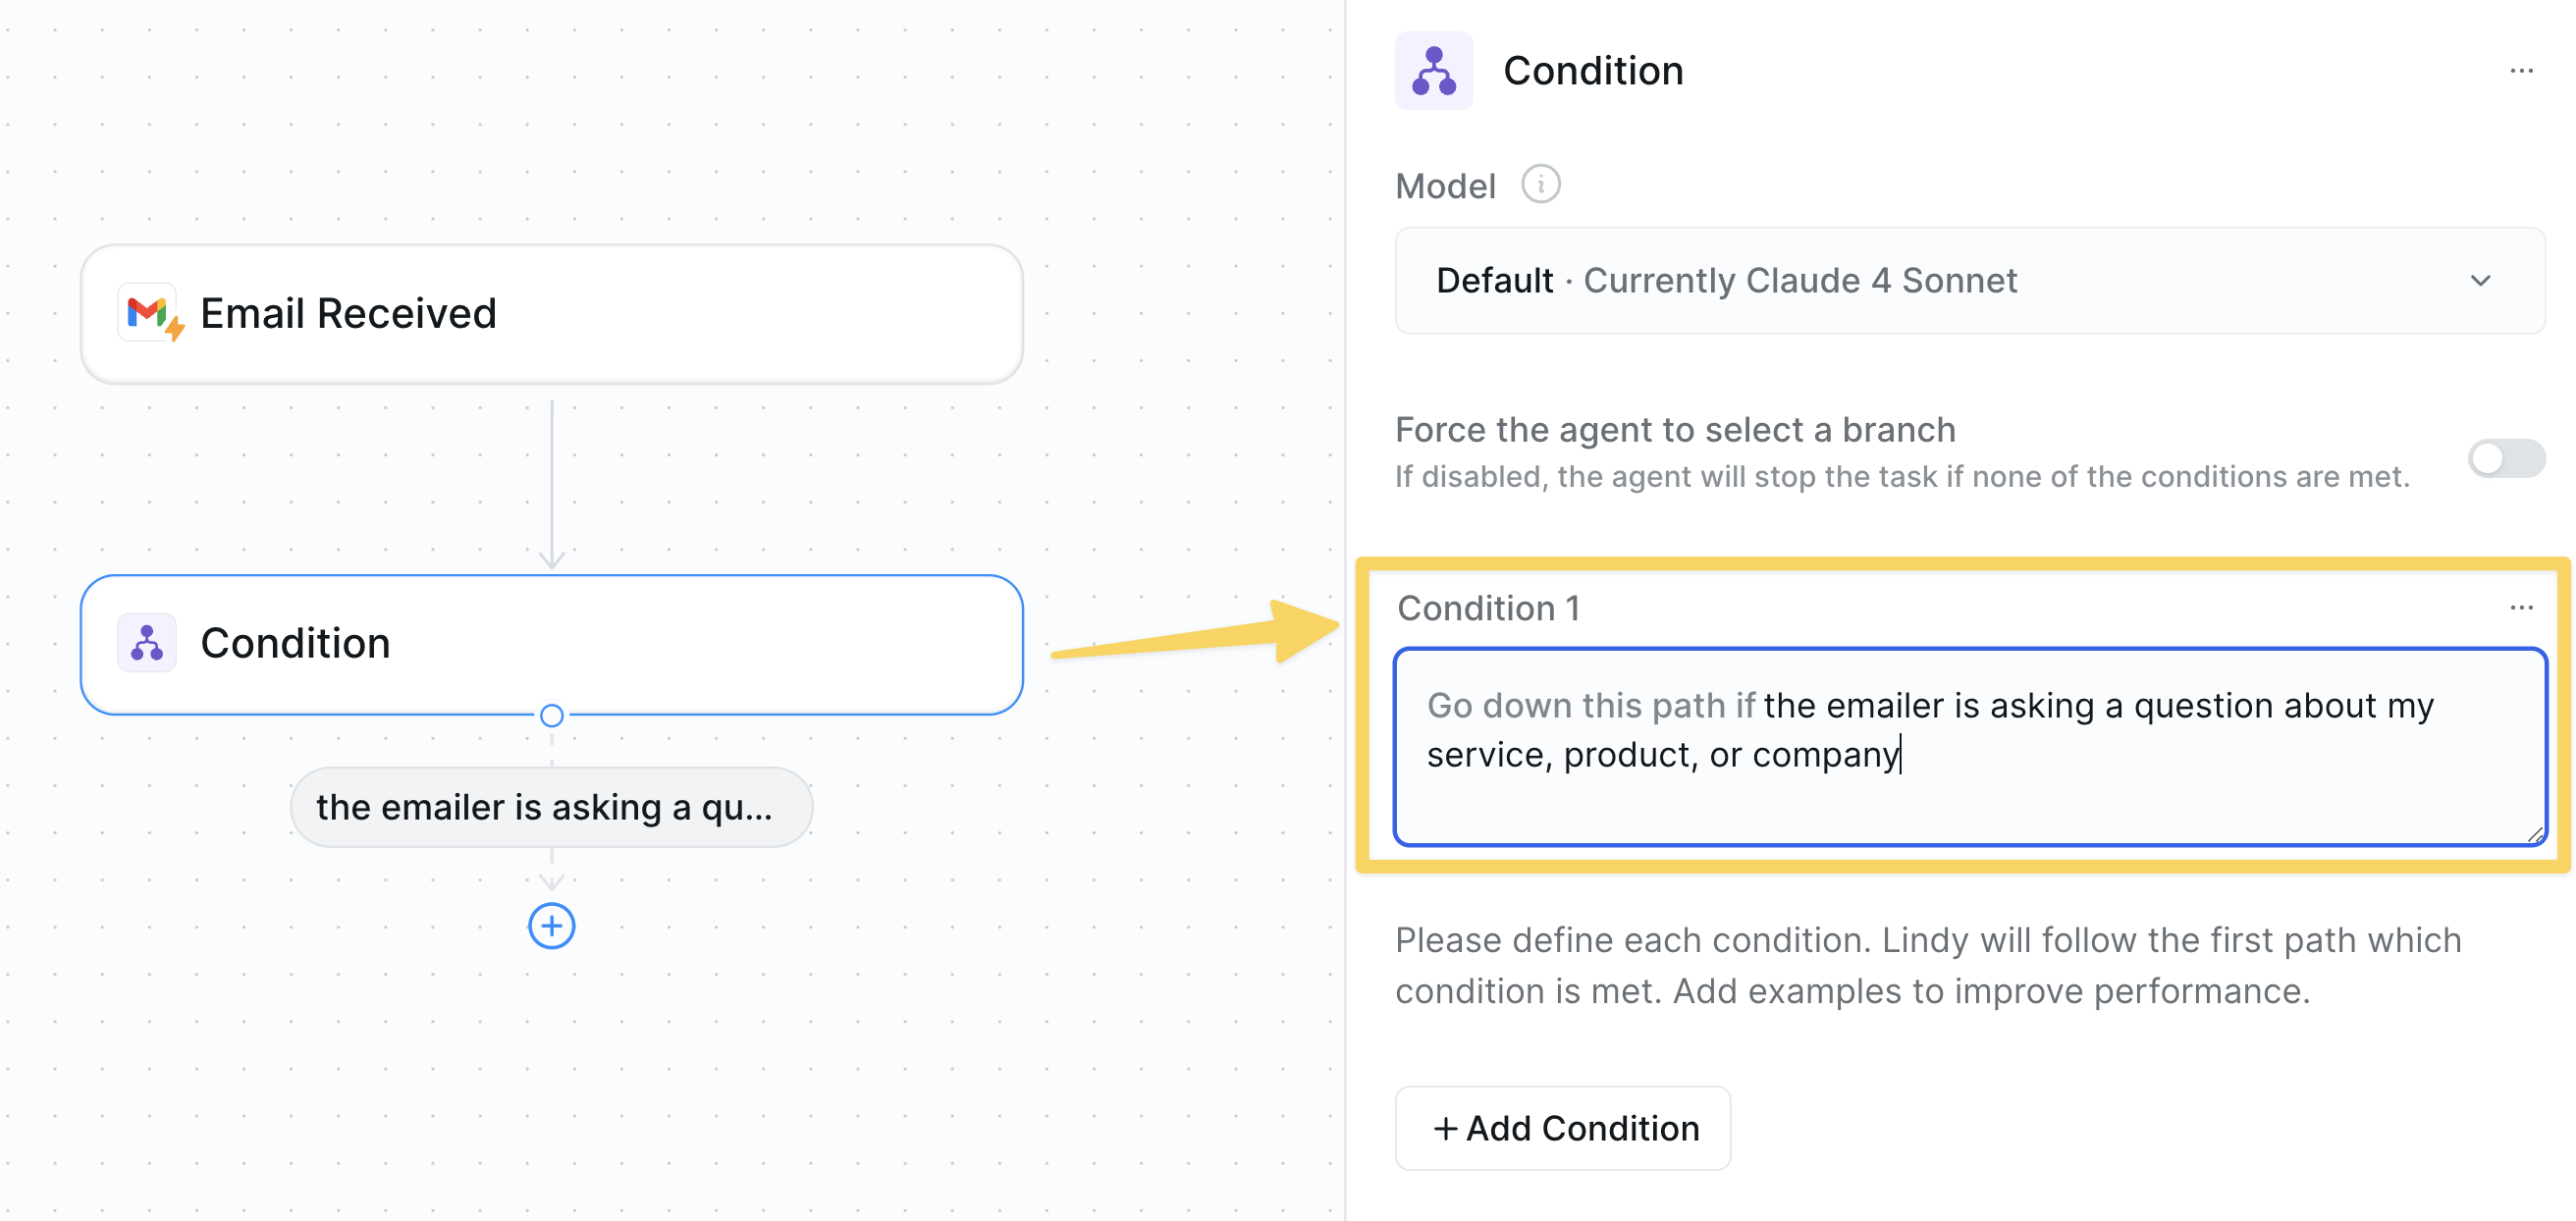
Lindy will only proceed to the next step if the condition is met. Each condition begins withGo down this path if...
Set your condition prompt to:
Step 4: Add a Knowledge Base & Actions
The Knowledge Base is a repository of data from which your AI agent retrieves information. AI agents search through knowledge bases semantically, finding results whose meaning is similar, even if the exact text doesn’t match.For example, searching for “refunds” will also find entries related to “returns.”
- Click “Add step” and select “Search knowledge base”
- Click “Website”
- Enter your company website URL and click “Crawl”
Add an Action
Actions are tasks your AI agent performs, such as replying to emails, updating a HubSpot CRM, or creating a Notion page.
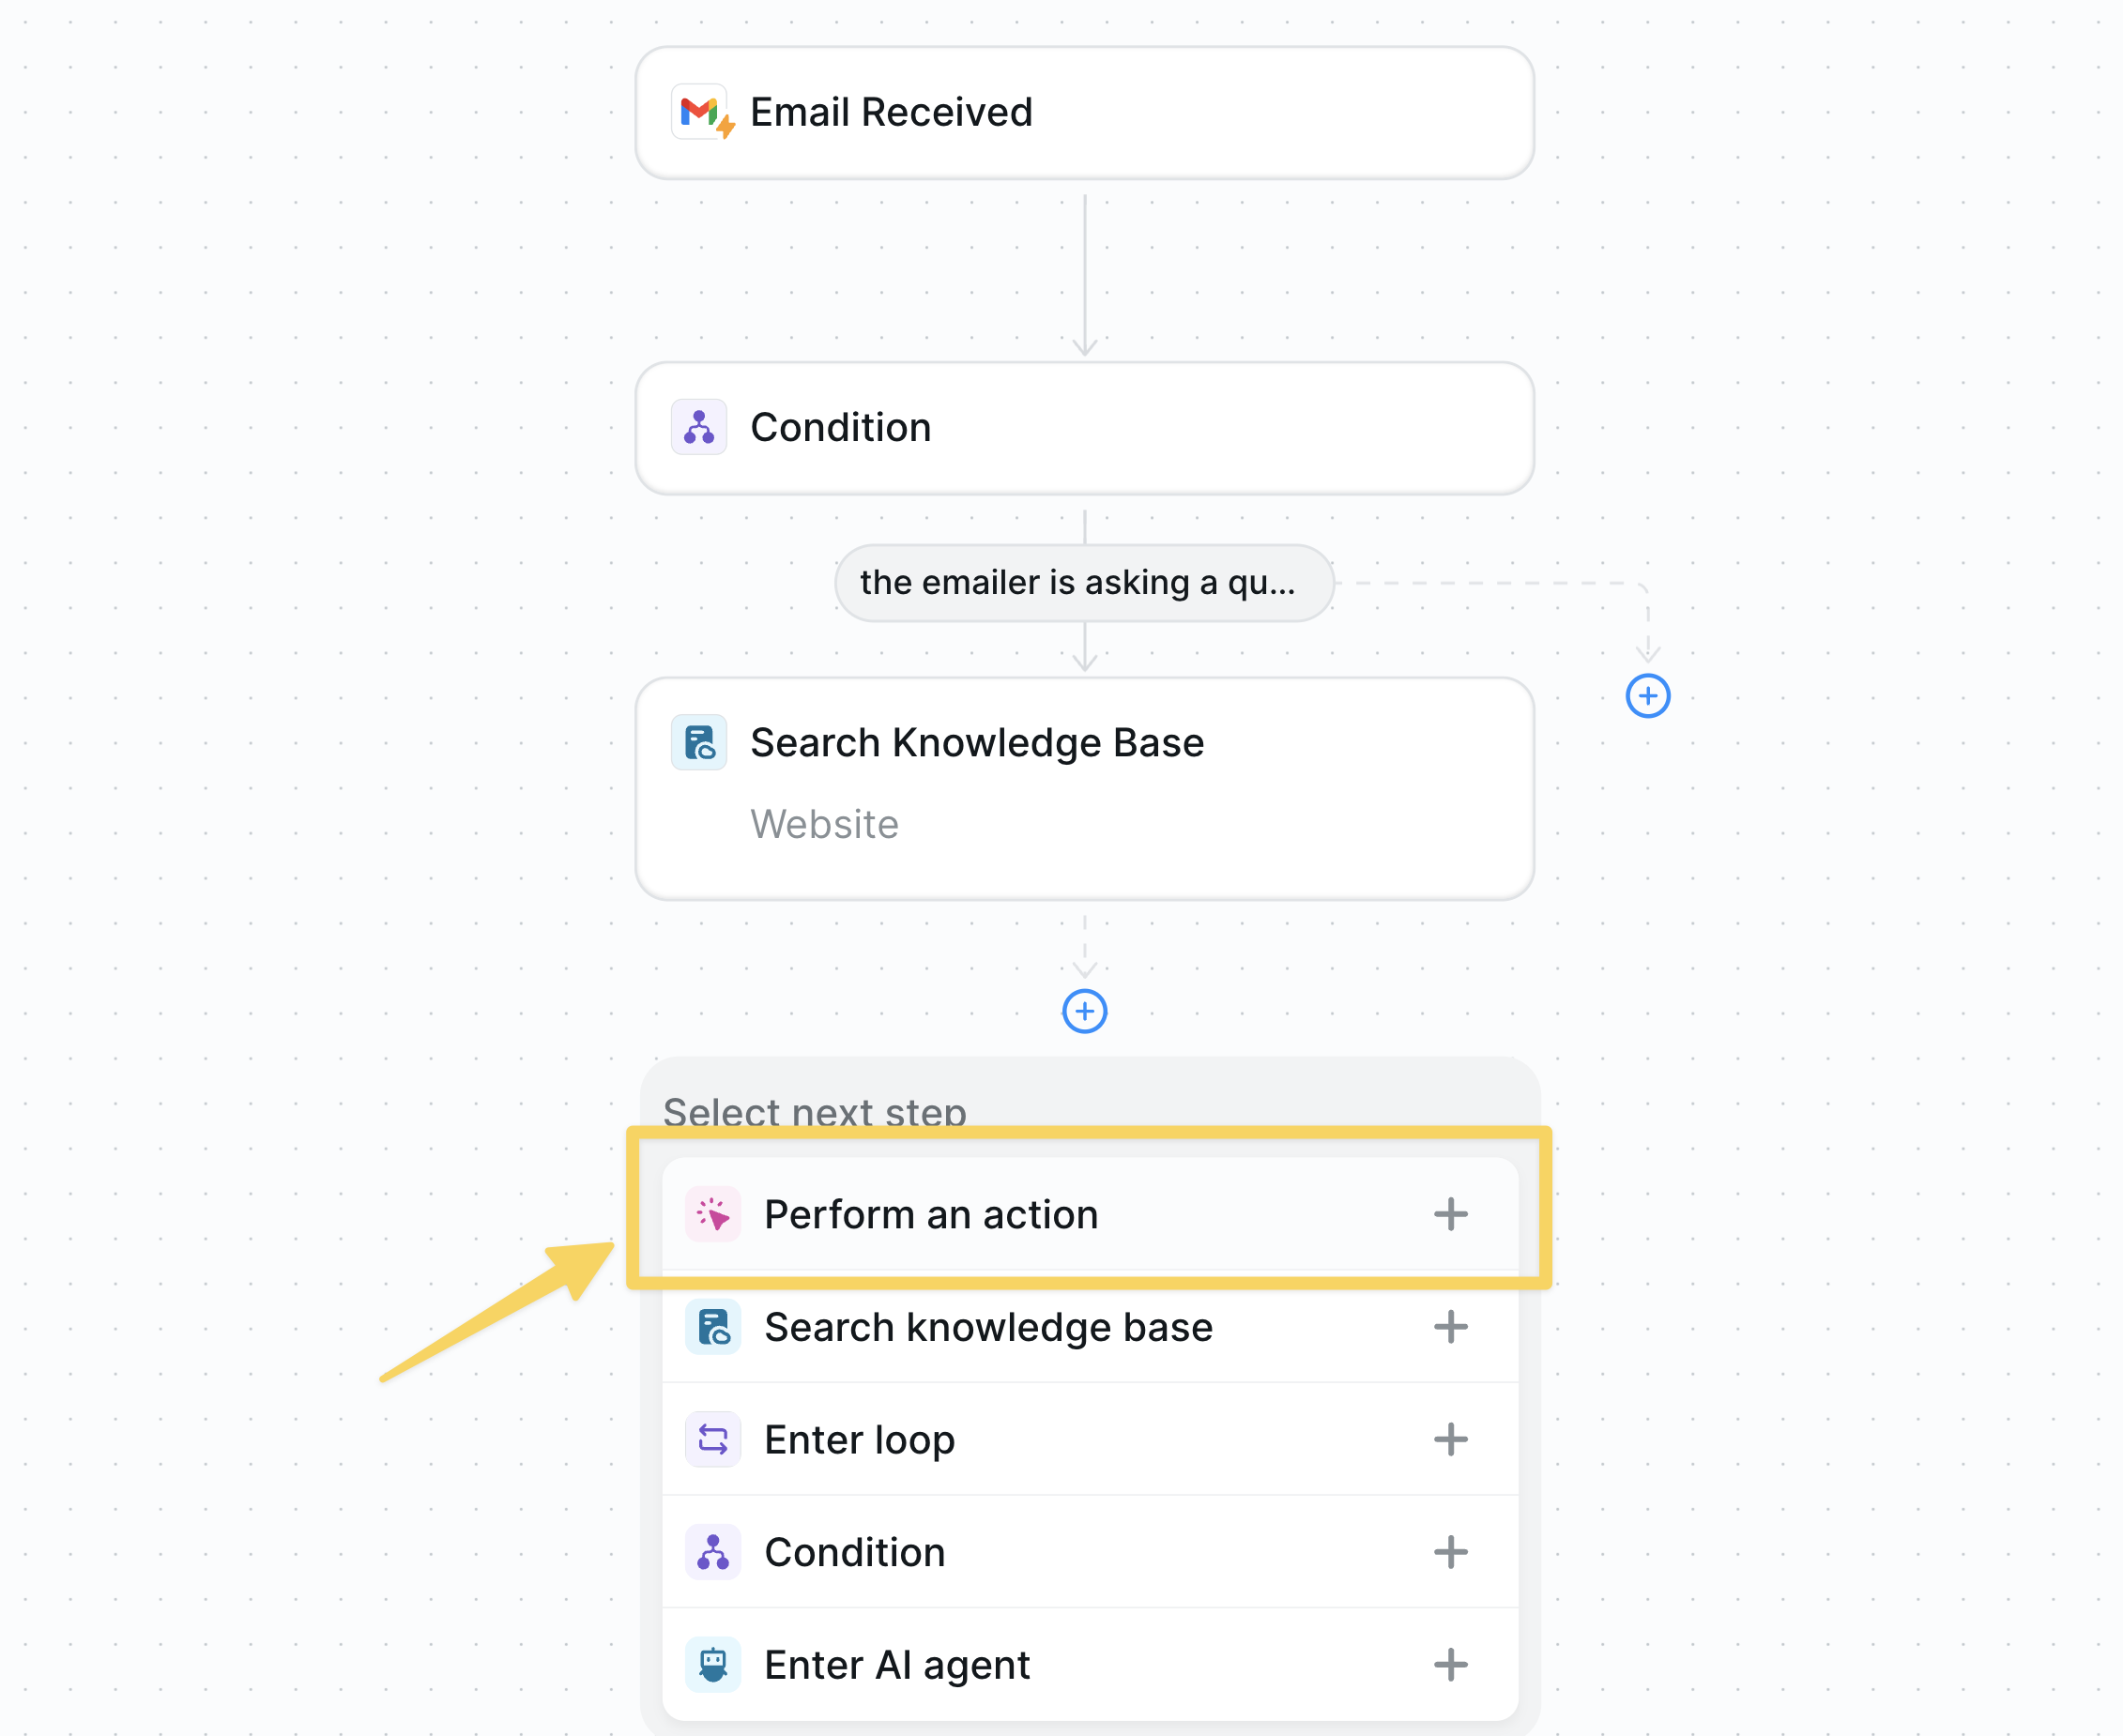
Configure Your Response
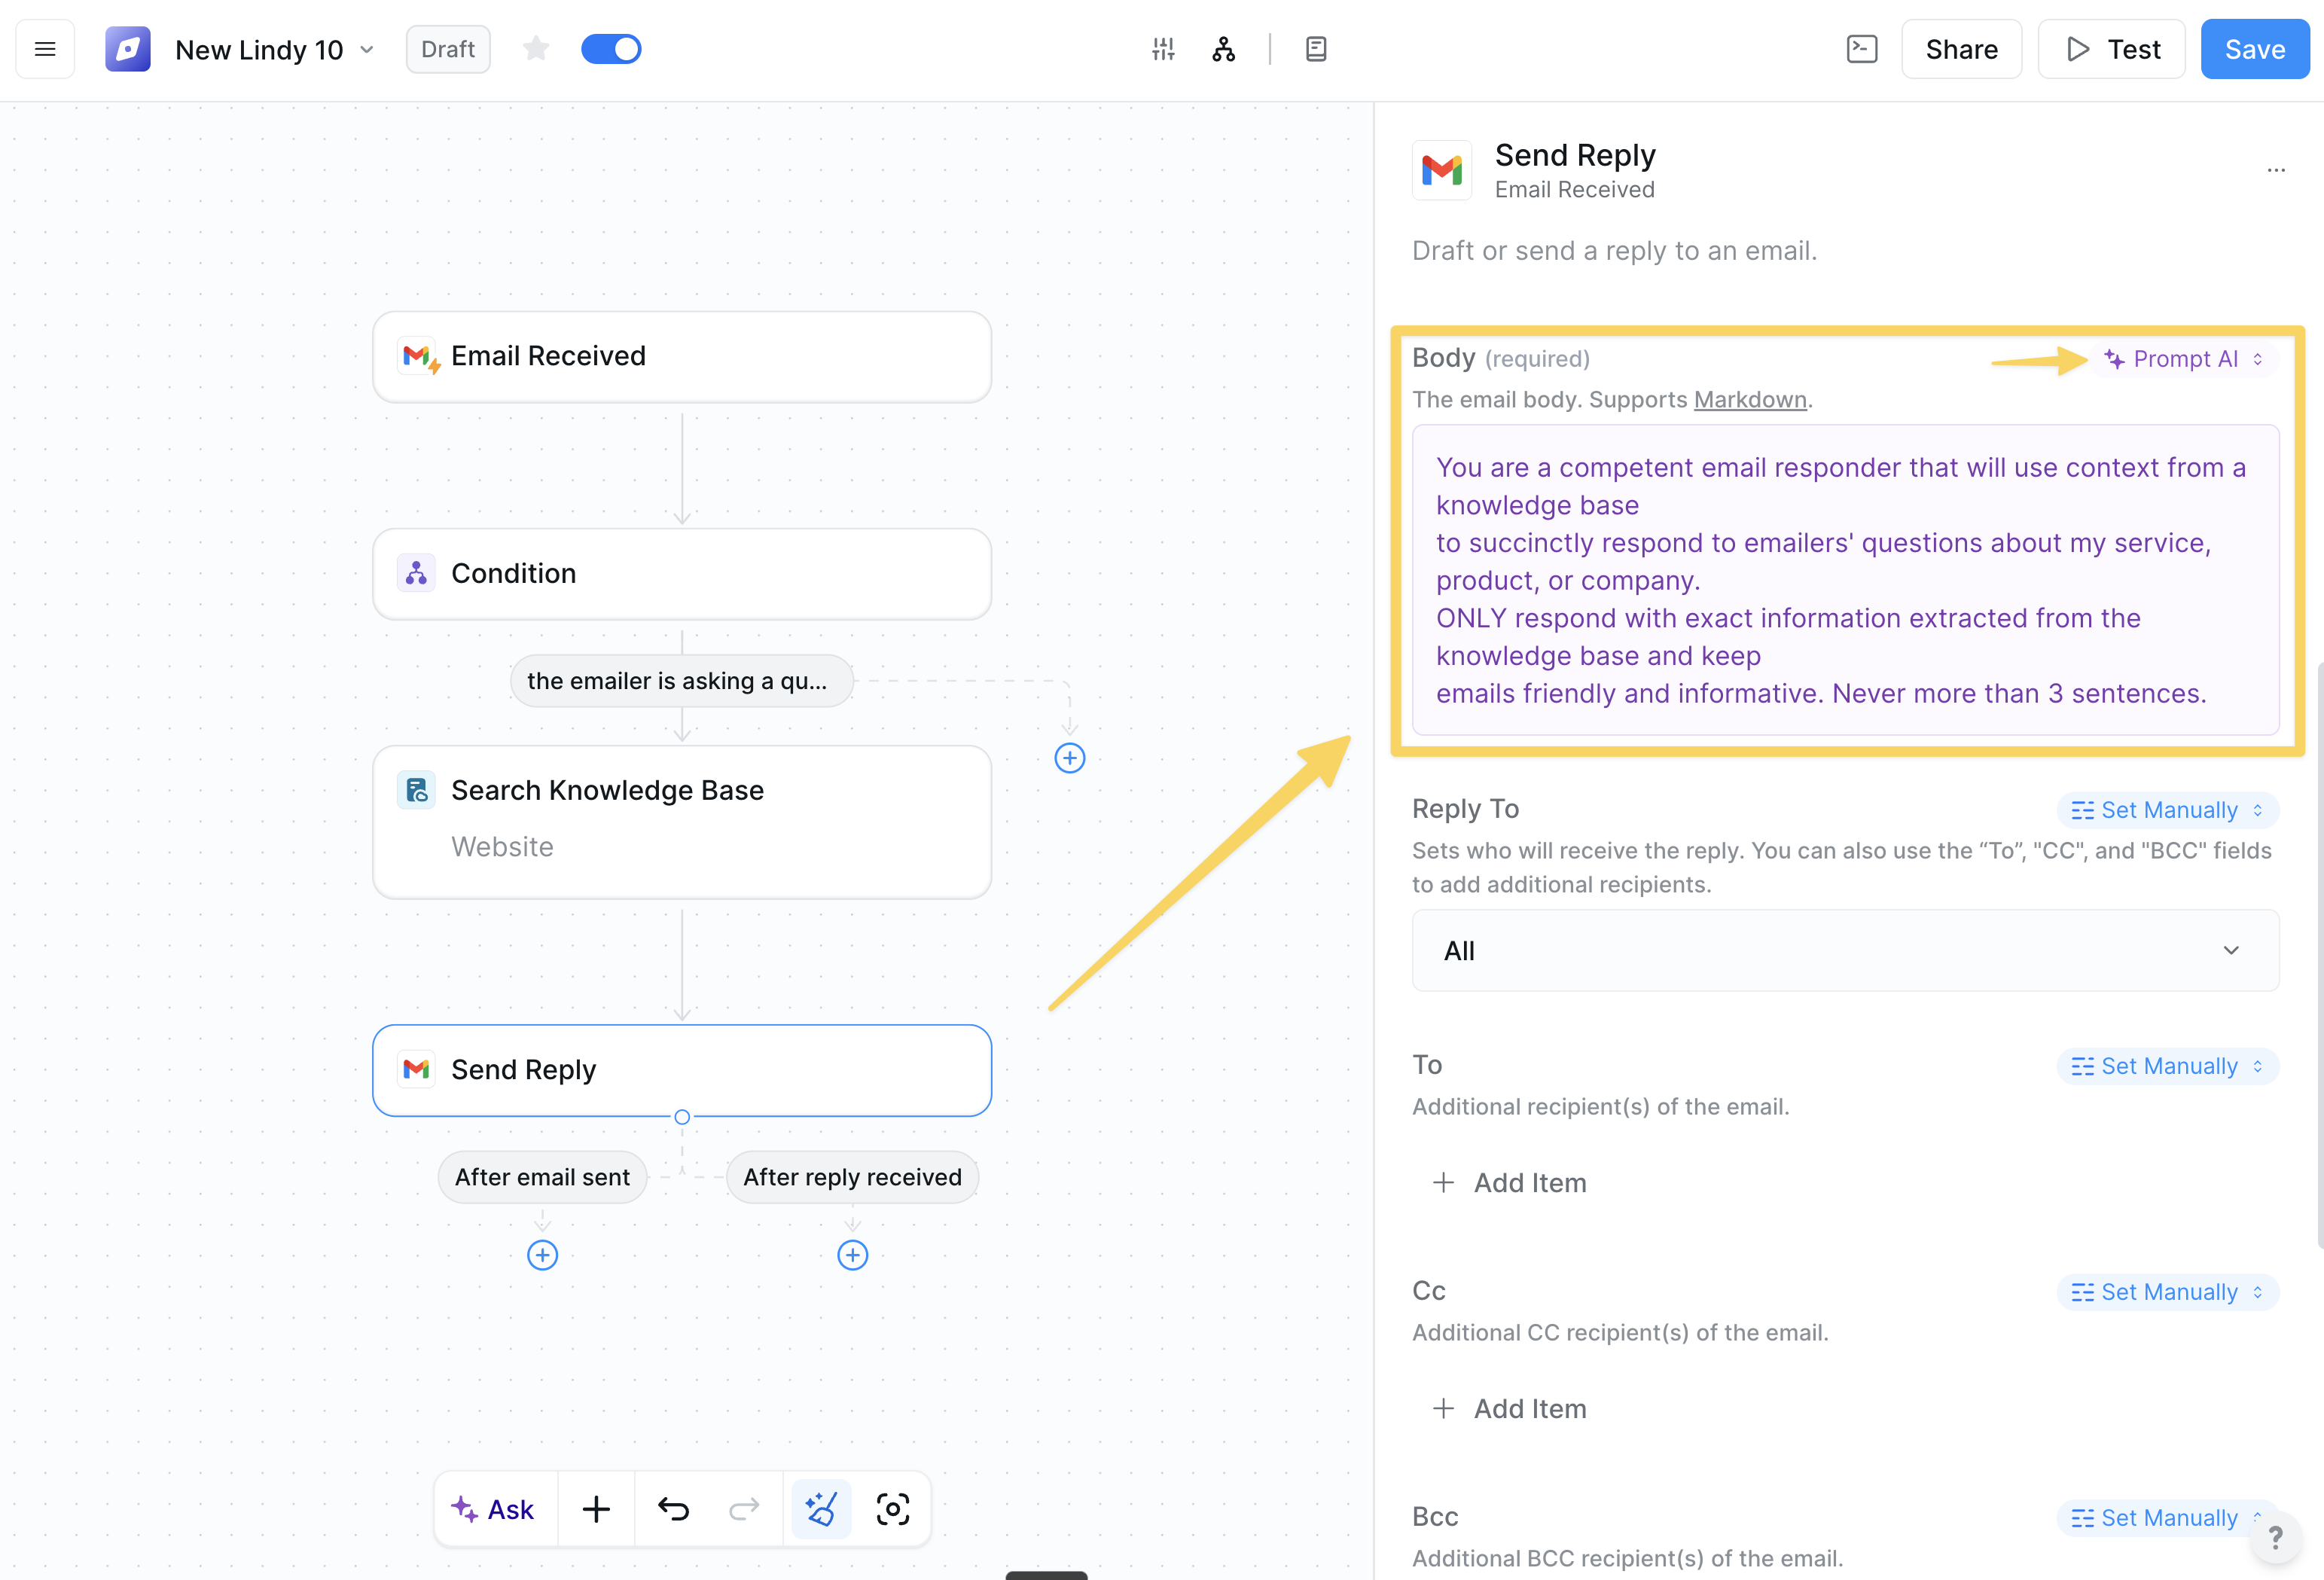
Now customize how your AI agent crafts responses using your knowledge base.- Ensure the Body field is set to “Prompt AI”
- Add this prompt to instruct your AI agent:
Step 6: Test Your Agent
Time to see your AI agent in action!-
Click the
Savebutton to save your workflow - Send yourself a test email from a different address (personal email works great) with a question about your business
- Click “Test Mode” and select your test email
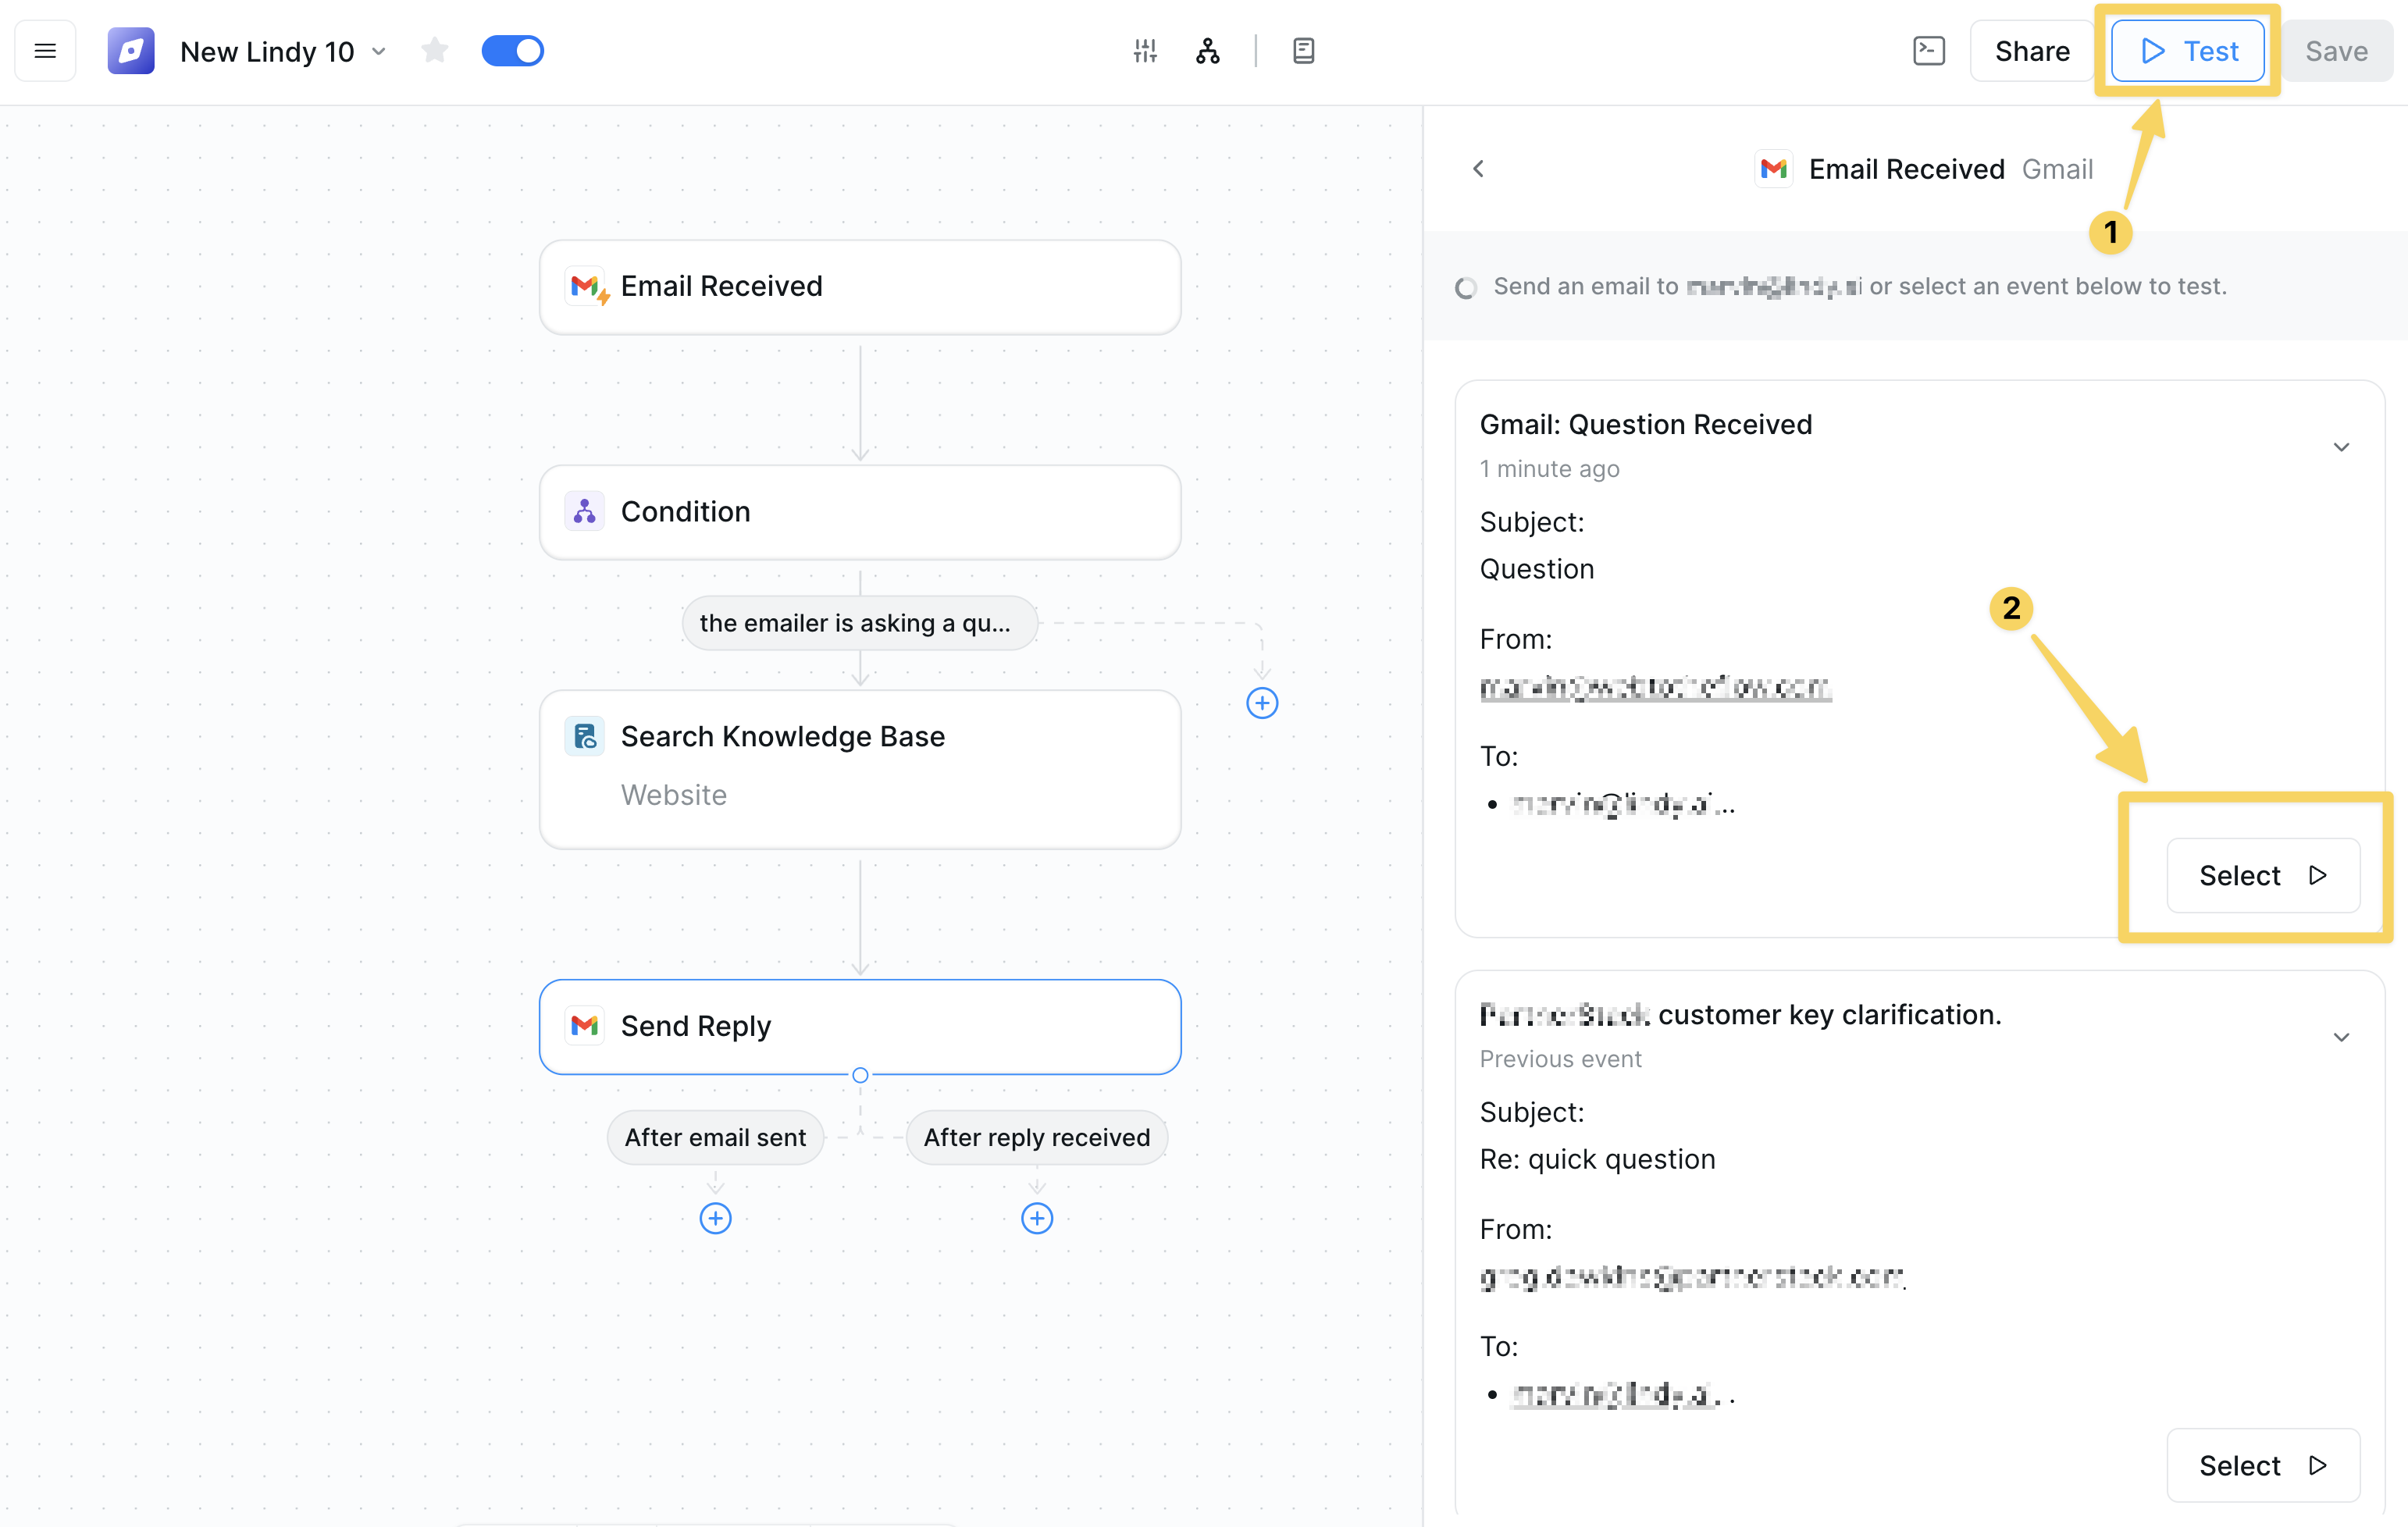
- Watch as your AI agent processes the email and generates a response
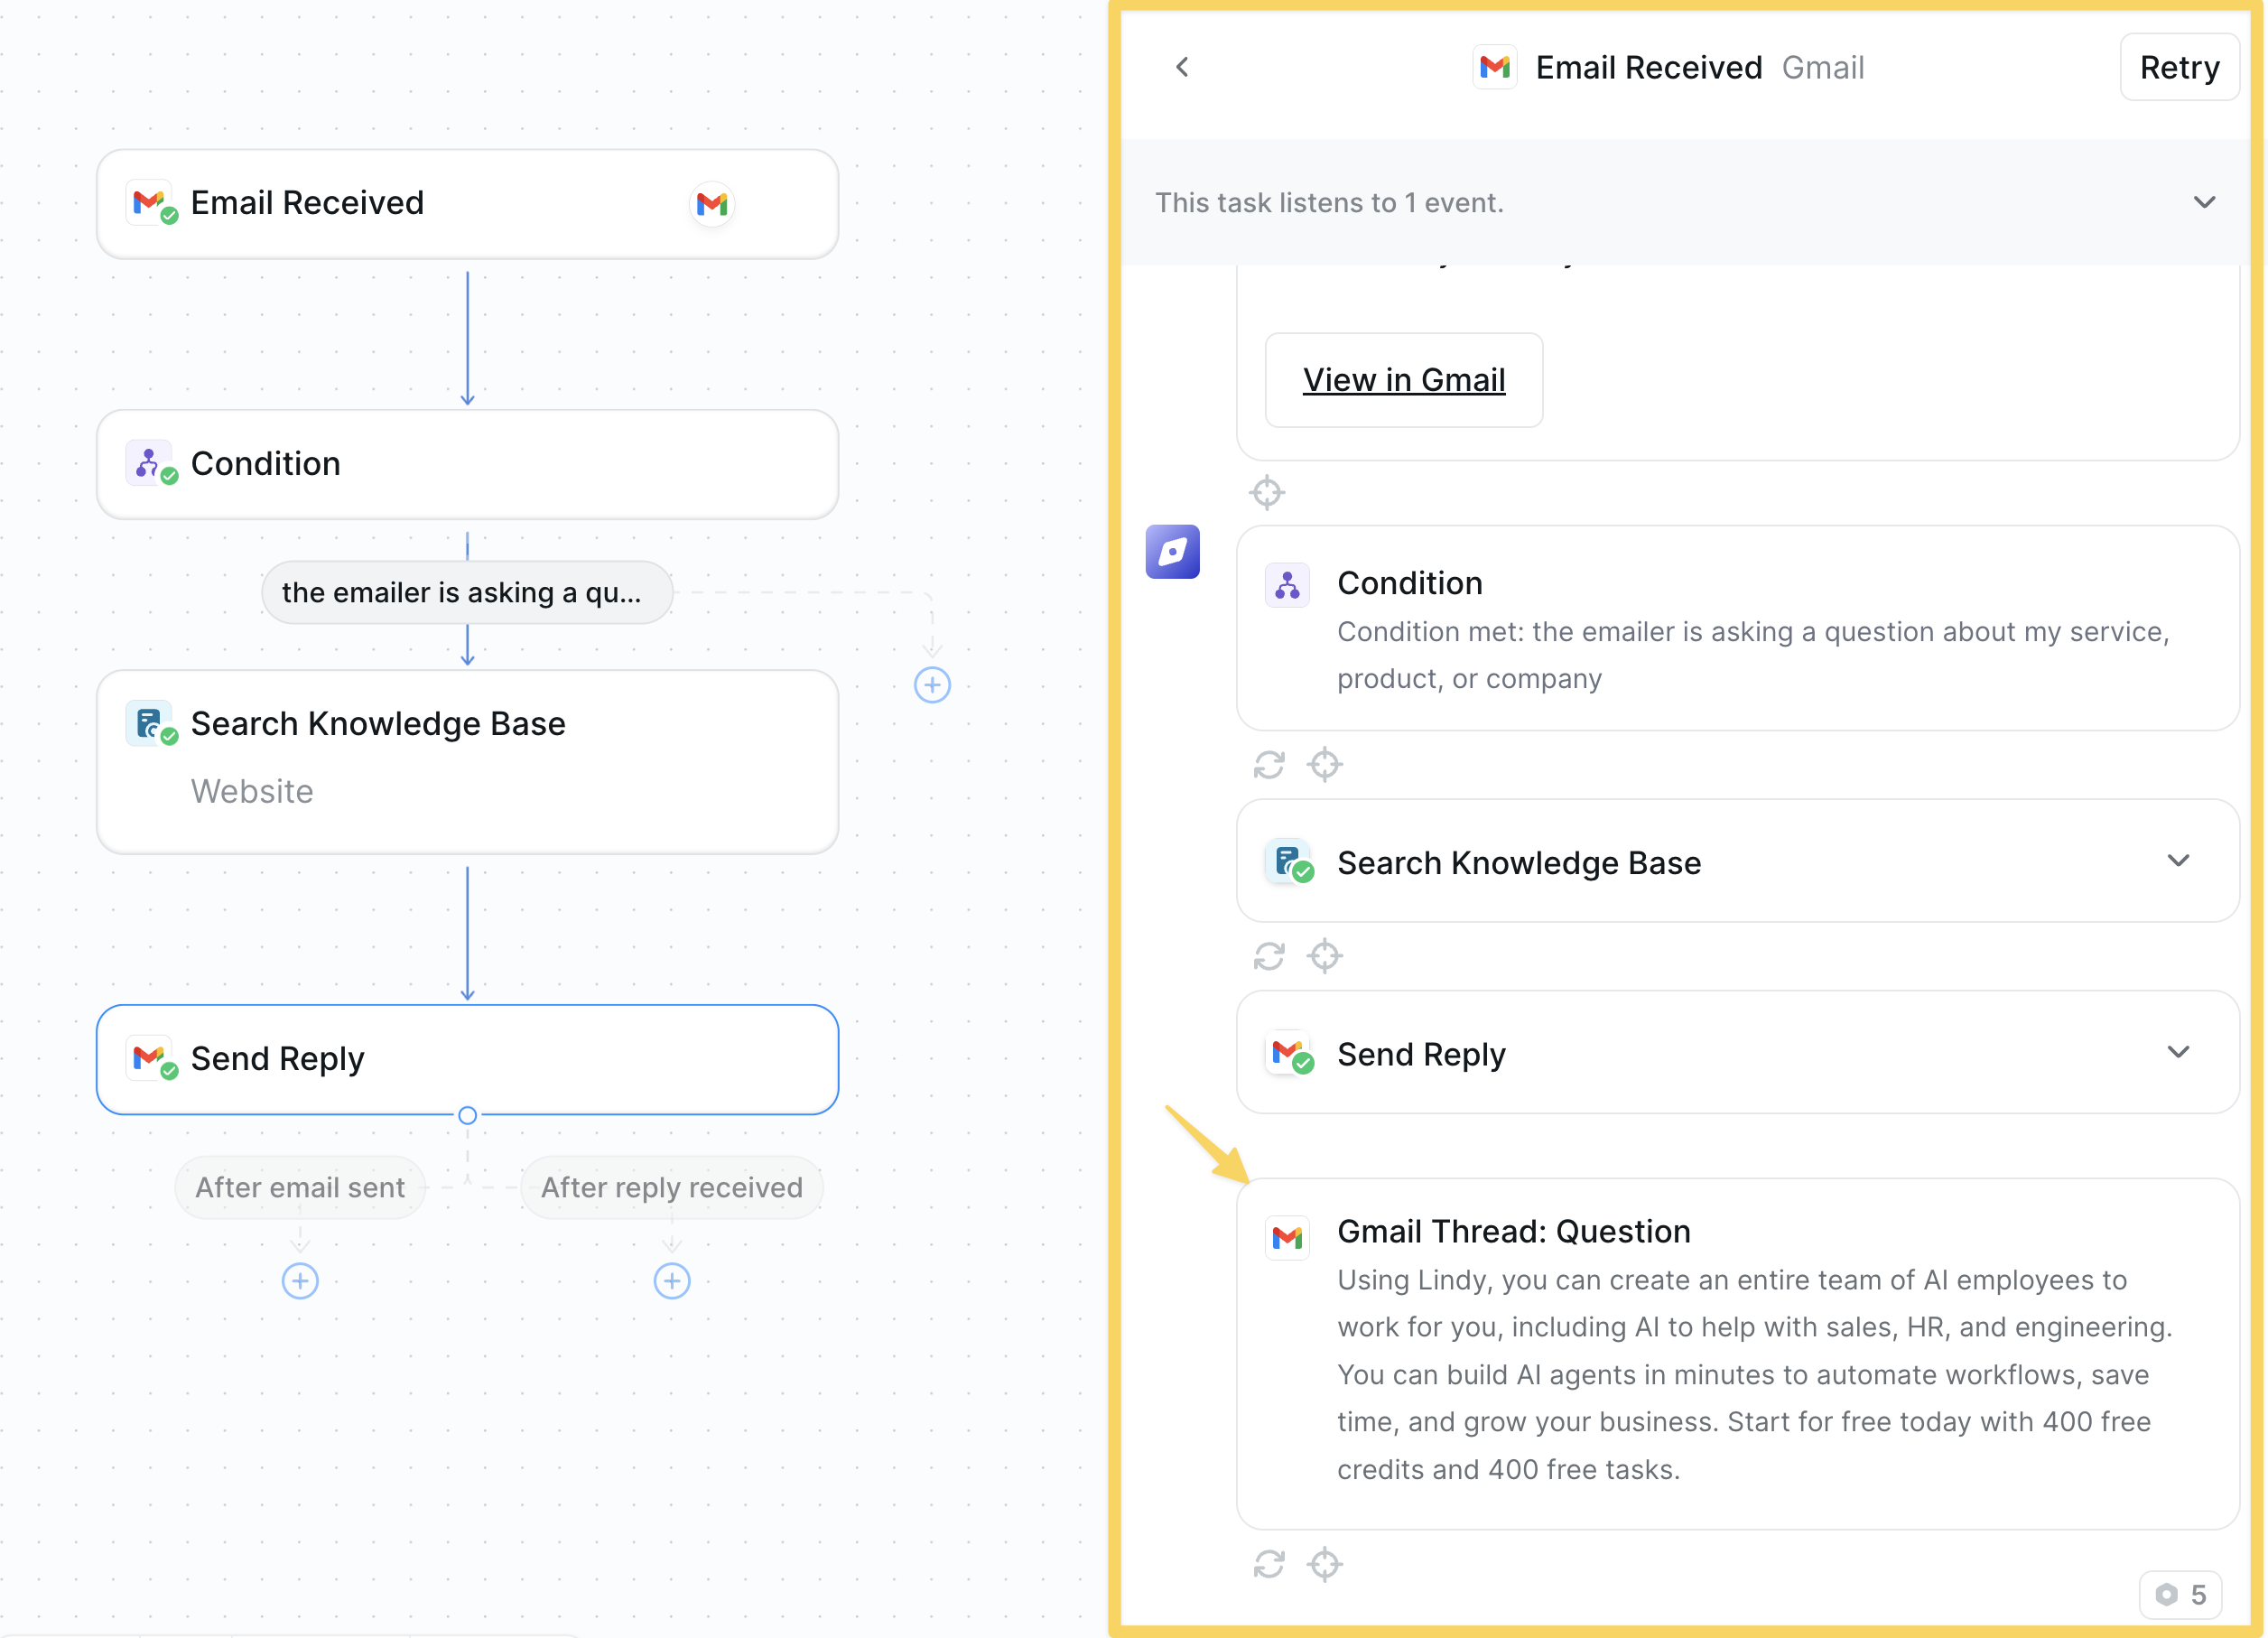
Remember: Improve your agent over time by reviewing its responses regularly and adjust the prompt to better match your communication style.
Bonus Step: Name and Monitor Your Agent
Give your AI agent a memorable name that reflects its purpose. Once enabled, click “Tasks” to view your AI agent’s activity history and monitor its performance.Congratulations!
You’ve successfully built your first AI agent! Here’s what you accomplished:- ✅ Created an AI agent from scratch
- ✅ Connected it to your Gmail account
- ✅ Set up intelligent email filtering with conditions
- ✅ Added a knowledge base for accurate responses
- ✅ Configured automated email responses
- ✅ Tested it with real data