Quick Overview
Connect your agent to Gmail or Outlook and let it:- Filter incoming mail by sender, keywords, or labels
- Categorize messages (Marketing, Support, Colleagues, Spam, etc.)
- Label & tidy the inbox automatically
- Draft or send replies with your voice and brand tone
- Tap a Knowledge Base for accurate answers when needed
Setting Up Your Email Assistant
Step 1: Connect Your Mailbox
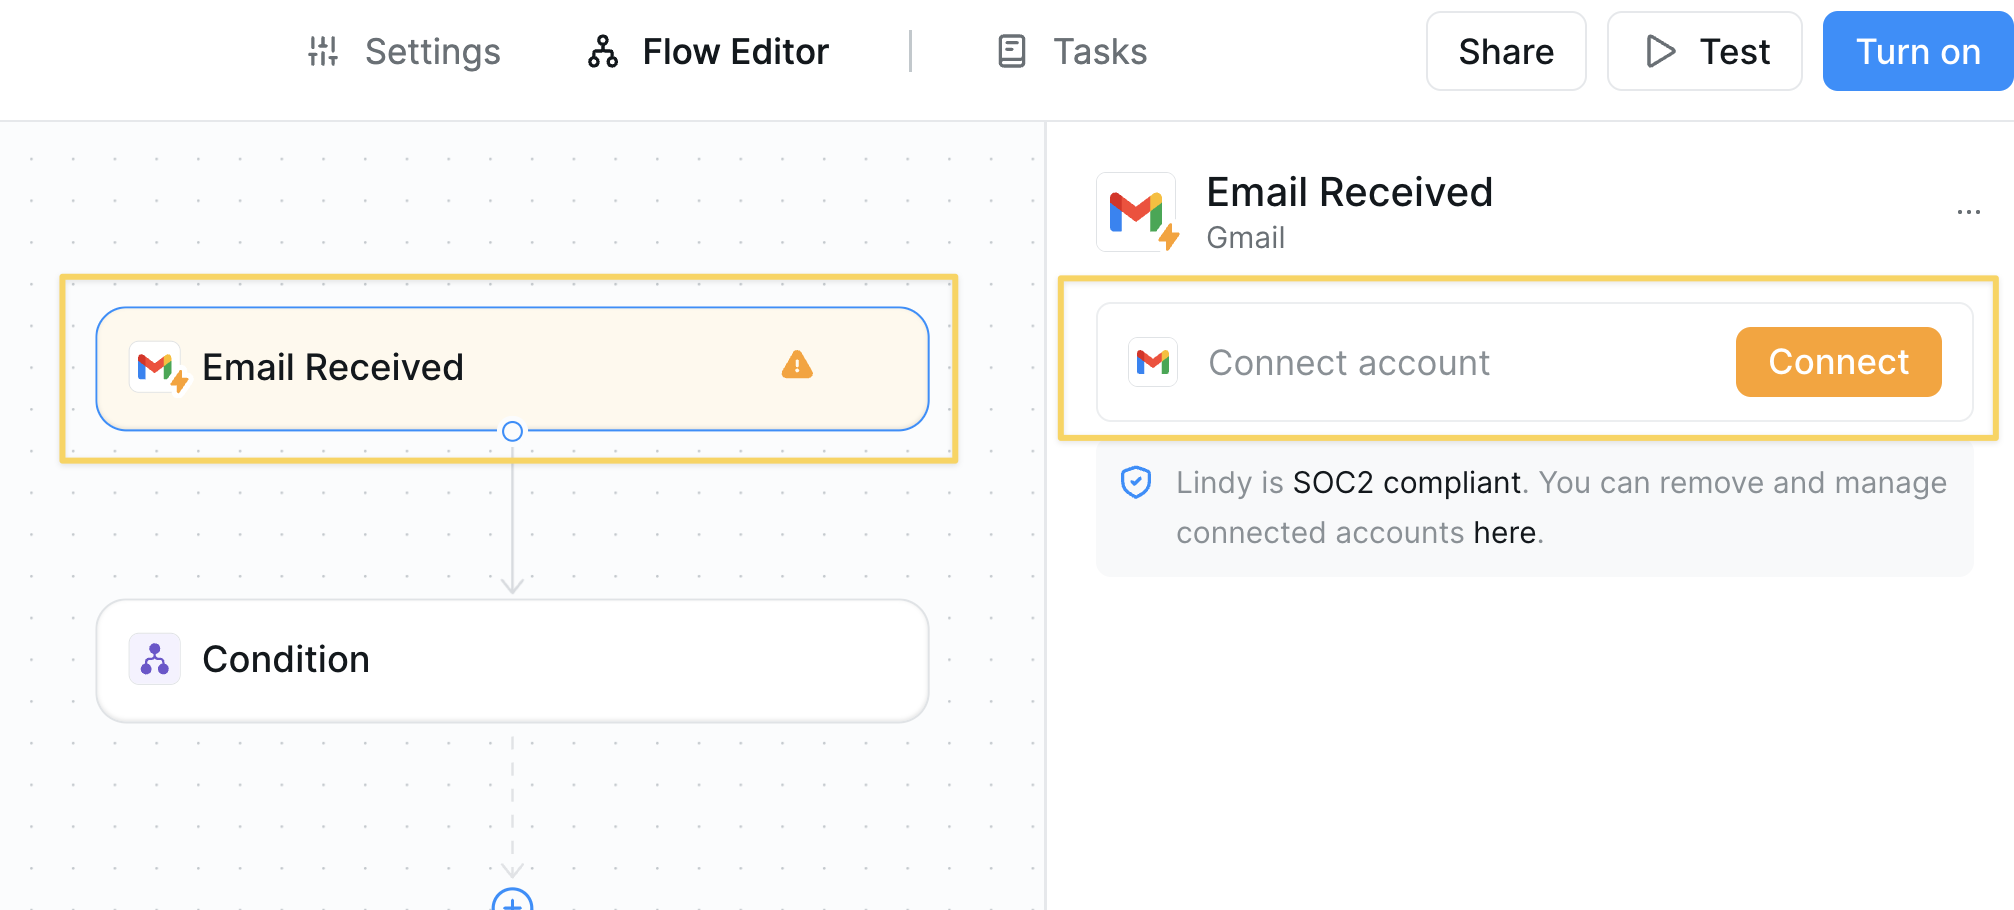
- Select
Gmail / Outlook – Email Receivedas the trigger. - Complete authentication to grant read/send access.
Step 2: Set Inbox Filters
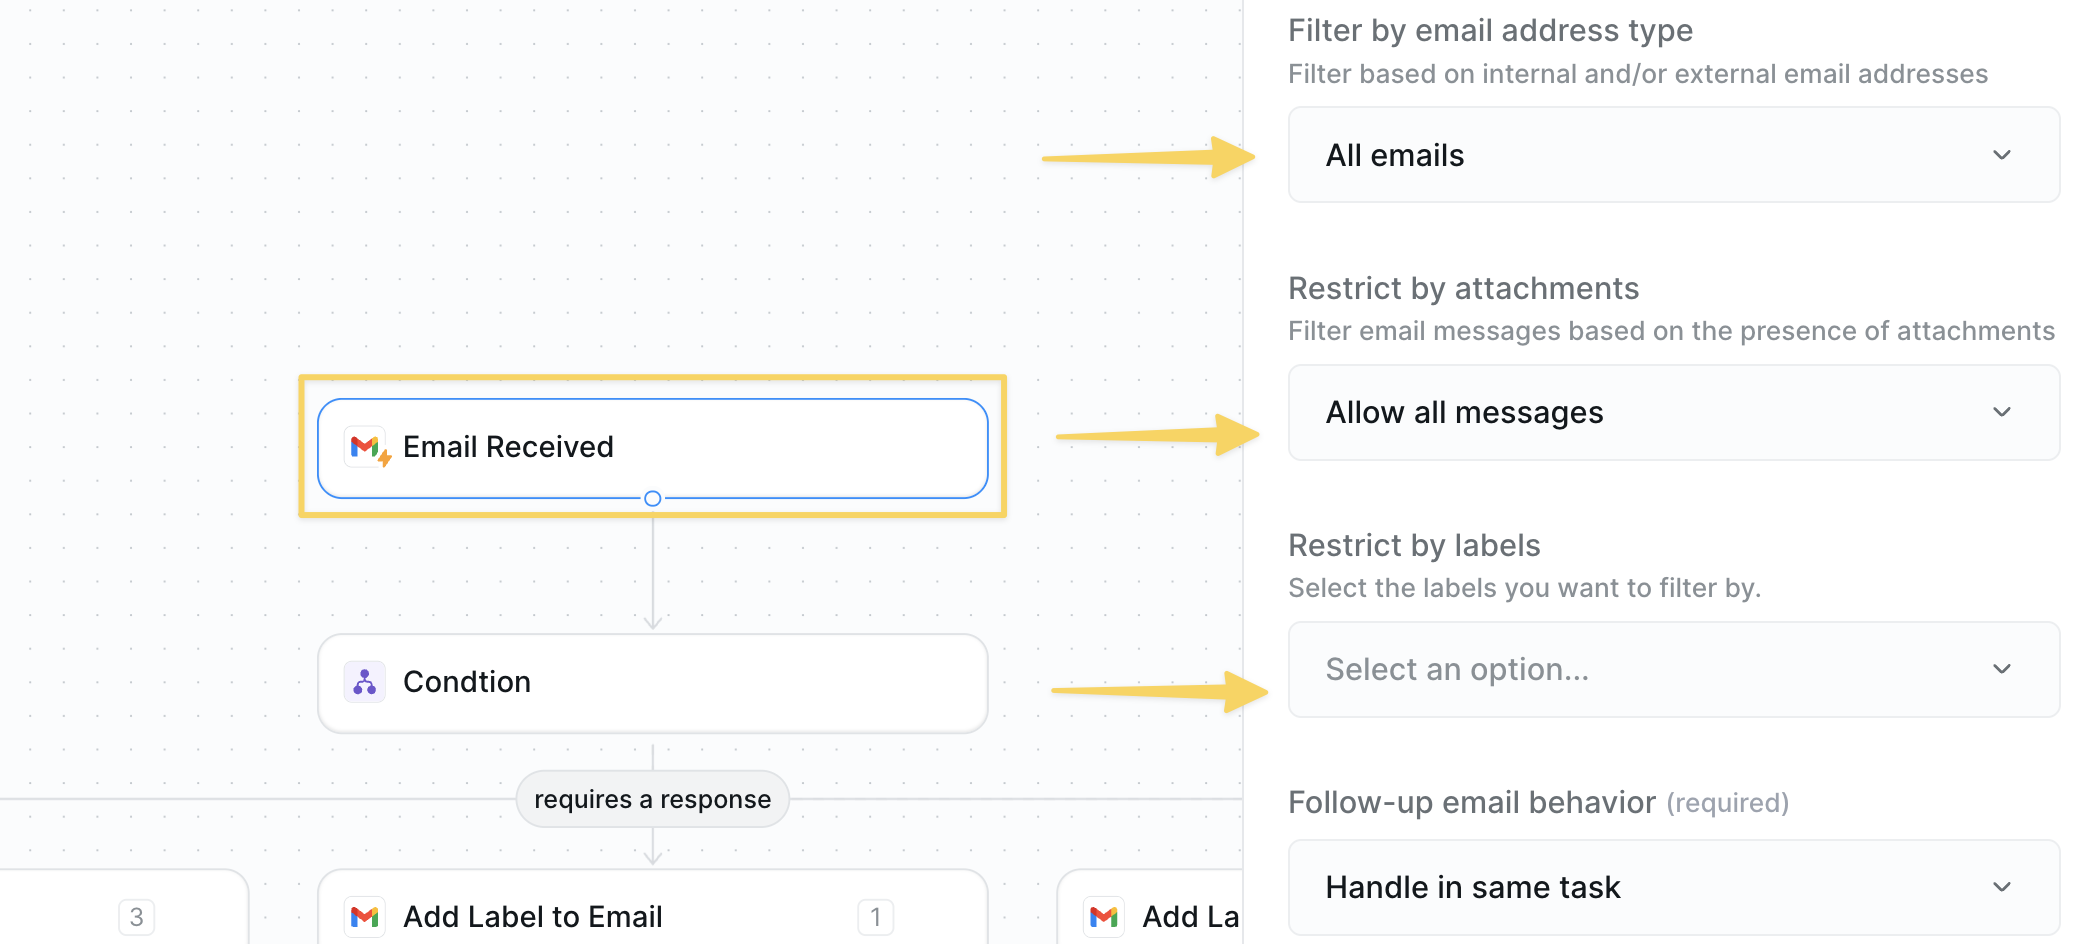
Trigger Filters to keep processing costs tight. Examples:
- Subject contains “Invoice”
- From equals
news@(route newsletters) - Attachment present (flag items needing review)
Step 3: Categorize with Conditions
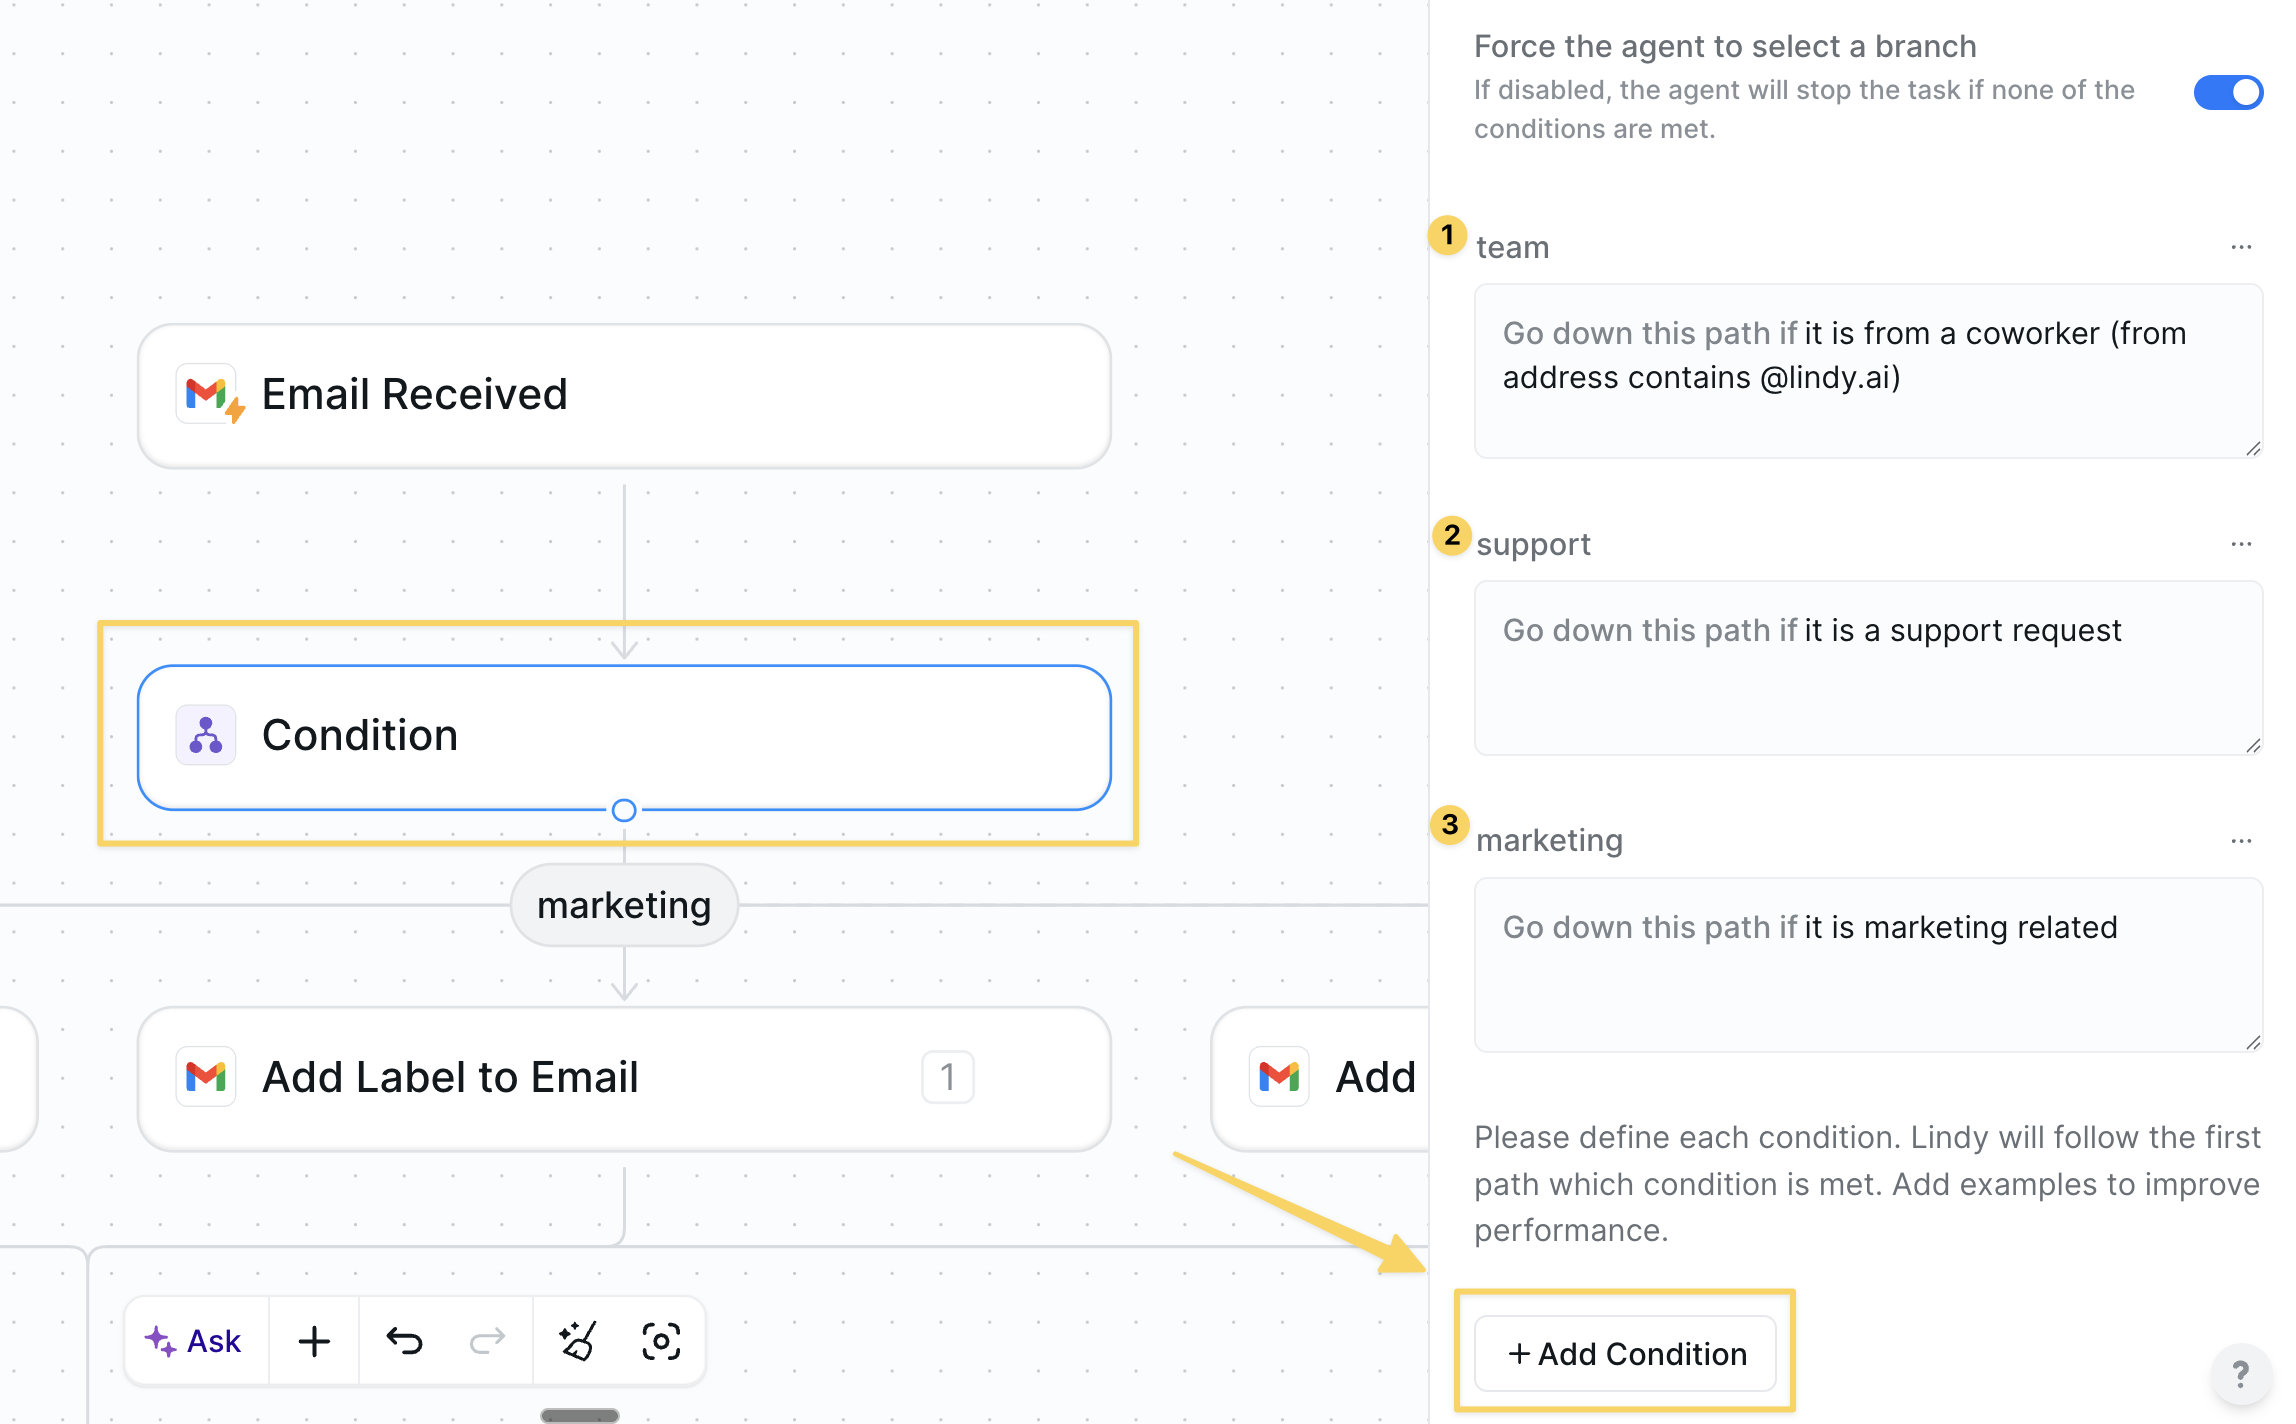
Condition step to branch emails into different paths based on their content.
Click Add Condition to create branches for each email type. Here are some examples:
| Condition Type | Example Setup |
|---|---|
| Team | Prompt: “Is from a coworker (from address contains @lindy.ai)“ |
| Support | Prompt: “Is this a support request?” |
| Marketing | Prompt: “Is this marketing related?” |
| Spam | Prompt: “Is likely spam and does not need response” |
| Unknown | Prompt: “None of the above applies” |
Step 4: Label & Organize
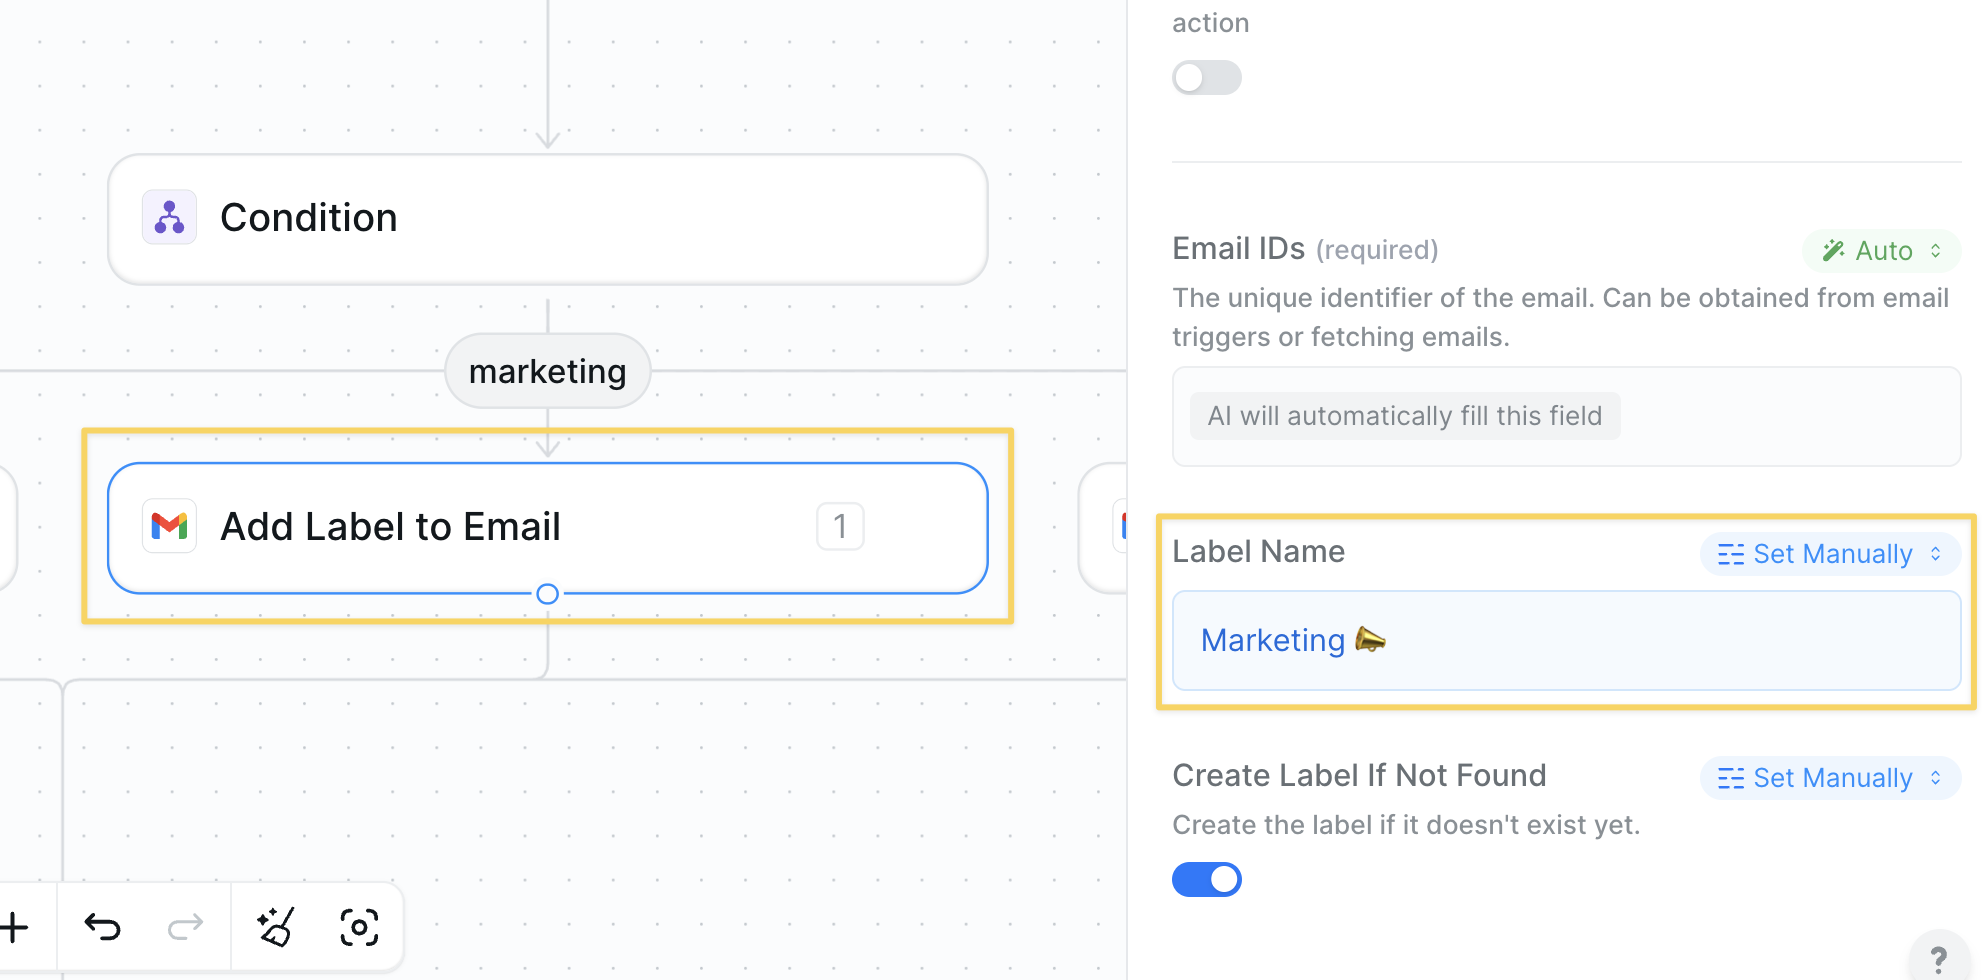
Add Label to Email action:
| Category | Label |
|---|---|
| marketing | Marketing 📣 |
| support | Support 🛠 |
| coworker | Team 💬 |
| spam | Spam ❌ |
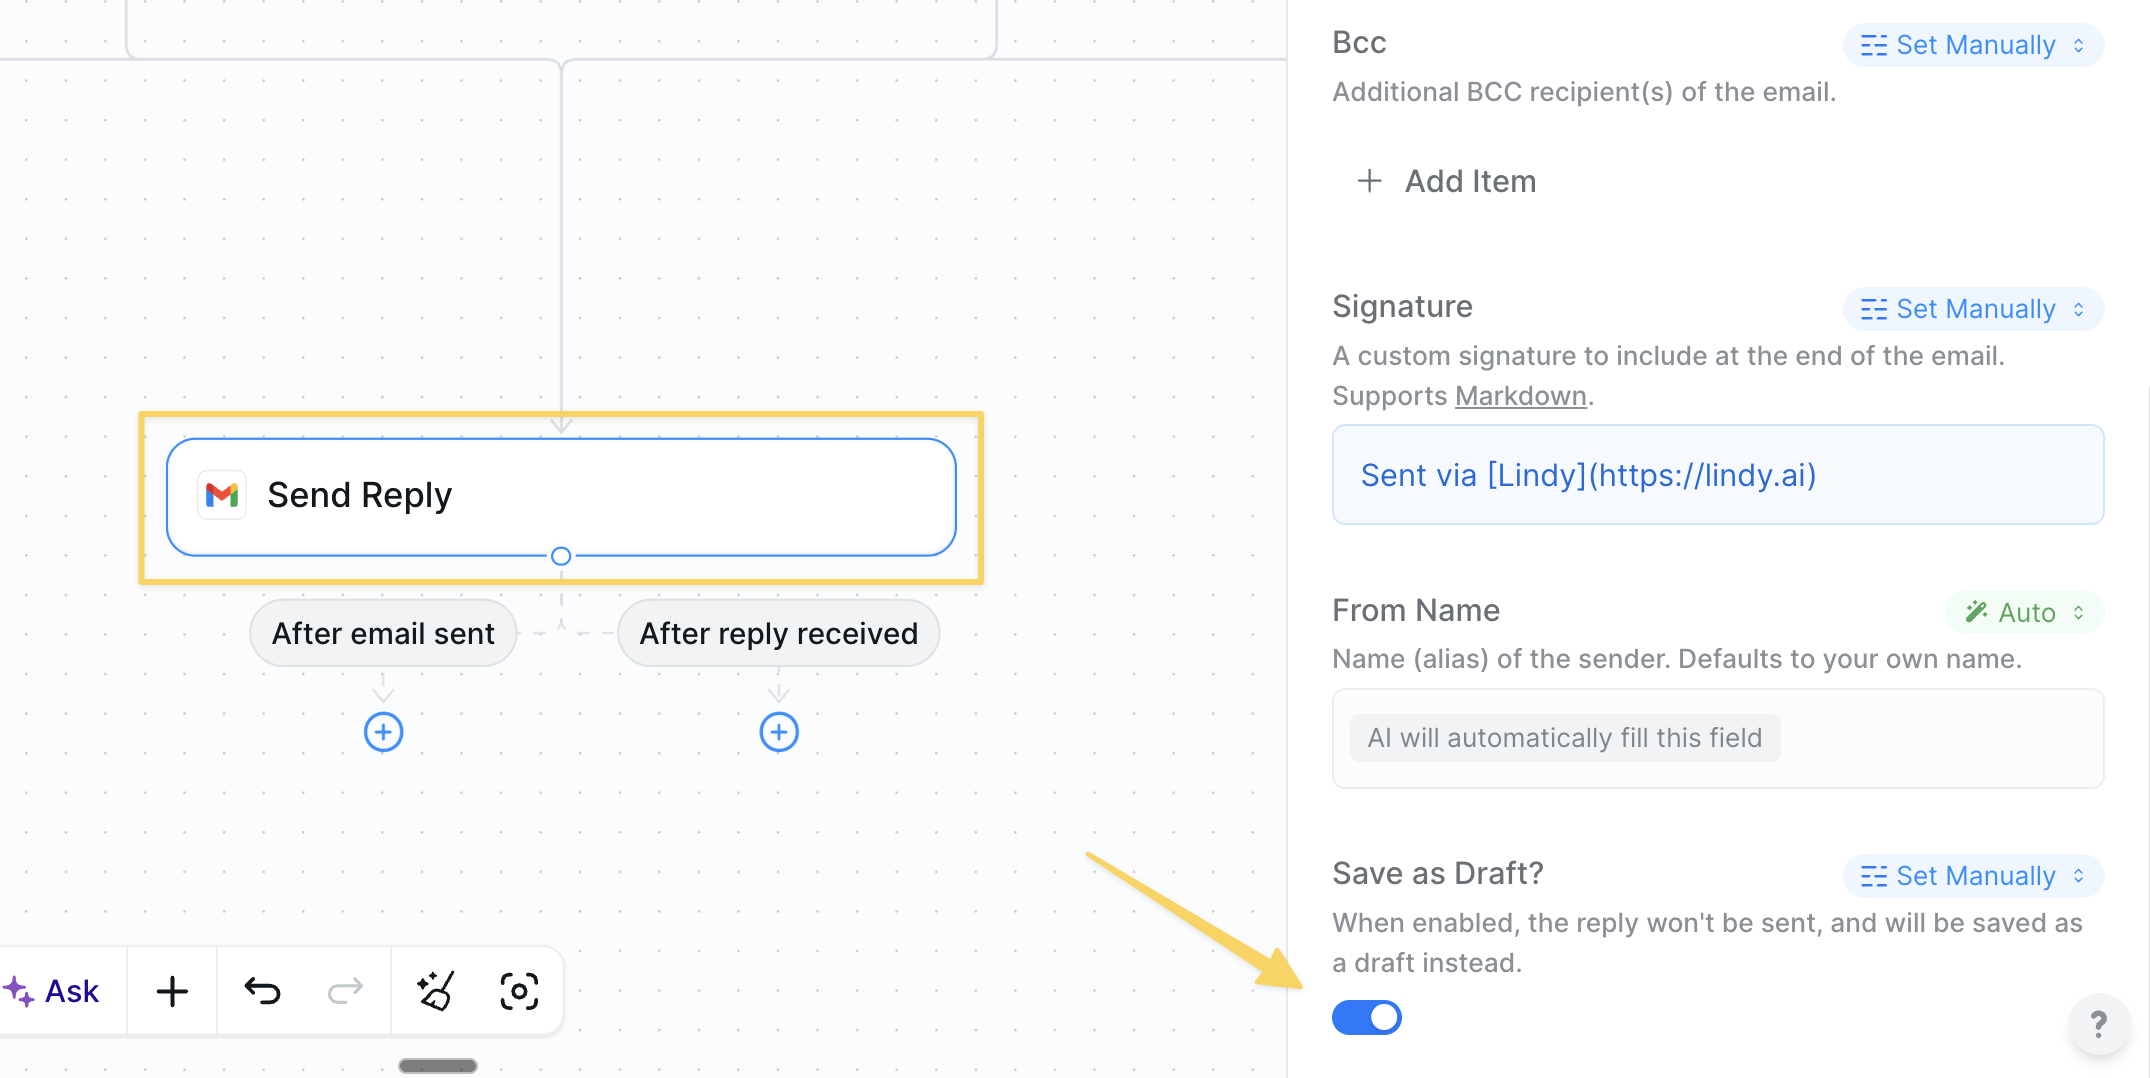
Step 5: Draft or Send Replies
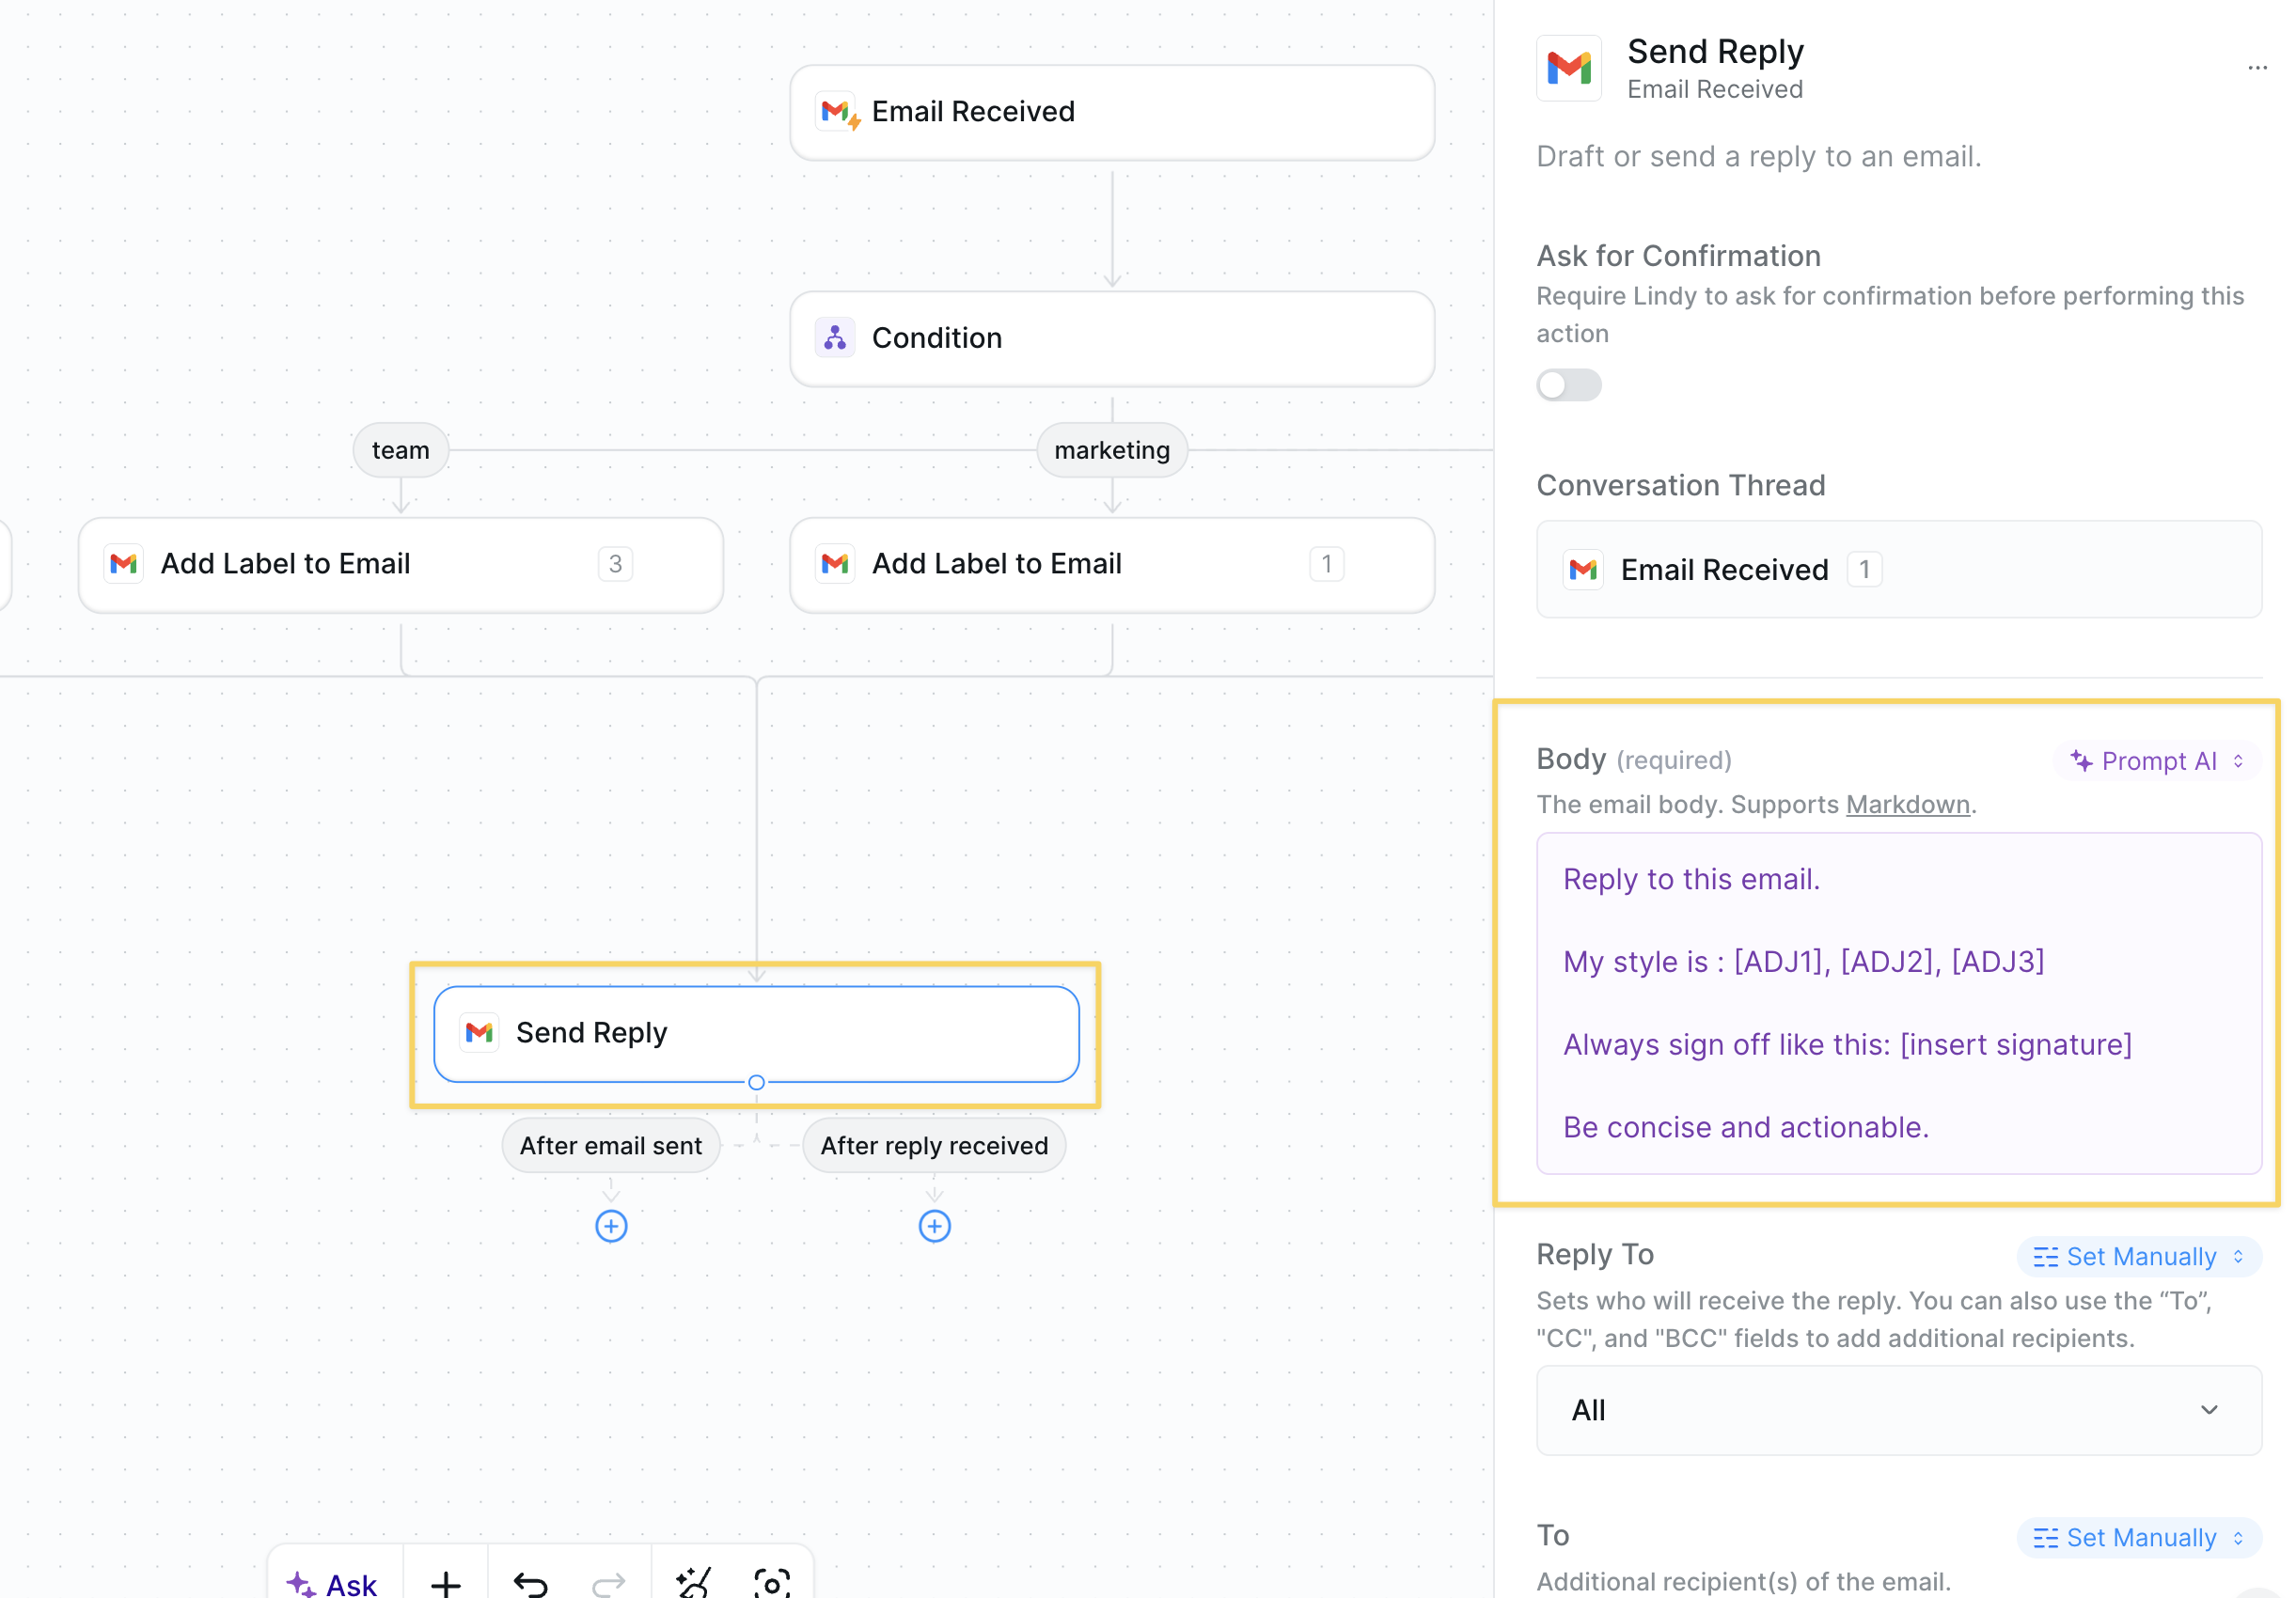
Send Reply action.
Use a prompt like this in the Body field and adjust the adjectives to match your style:
Save as Draft if you want to review before sending.
Step 6: Add a Knowledge Base (Optional)

- Attach docs (FAQ, help center, pricing guides).
- Insert
Search Knowledge Basebefore the reply action. - Gate replies with a
Found answer?condition to avoid guesswork.
Advanced Customizations
| Trick | What it does |
|---|---|
| Thread Sentiment Check | Score each email’s tone (angry, happy, neutral) → escalate negative threads to Slack. |
| VIP Escalation | If from domain matches big-logo clients, bypass auto-reply and ping you instantly. |
| Spam Digest | Collect low-priority marketing mails → send one daily summary at 7 AM. |
| Attachment OCR | Auto-extract invoice data from PDFs and push to your accounting system. |
Best Practices
Start in Draft Mode
Start in Draft Mode
Keep
Save as Draft on for the first week to spot issues.Keep the KB Fresh
Keep the KB Fresh
Out-of-date answers are worse than no answer; schedule monthly reviews.
Avoid Over-Automation
Avoid Over-Automation
Leave sensitive/legal threads for human review.
Next Steps
Now that your Email Assistant is set up, explore these complementary workflows:Gmail Integration
Advanced email automation and workflows
Conditions
Add smart routing logic to email workflows
Templates
Jump-start with pre-built email workflows
Human in the Loop
Add approval steps for important emails