Quick Overview
Scheduling links can feel impersonal and coordinating meeting times manually is time-consuming. Let your agent handle the back-and-forth for you! CC your agent on any thread and it will:- Detect whether a specific time was suggested
- Propose three slots if none was given
- Book the meeting on your calendar with full context
- Confirm with all parties once the invite is sent
- Reschedule gracefully if plans change
Setting Up Your Meeting Scheduler
Step 1: Configure Lindy Mail
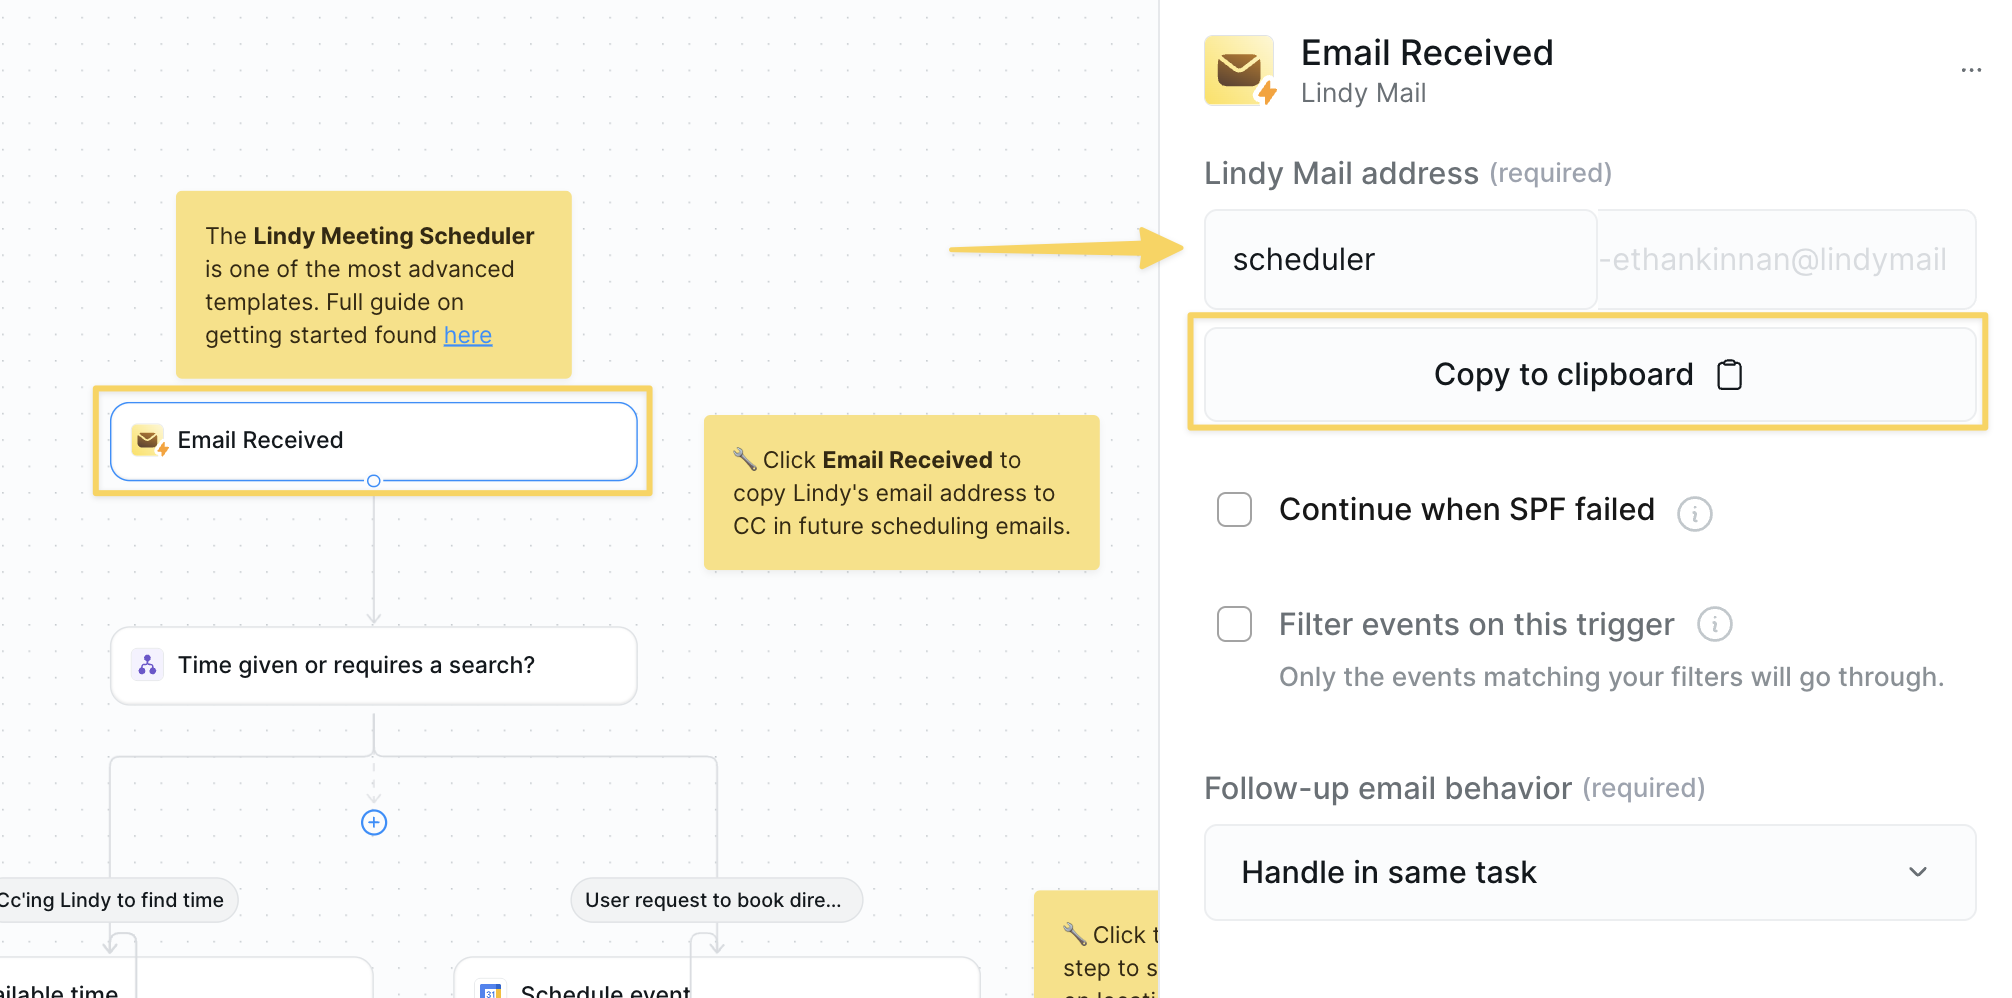
- Open the
Email Receivedtrigger. - Copy your unique Lindy Mail Address—this is the address you’ll CC.
Step 2: Understand the Initial Condition
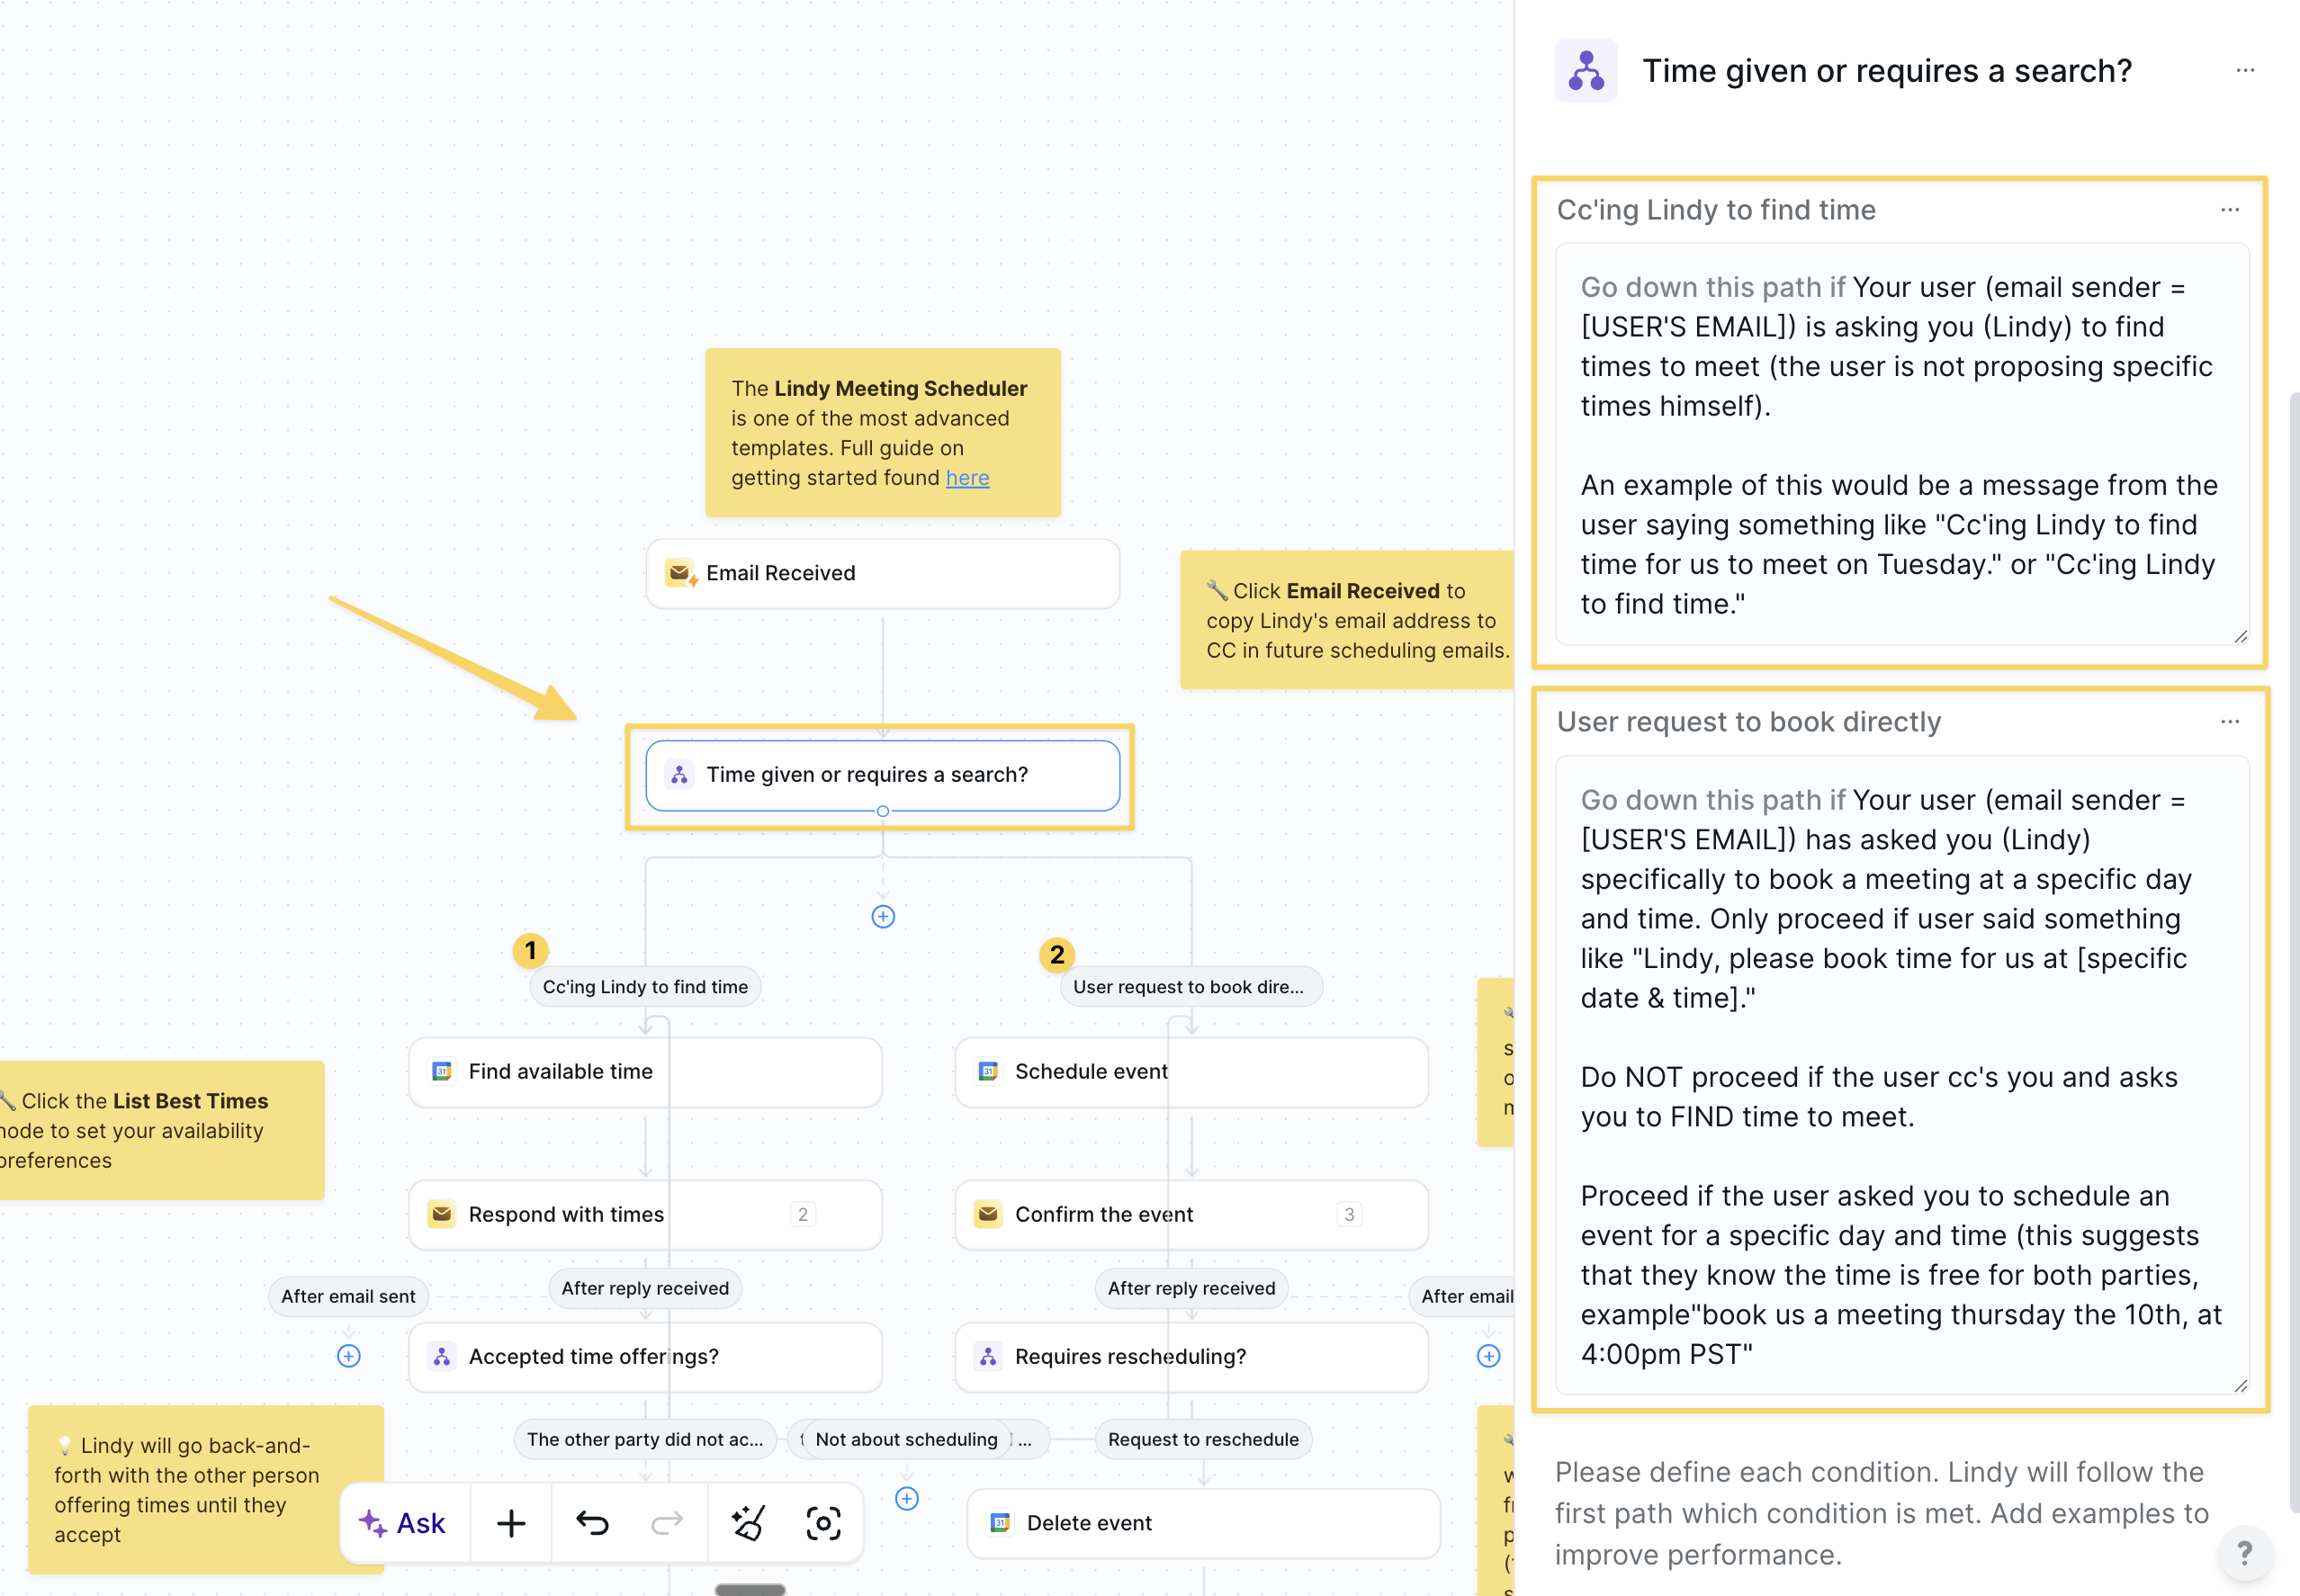
Condition step “Time given or requires a search?” determines what type of scheduling request this is:
Two paths:
-
“CC’ing my agent to find time:” When the sender asks the agent to find available times
- Example: “CC’ing my agent to find time for us to meet on Tuesday”
-
“User request to book directly”: When a specific date/time is already agreed upon
- Example: “Agent, please book time for us at Thursday the 10th, at 4:00pm PST”
Step 3: List Best Times
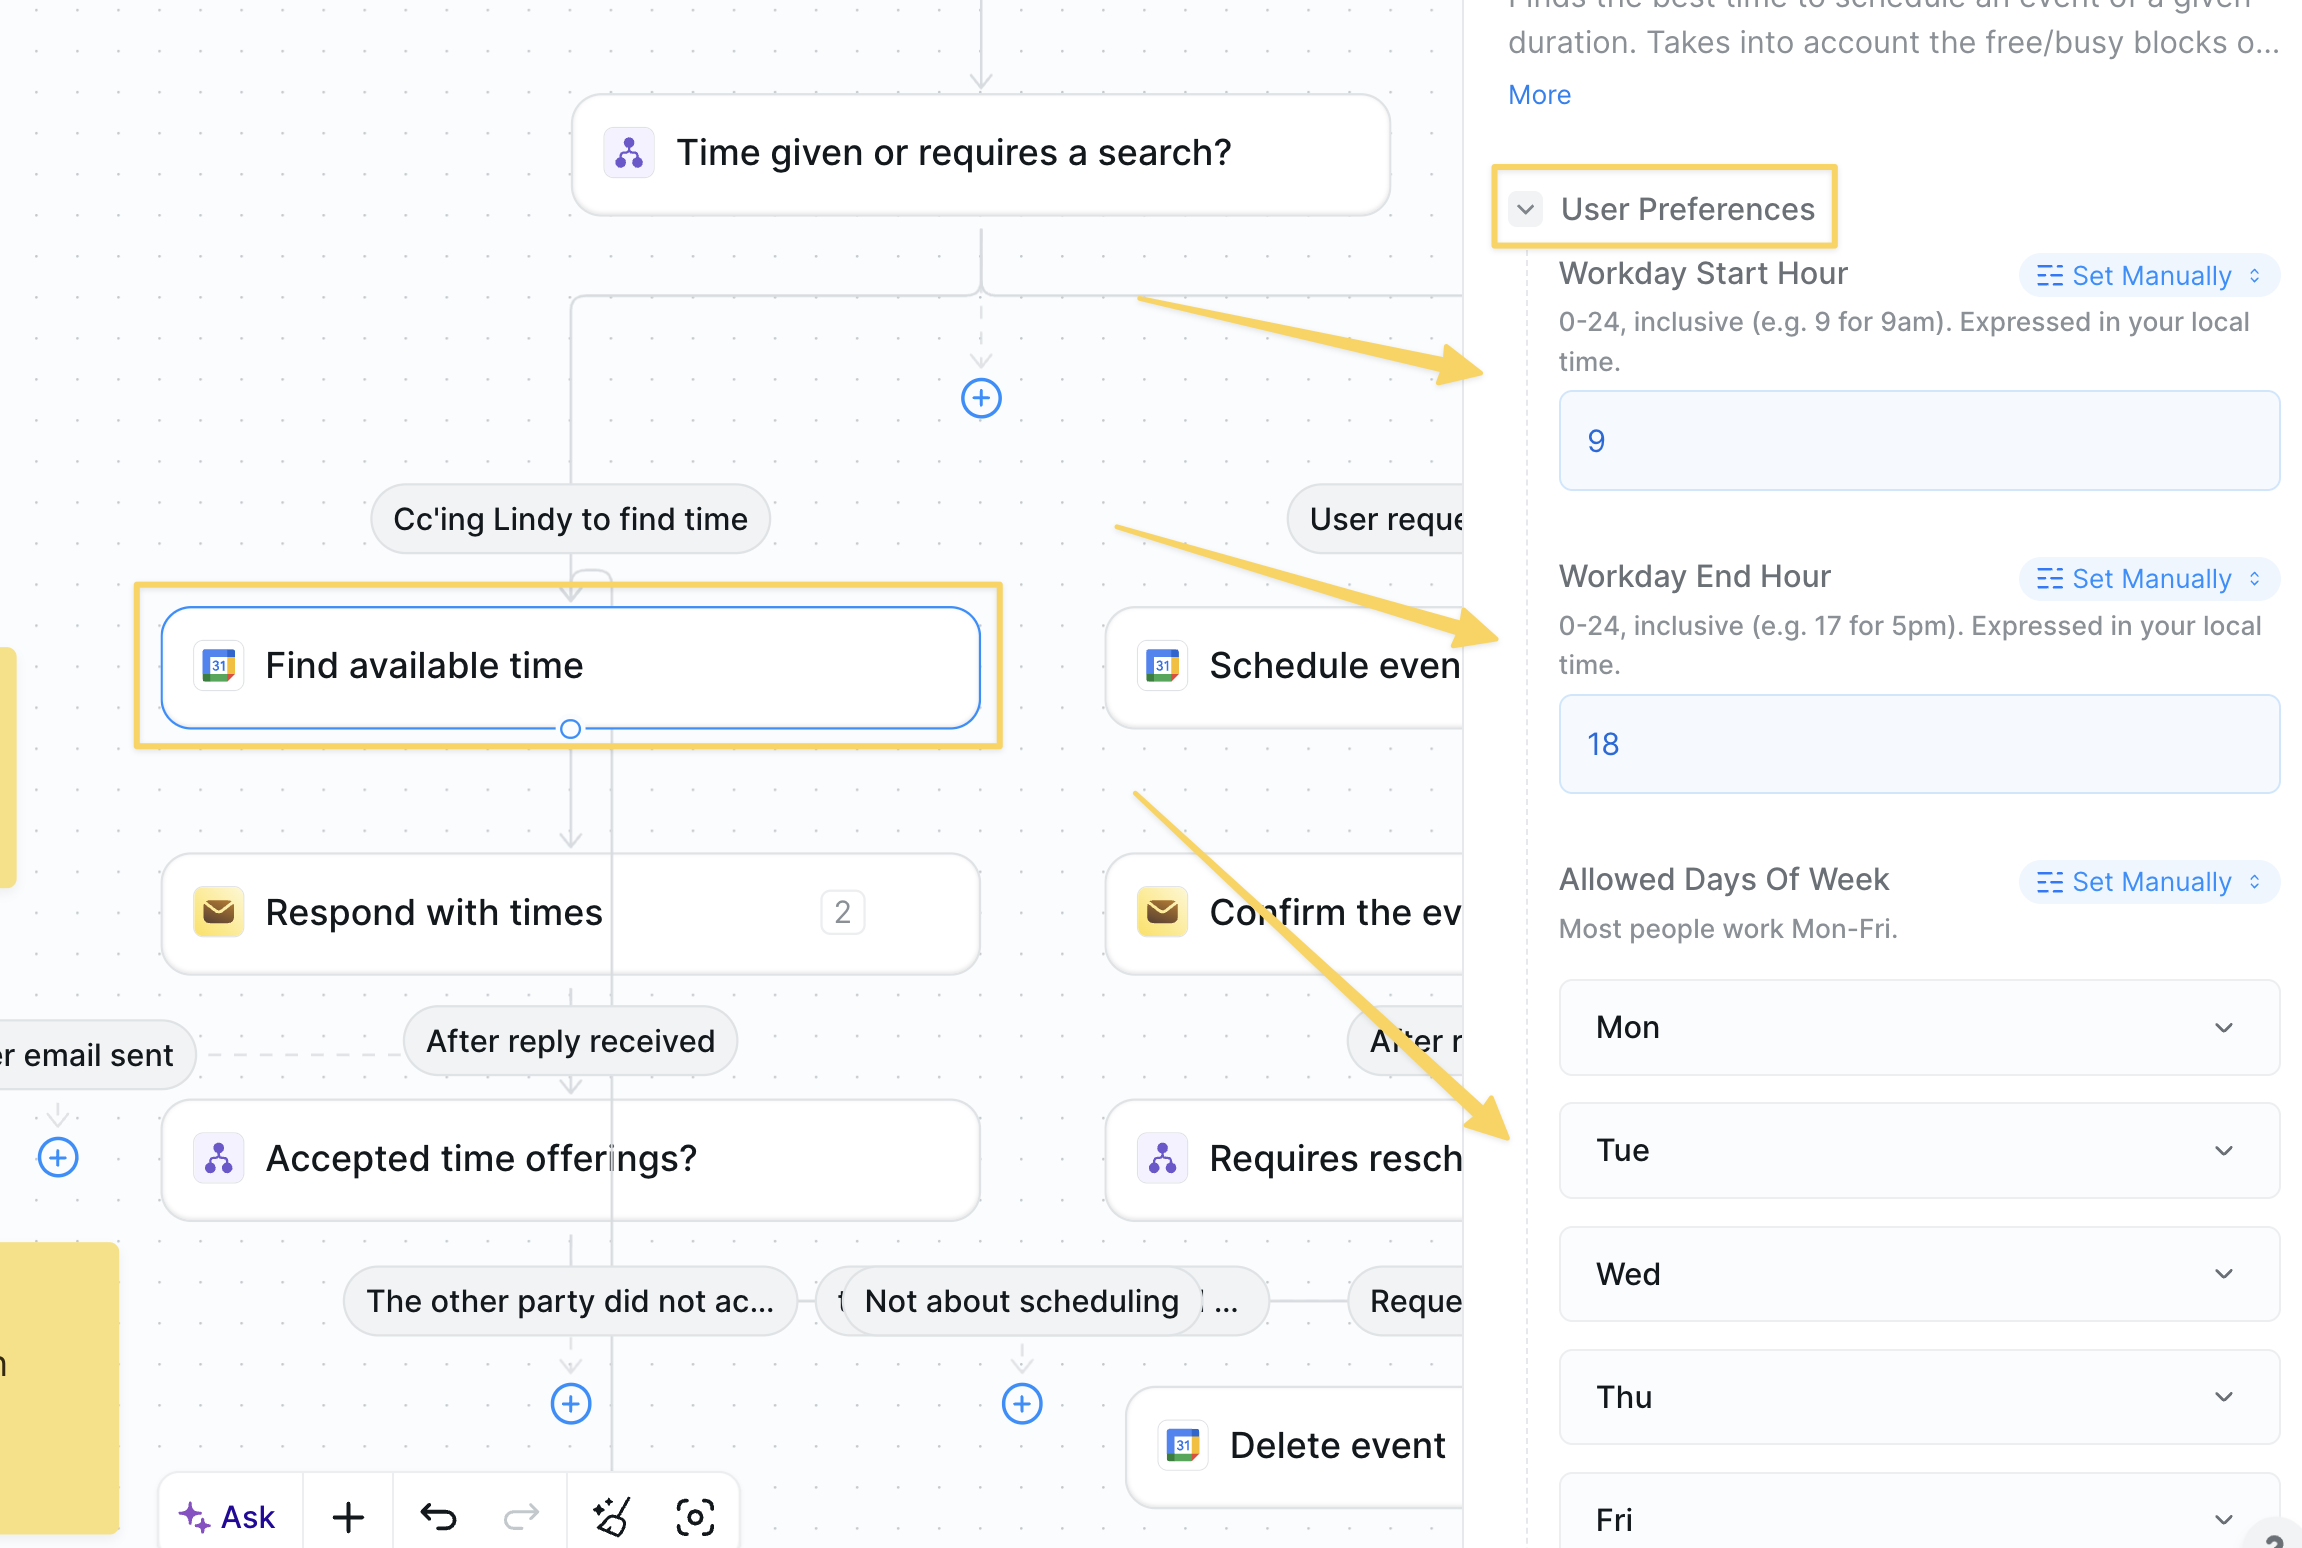
- Action:
Google Calendar – Find available time - In the
Find available timestep, configure your scheduling preferences such as time of day, days of week, working hours, earliest/latest start times, max meetings per day, and which calendars to check for conflicts.
Step 4: Respond With Times
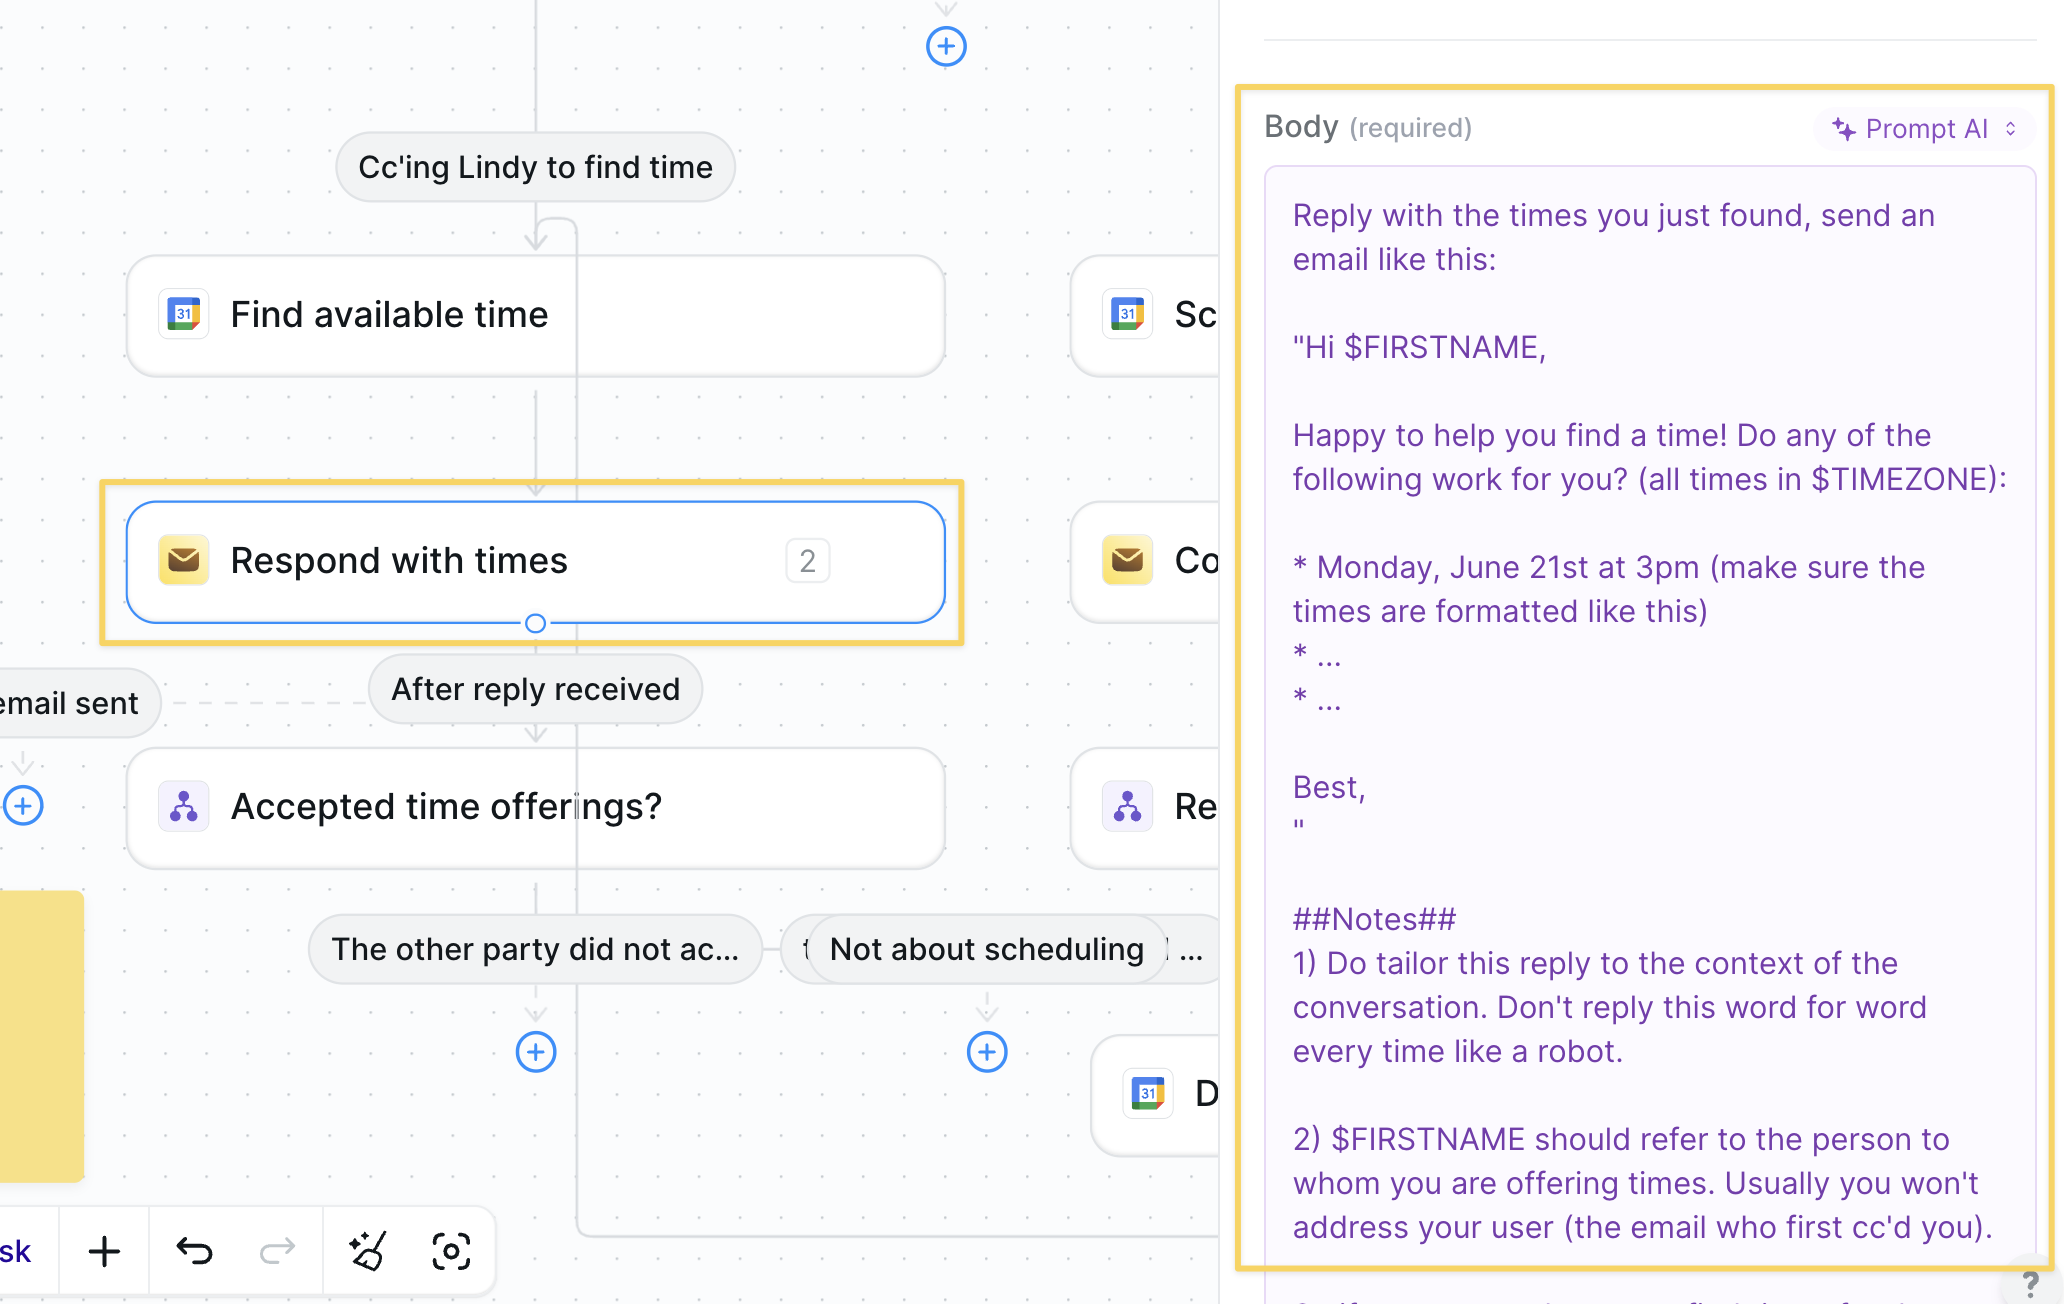
Lindy Mail – Send Reply with body:
Step 5: Create the Event
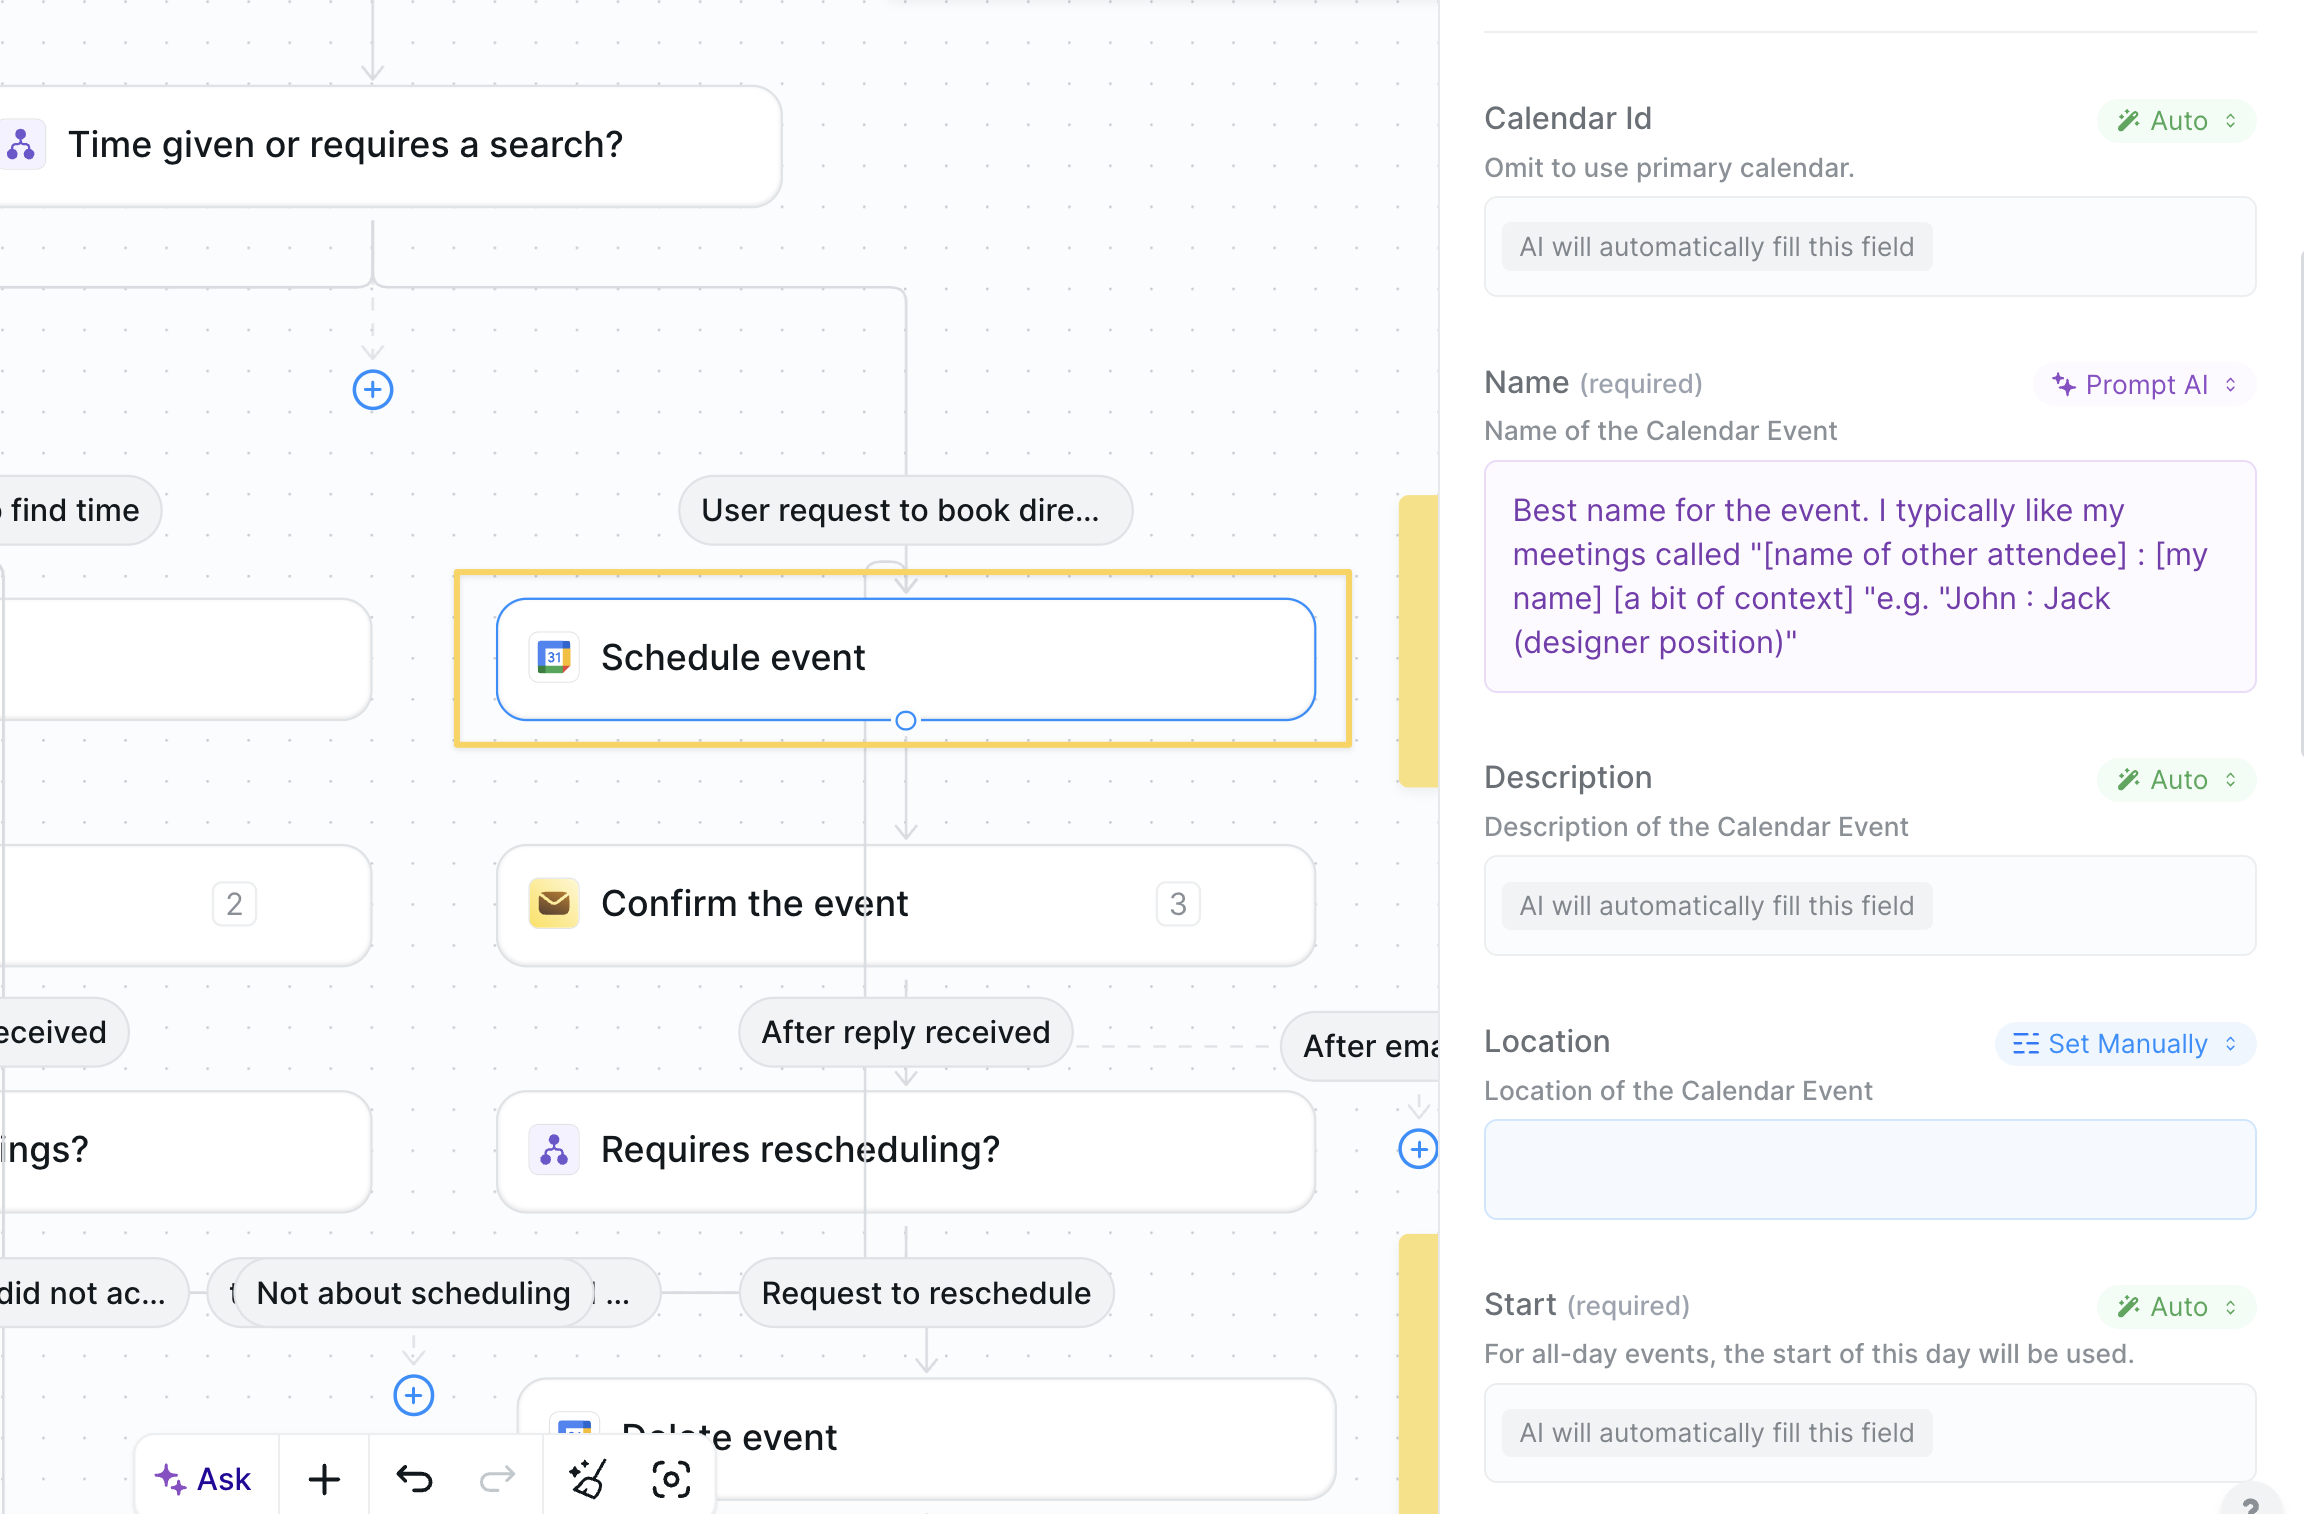
- Action:
Google Calendar – Create Event - Leave most fields on Auto; prompt the name/description using email context.
- Add a meeting link only if the thread agreed to virtual.
Step 6: Confirm or Reschedule
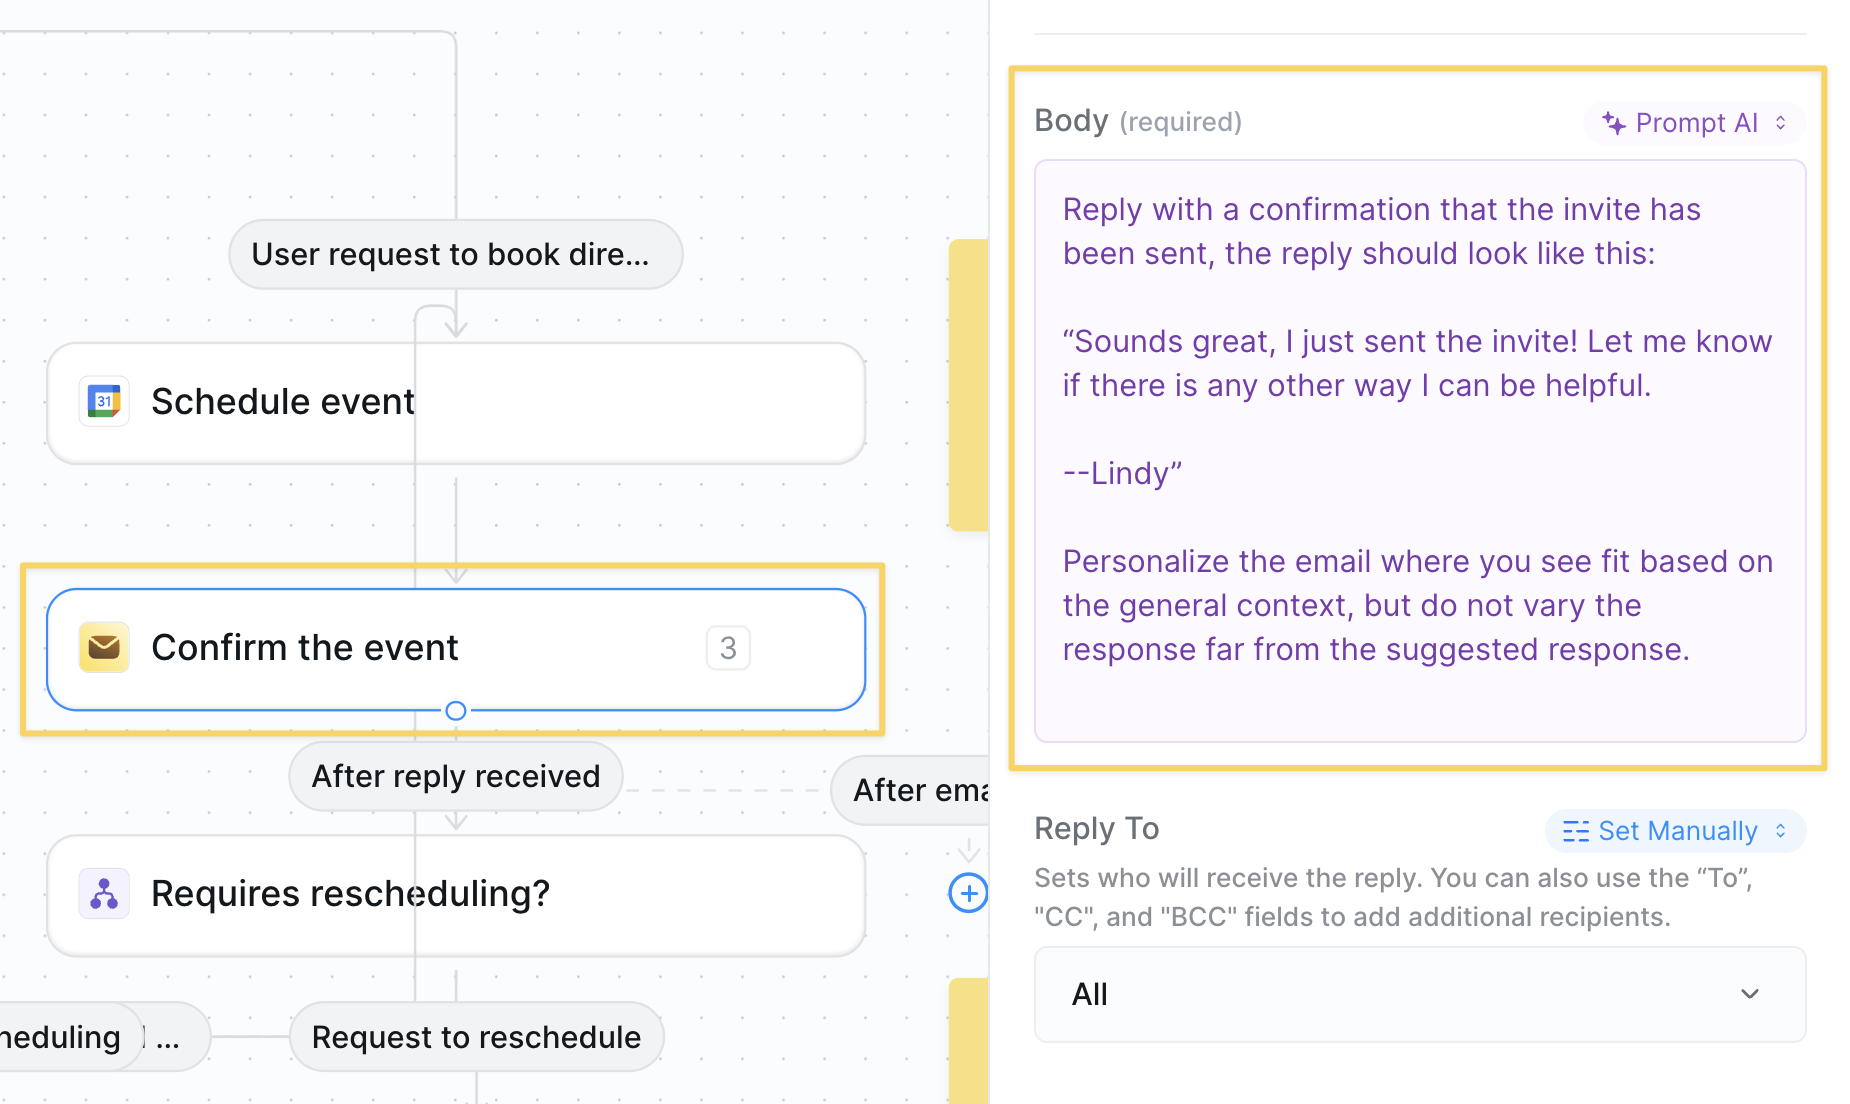
Lindy Mail – Send Replyto confirm booking:
- Final
Conditionwatches for reschedule requests; if true, delete the old event and loop back to Step 3.
Advanced Customizations
| Trick | What it does |
|---|---|
| Multi-time-zone Logic | Detect the recipient’s locale and convert proposed times automatically. |
| Round-Robin Calendars | Cycle availability across a team for shared demo inboxes. |
| Buffer Windows | Add min/max gaps between meetings to avoid calendar pile-ups. |
| Meeting Type Routing | Use subject keywords (Demo, Interview, Support) → route to right calendar. |
Best Practices
Keep Replies Human
Keep Replies Human
Tailor your agent’s email prompts so they match your personal style and brand.
Limit Calendar Scope
Limit Calendar Scope
Check only relevant calendars to avoid false conflicts or double-booking.
Test First Week
Test First Week
Run in confirmation-only mode until you trust the flow end-to-end.
Respect Time Zones
Respect Time Zones
Always include a clear time-zone label in proposed times and confirmations.
Next Steps
Calendar Prep
Research attendees before meetings
Meeting Assistant
Record and summarize every call
Google Calendar
Advanced calendar management features
Triggers
Set up calendar-based automation triggers