Quick Overview
Conditions let your agent make smart decisions about which path to take in a workflow. Instead of rigid rules like “if field equals X”, you write natural language prompts like “if the customer seems angry” or “if this email needs a response”. Your AI agent evaluates these conditions by understanding context, sentiment, and meaning, not just exact matches. This lets you handle more nuanced scenarios without hard-coding every rule. Use conditions to route different types of requests, filter content intelligently, or handle multiple scenarios within a single workflow. Your agent chooses the best path based on what it actually understands from the data.Creating Your First Condition
To add a condition to your workflow, click the plus button (Add step) below any action or between two actions, then select “Condition”.
Setting Up the Condition
Once you’ve added a condition, you’ll see the condition configuration panel.
the email received was asking a question and needs a responsethe email contains a 6 digit user ID numberthe user asked for a refund or seems angry
Adding Multiple Condition Paths
You can create multiple branches to handle different scenarios. Click ”+ Add Condition” to create alternate paths.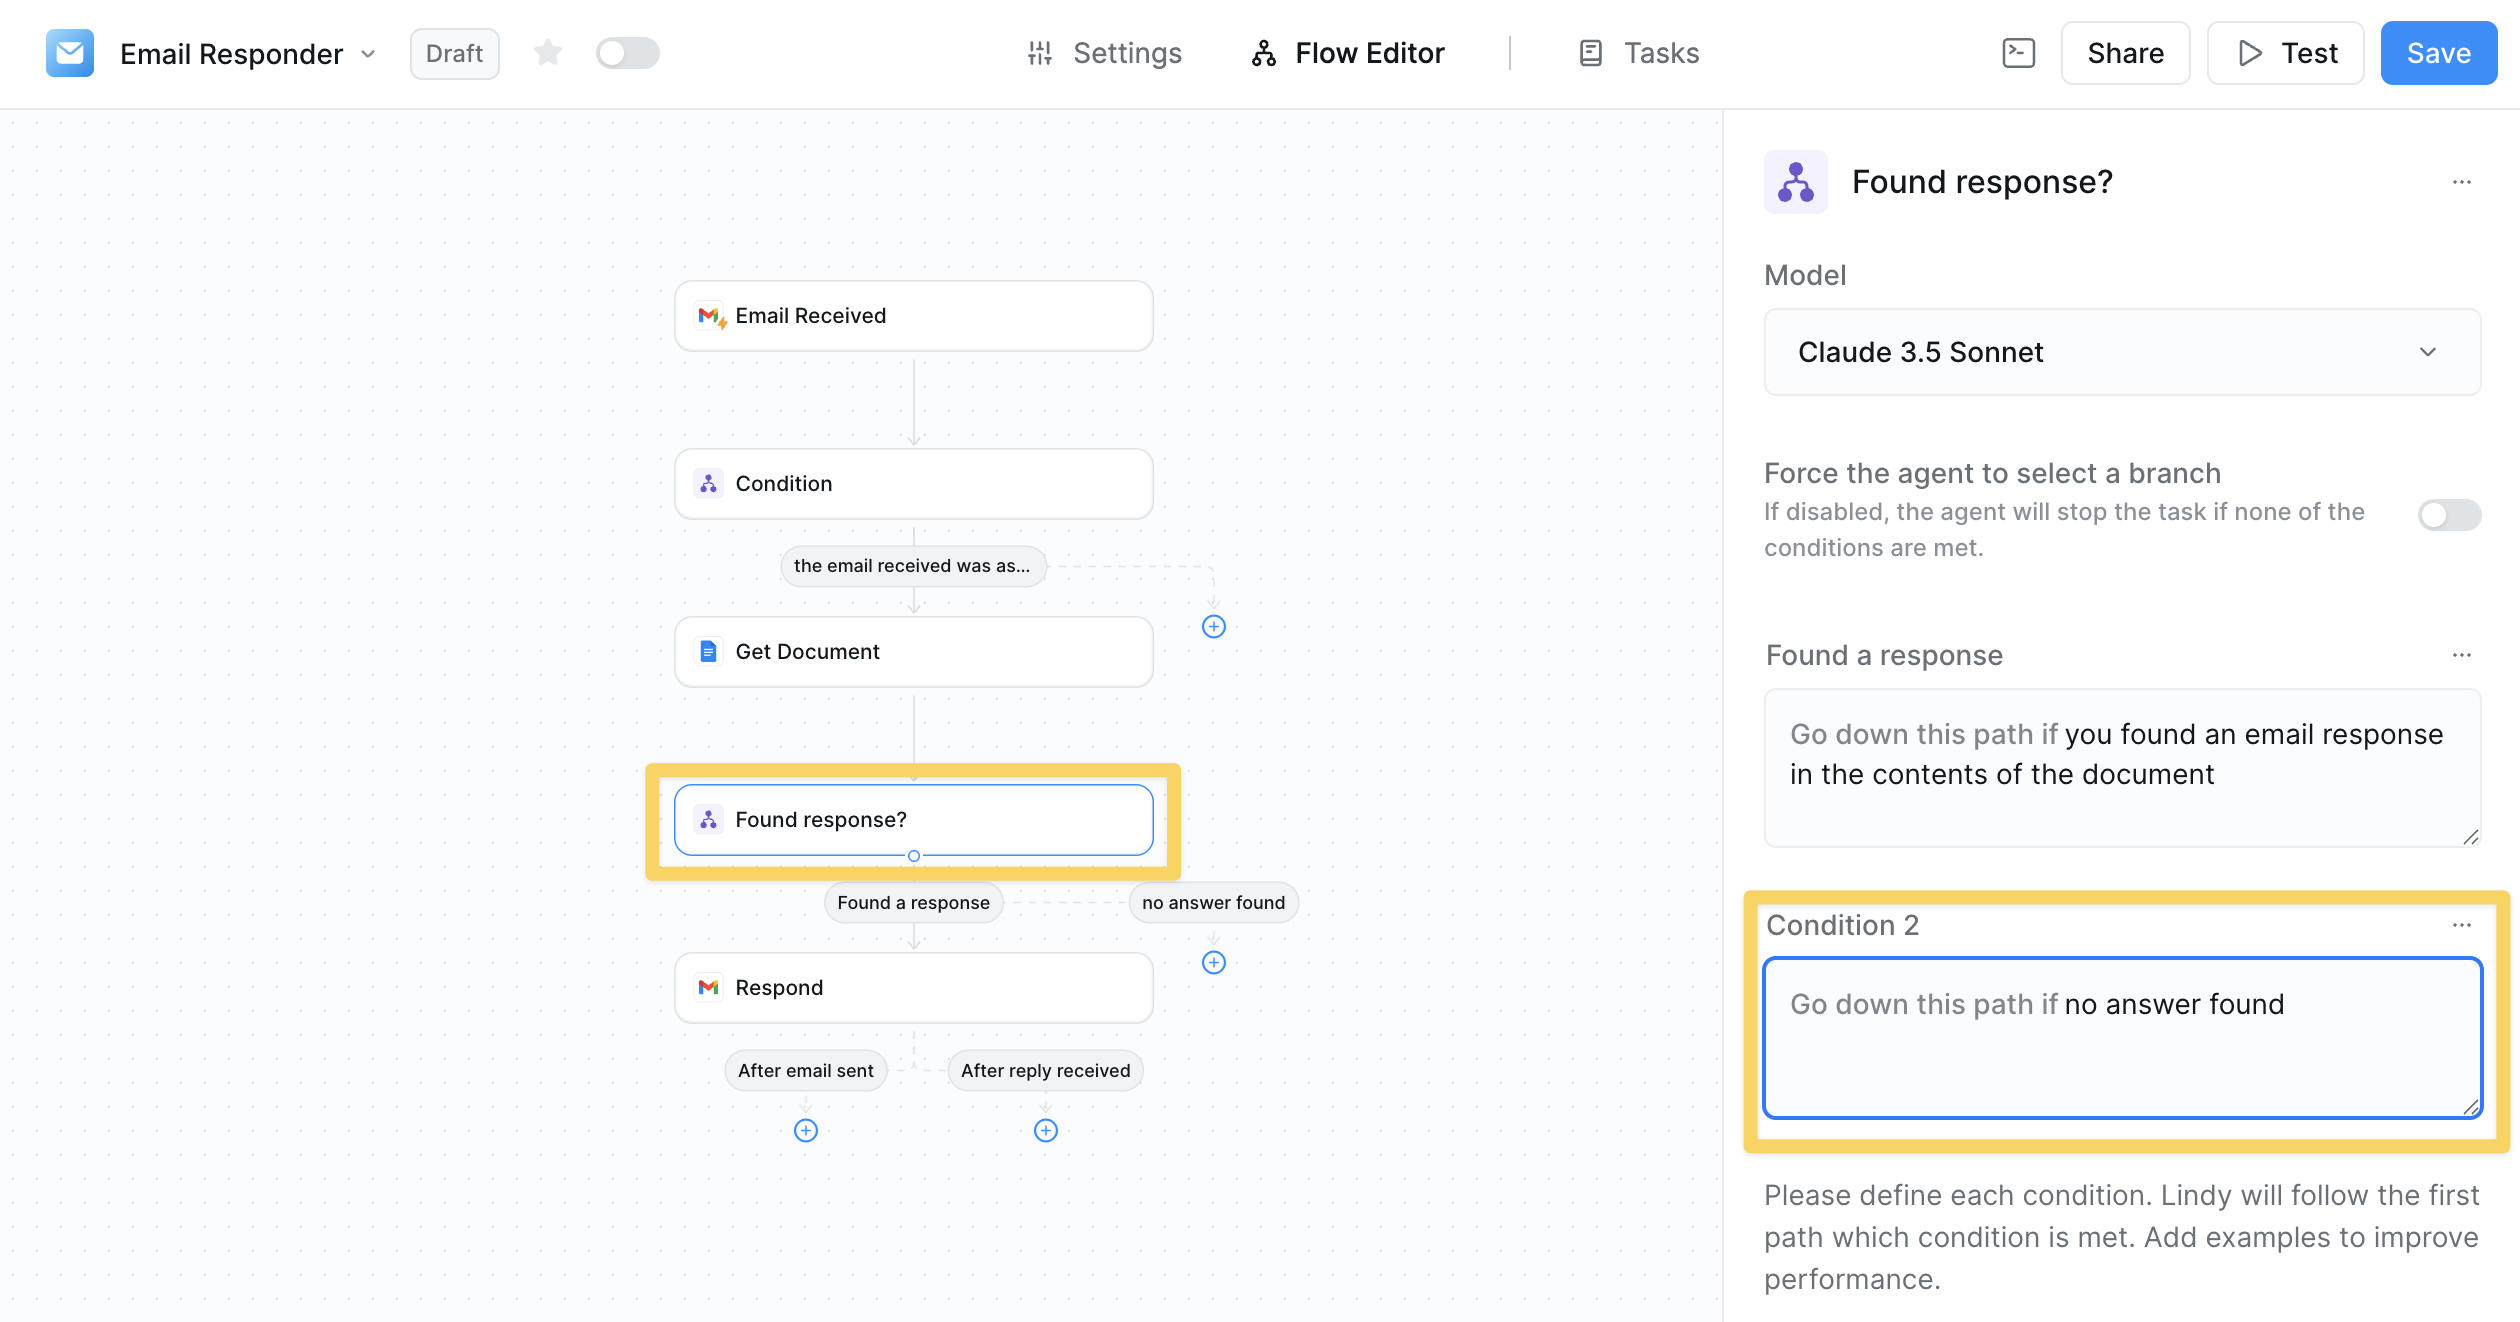
Each condition branch should have a clear, distinct criteria. Your agent will evaluate all conditions and follow the path the model deems “most true”.
Advanced Configuration
Force Agent to Select a Branch
By default, if no conditions are met, your agent will stop the task. You can change this behavior by enabling “Force the agent to select a branch”.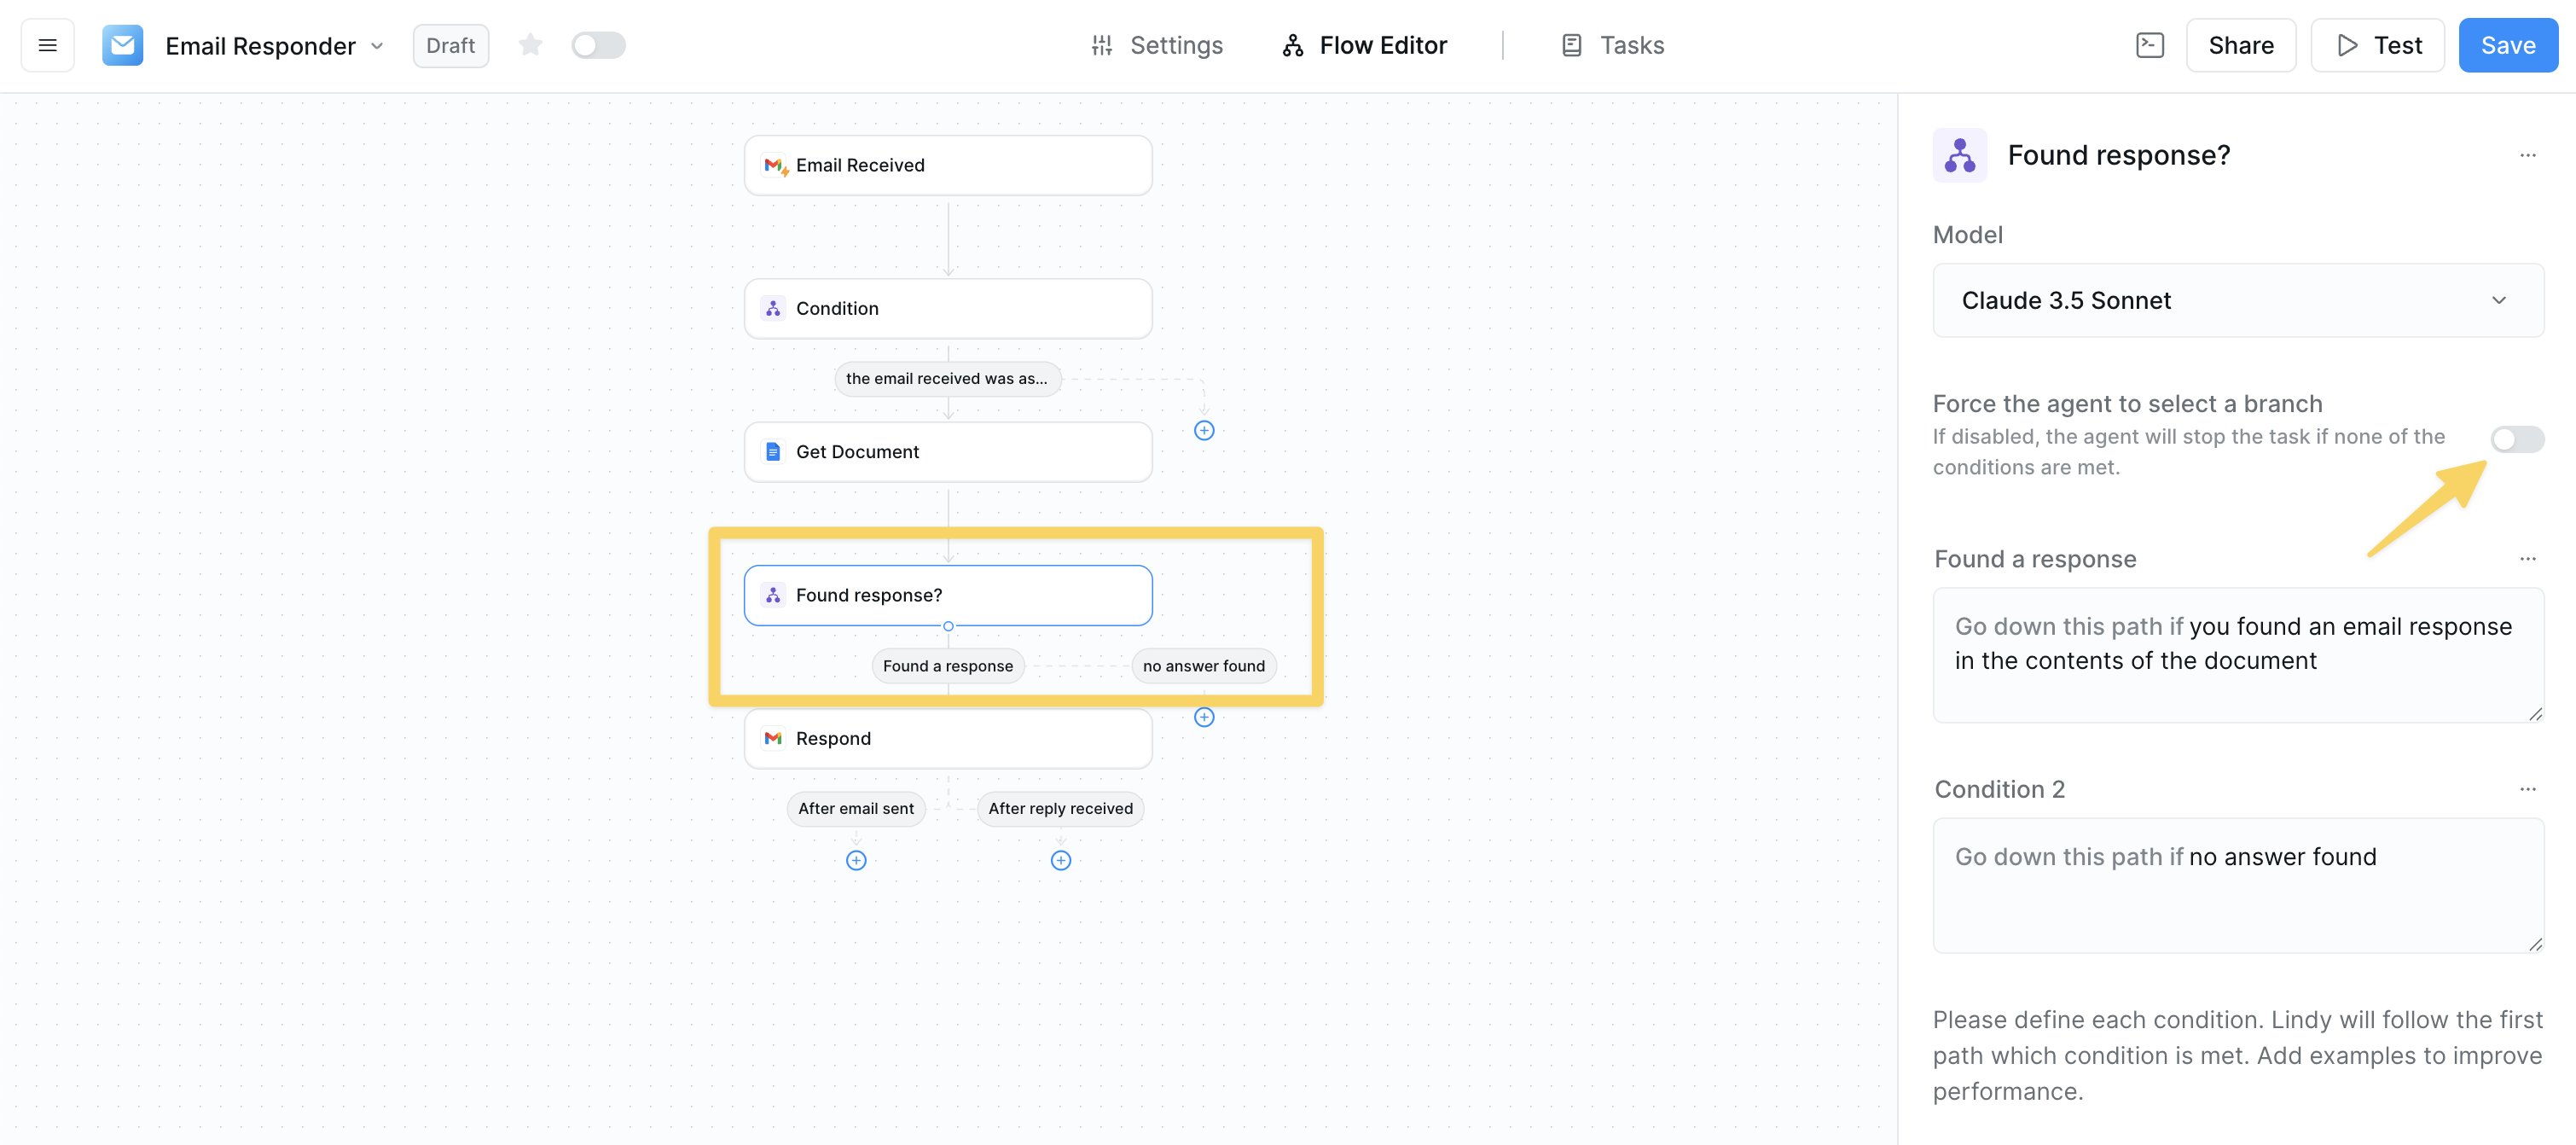
Renaming Conditions
For better organization, especially in complex workflows, rename your conditions with descriptive titles.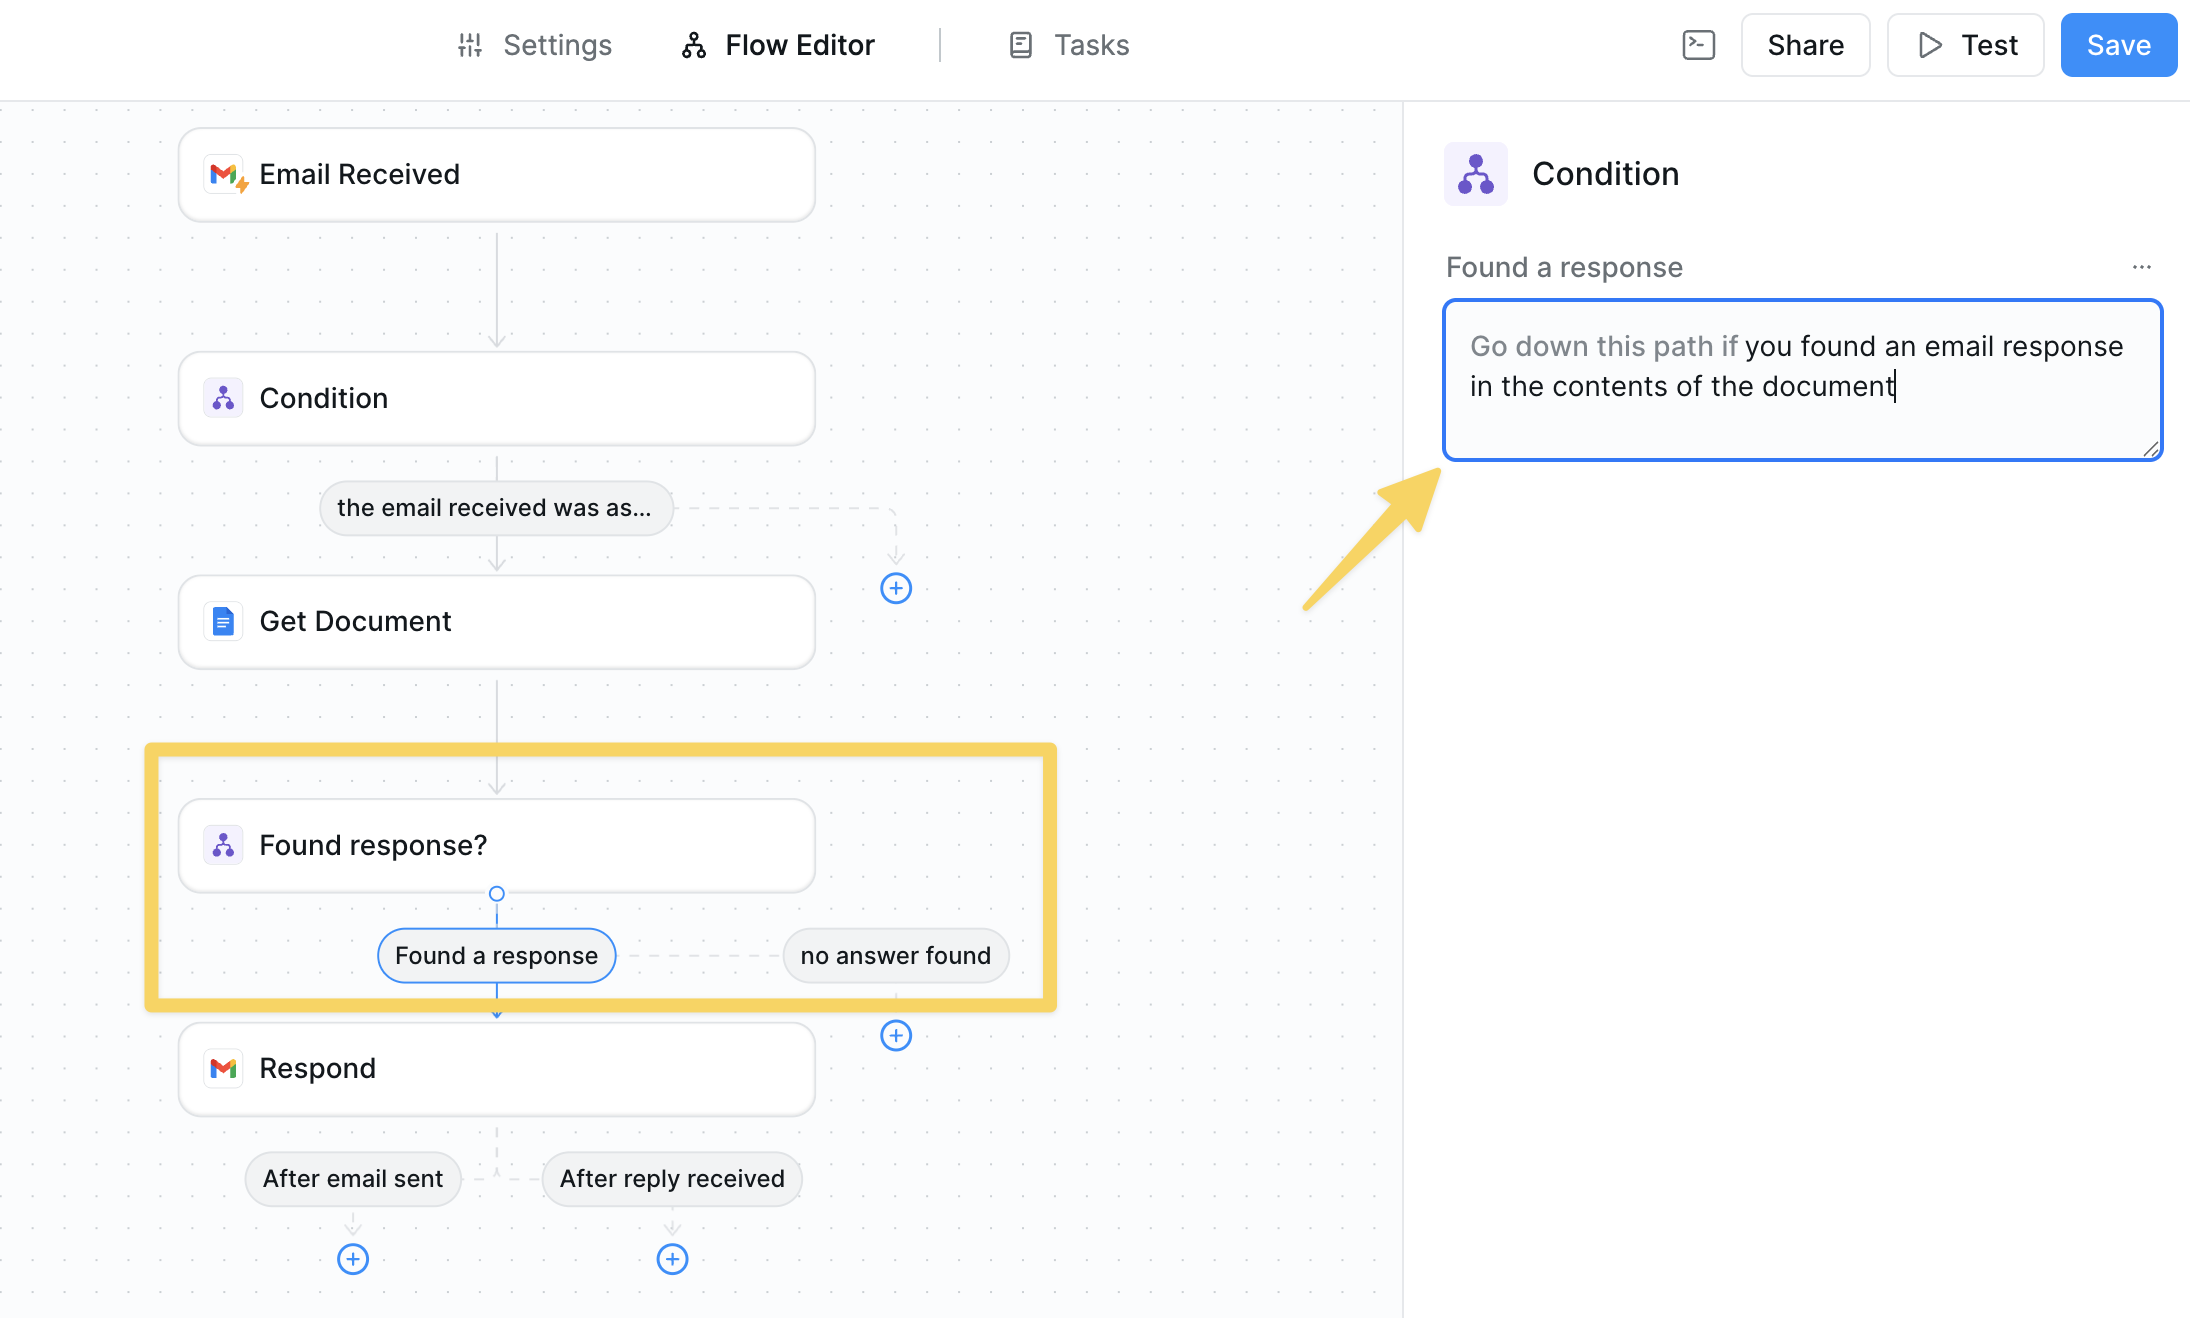
Best Practices
Write Clear, Specific Prompts
Write Clear, Specific Prompts
Be explicit about what you’re looking for. Instead of “important email”, use “email from a C-level executive or marked as high priority”.
Test Edge Cases
Test Edge Cases
Consider what happens when conditions overlap or when none match. Use the test panel to verify behavior.
Add Examples
Add Examples
Include examples in your condition prompts to improve accuracy: “the email asks about pricing (e.g., ‘how much does it cost’, ‘what are your rates’)”.
Troubleshooting
Common Issues
-
Workflow stops when no conditions match
- Enable “Force agent to select branch” or add a catch-all condition
-
Wrong path is chosen
- Review and refine your condition prompts
- Add more specific examples
-
Conditions overlap
- Make each condition mutually exclusive
- Order from most specific to least specific
Next Steps
Now that you understand conditions, explore these related concepts:Loops
Repeat actions for multiple items using conditions as filters
Knowledge Base
Combine conditions with knowledge search for intelligent routing
Human in the Loop
Use conditions to determine when human review is needed
Testing Workflows
Test your conditions with different scenarios