Quick Overview
A Meeting Notetaker agent automatically joins your scheduled meetings, records the conversation, and creates detailed summaries with action items, decisions, and key discussion points. It’s like having a dedicated assistant in every meeting who never misses a detail and always delivers organized notes. You can find aMeeting Notetaker template on the left-hand side of your Lindy dashboard to get started quickly.
Key benefits of using a Meeting Notetaker:
- Automatic attendance — Agent joins meetings based on your calendar without manual intervention
- Comprehensive notes — Captures all important discussions, decisions, and action items
- Organized storage — Saves meeting notes in your preferred format with consistent formatting
- Searchable archive — Creates a searchable repository of all your meeting history
- Team alignment — Ensures everyone has access to the same information, even if they missed the meeting
Setting Up Your Meeting Notetaker
Once you’ve clicked on the Meeting Notetaker template to your account, open the Flow Editor to see how it works. Let’s walk through each step to customize it for your needs.Step 1: Connect Your Calendar
Start by connecting the Google Calendar that contains the meetings you want your agent to join.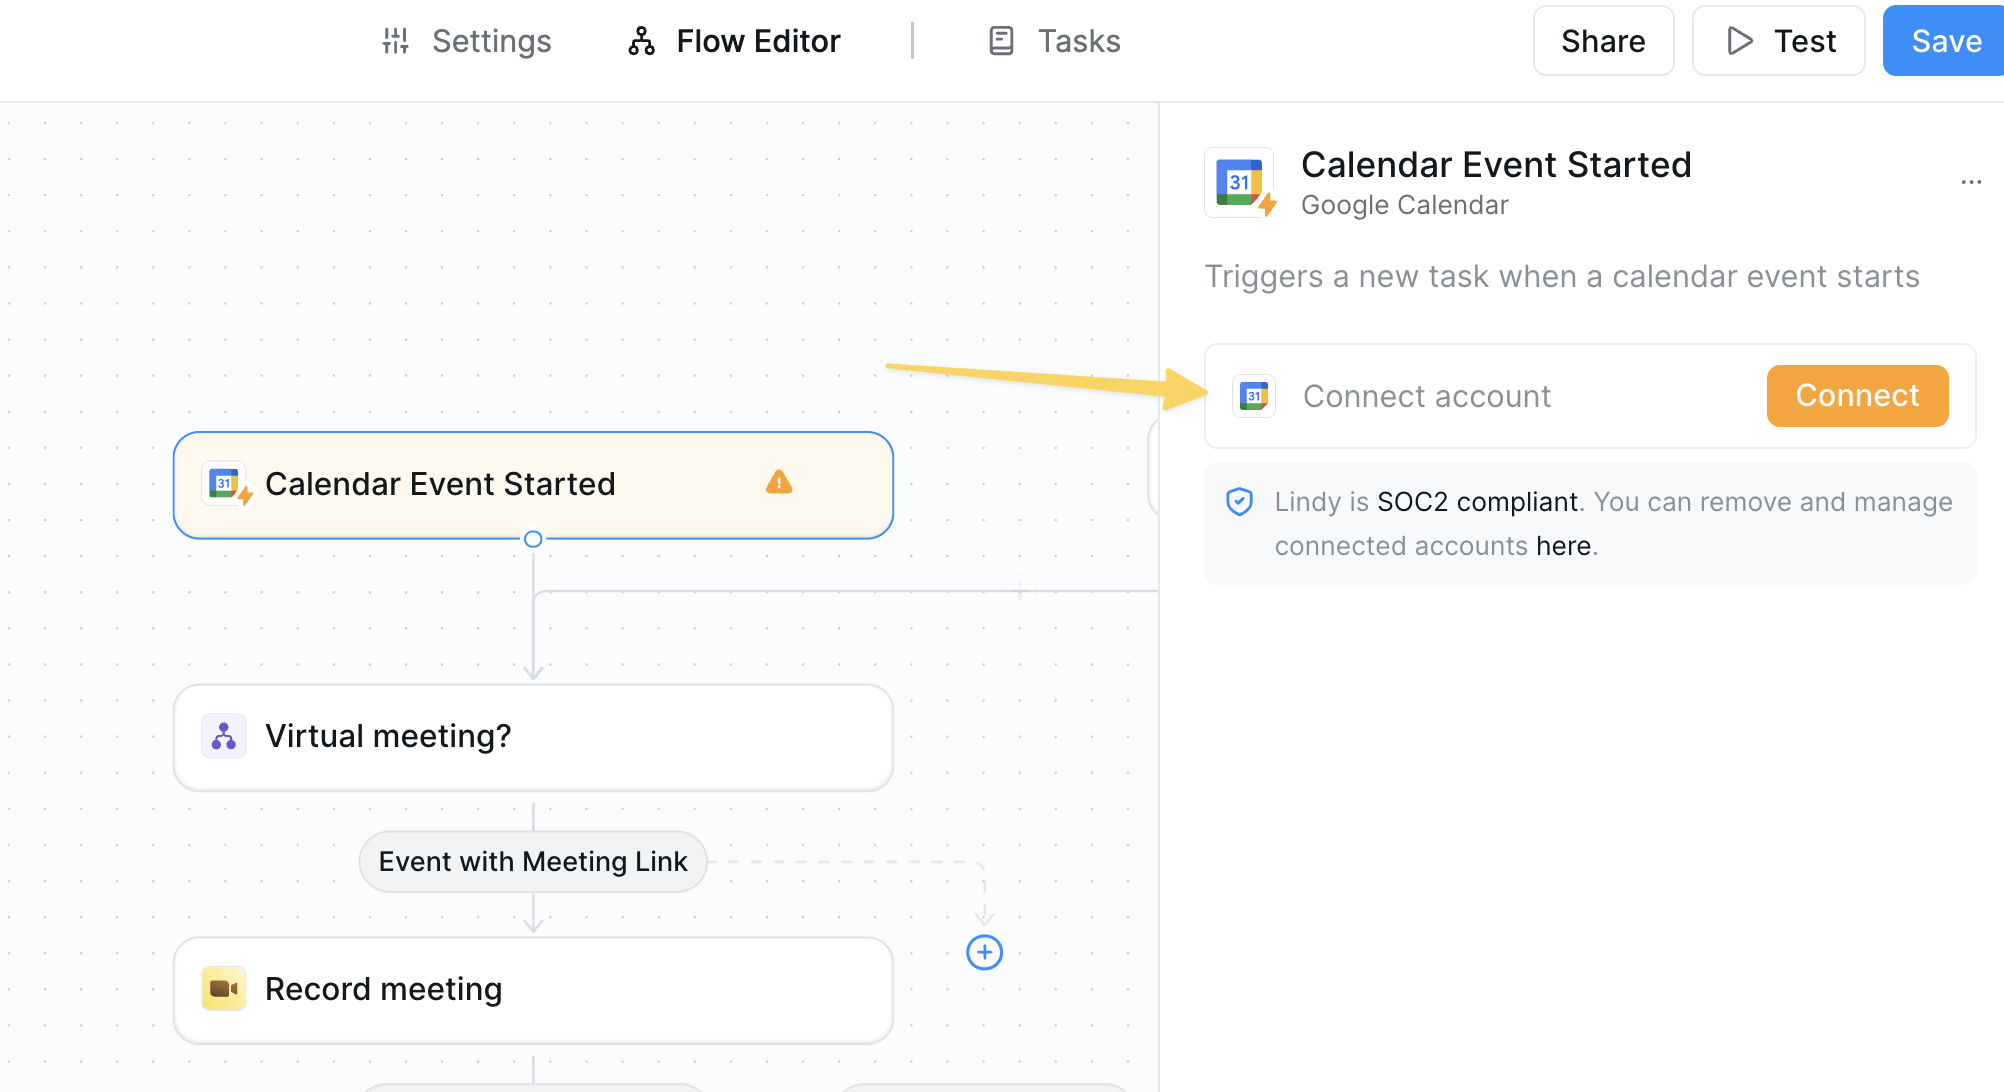
Calendar Event Started trigger and select the calendar you want your agent to monitor. This can be your personal calendar or a shared team calendar.
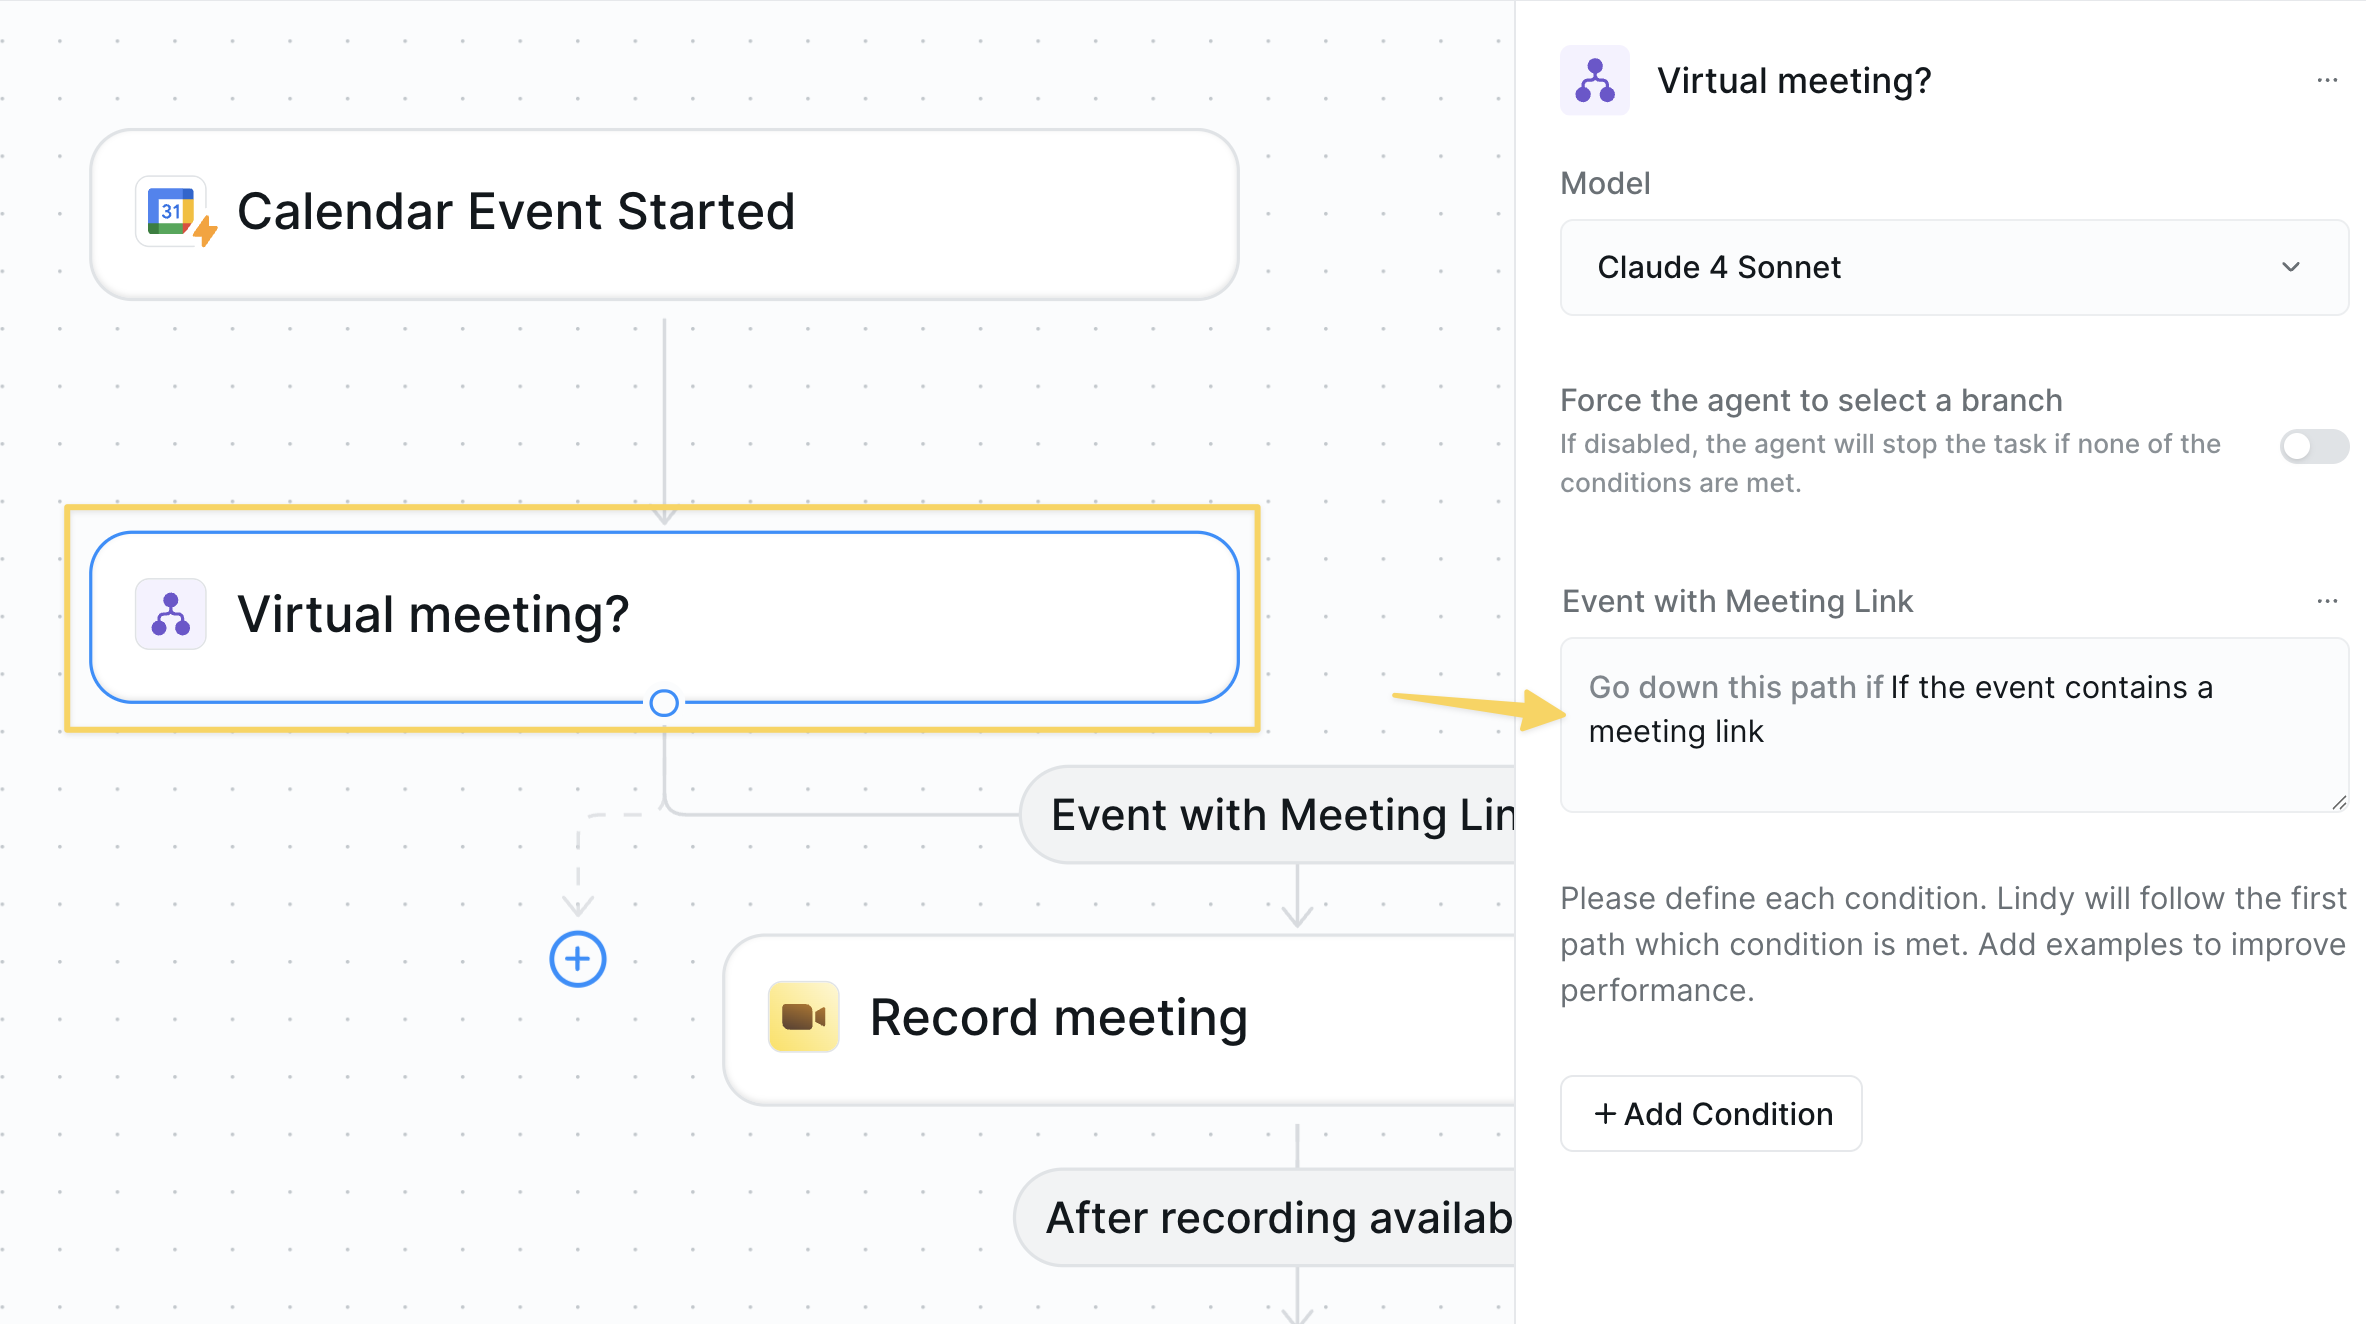
Step 2: Filter for Virtual Meetings
The next step is aCondition that ensures the agent only processes virtual meetings.
- Filter for events containing “Demo Call” in the name
- Only join meetings with specific attendees
- Skip meetings marked as “Private”
Step 3: Configure Meeting Recording
Now let’s set up how your agent will join and behave in your meetings.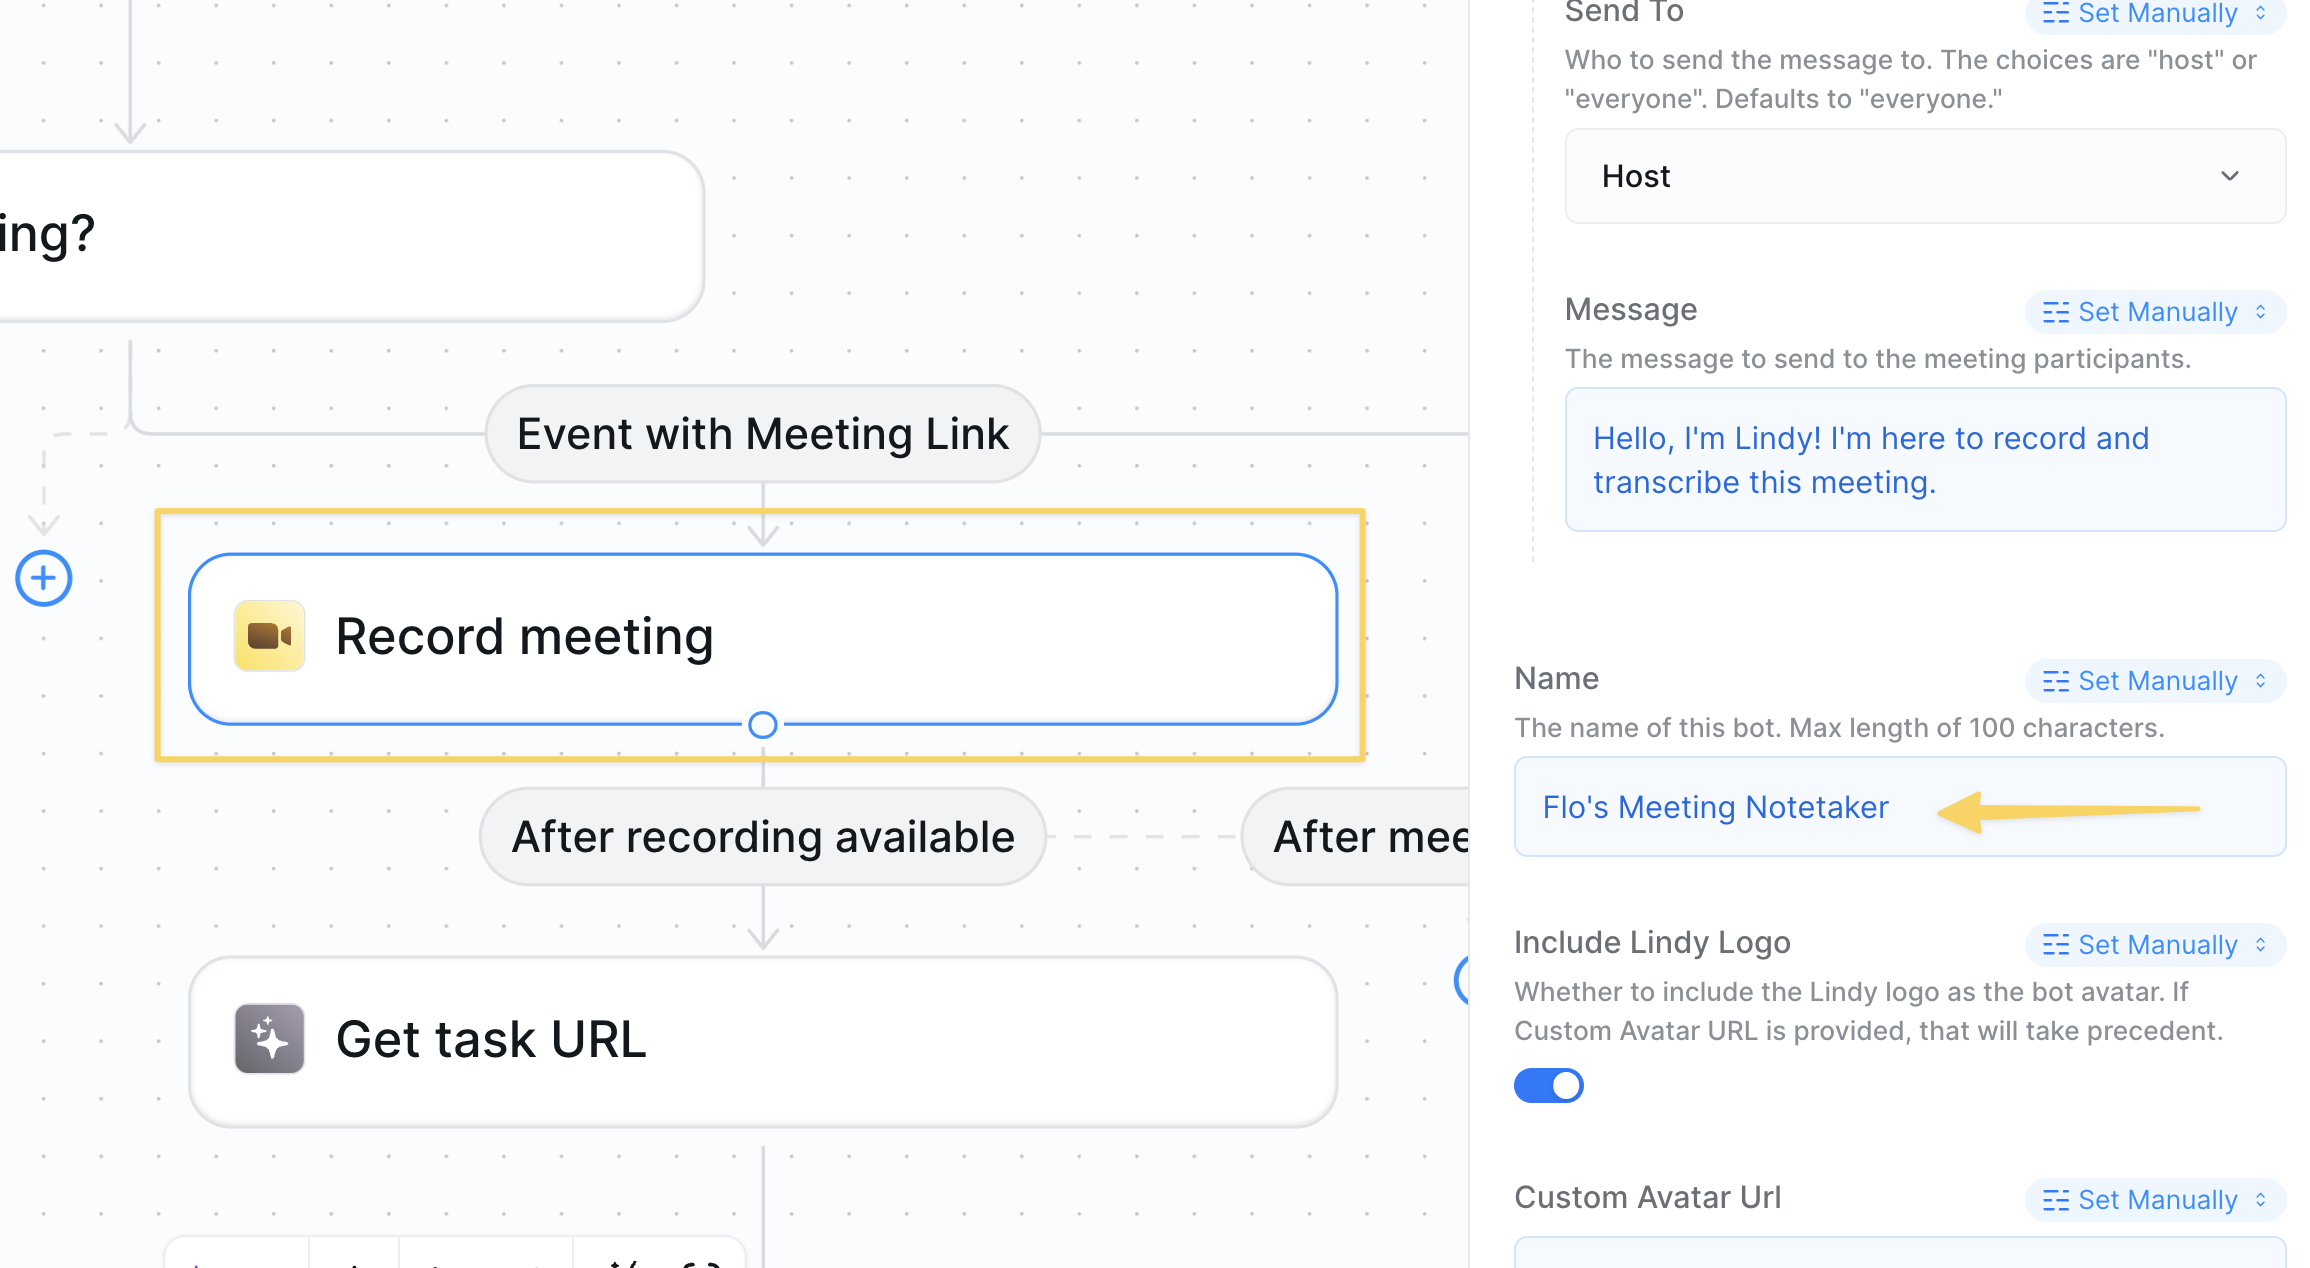
Record Meeting action you can customize several options, but here are a few suggestions:
Chat Message Settings
- Chat Message On Join: Customize what your agent says when joining (or leave blank for silent entry)
- Name: Set your agent’s display name (e.g., “Sarah’s Notetaker”)
Recording Options
- Meeting URL is set to “Auto” so your agent intelligently finds the meeting link
- Recording will start automatically when your agent joins
Step 4: Email Meeting Recap to Attendees
Set up an email to automatically send meeting summaries to all attendees with theGmail Send Email action.
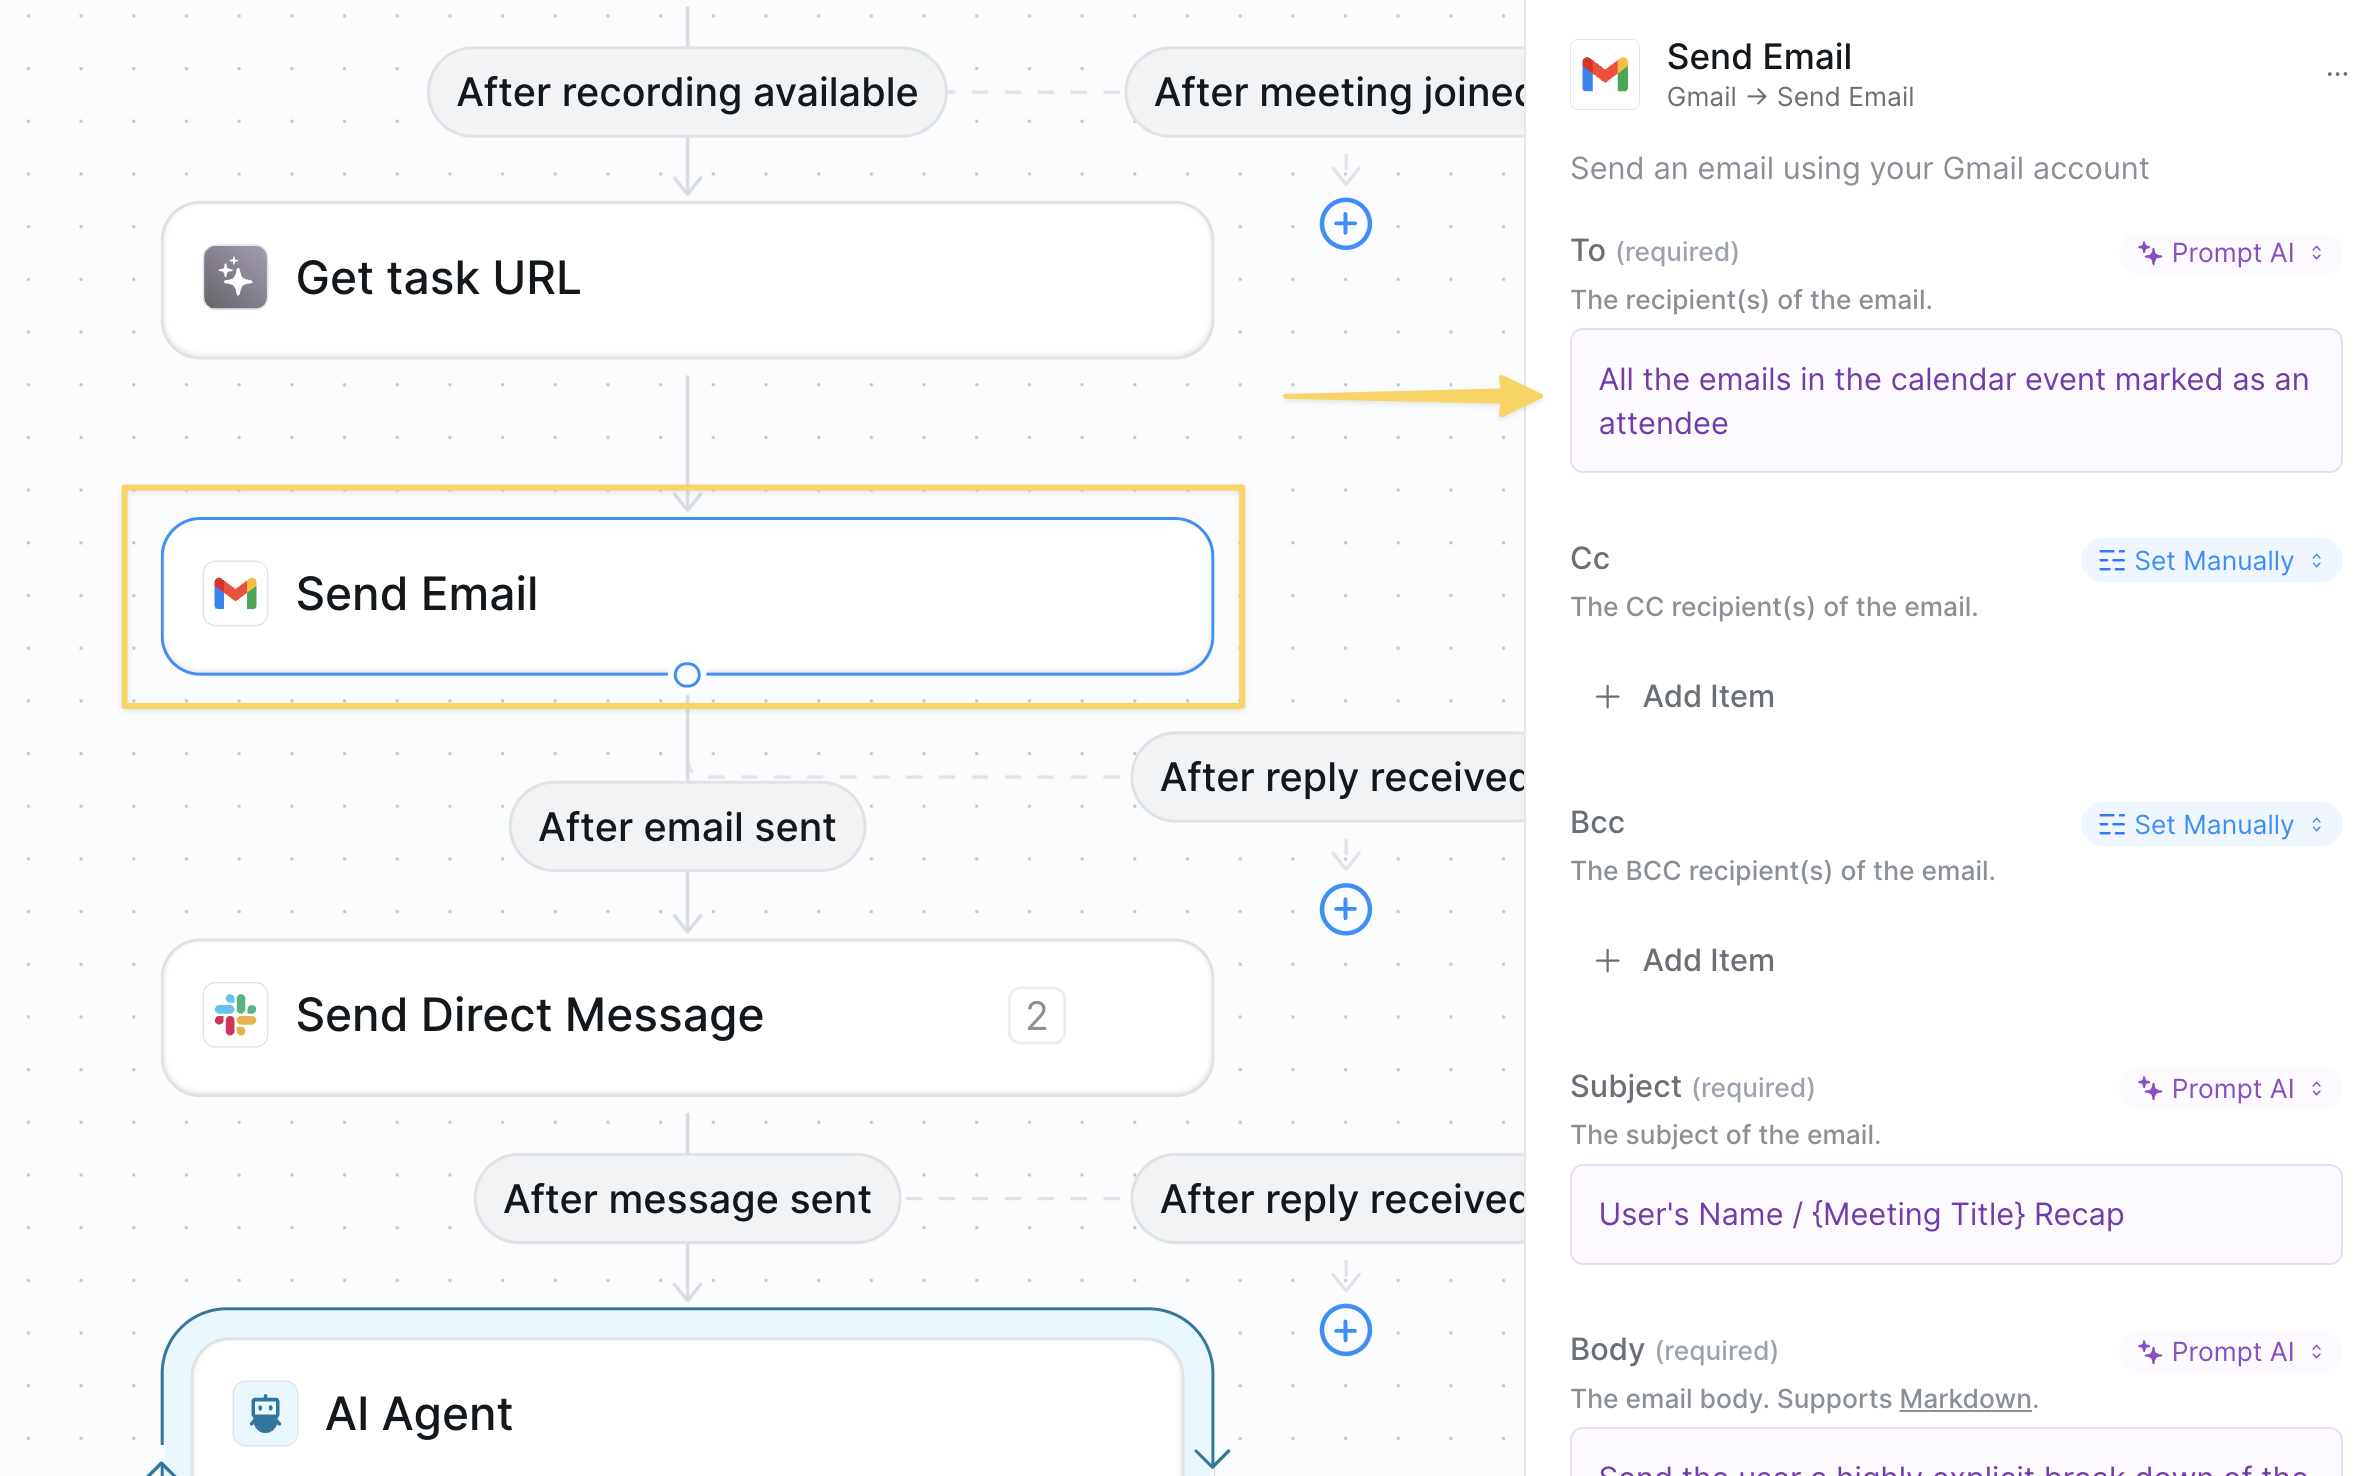
Recipient Settings
- To field: Uses “Prompt AI” mode with: “All the emails in the calendar event marked as an attendee”
- This dynamically includes everyone who was invited to the meeting
Content Customization
- Subject: Customize the email subject line
- Body: Include meeting summary, action items, and the task URL for easy access to recordings
Step 5: Slack Summary Integration
Send meeting summaries directly to your Slack for immediate visibility using theSlack Send Direct Message action.
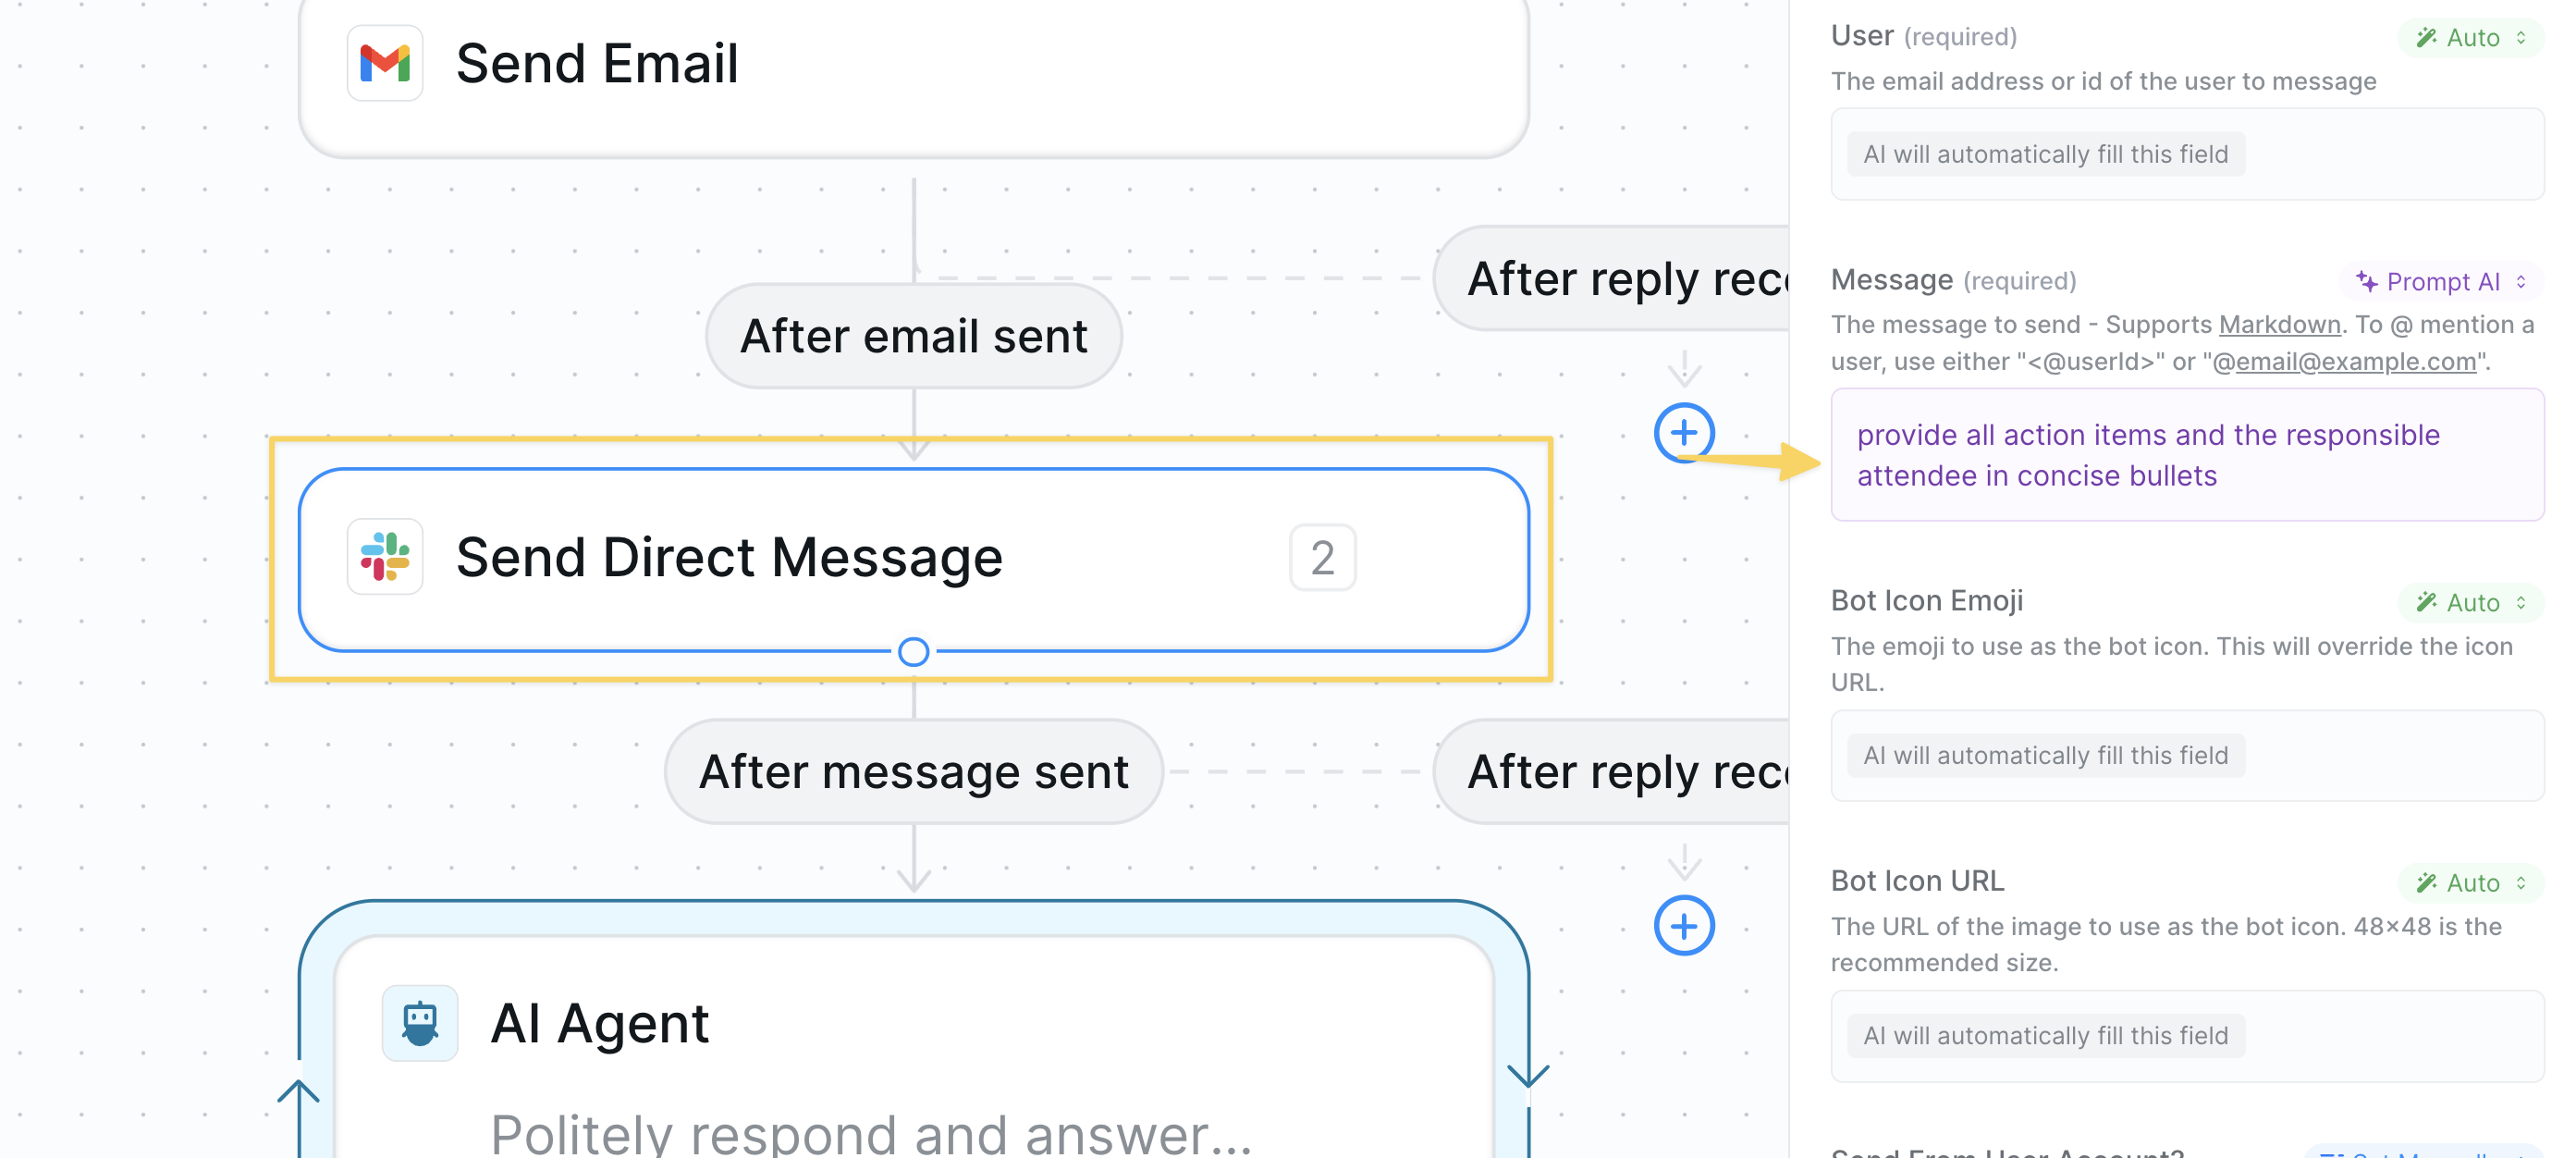
User Configuration
- User field: Switch to “Set Manually” and enter your email address connected to Slack
- Message field: Customize what details to include in the Slack summary
Step 6: AI Agent for Follow-up Questions
The final step adds an AI Agent to handle follow-up questions about your meetings.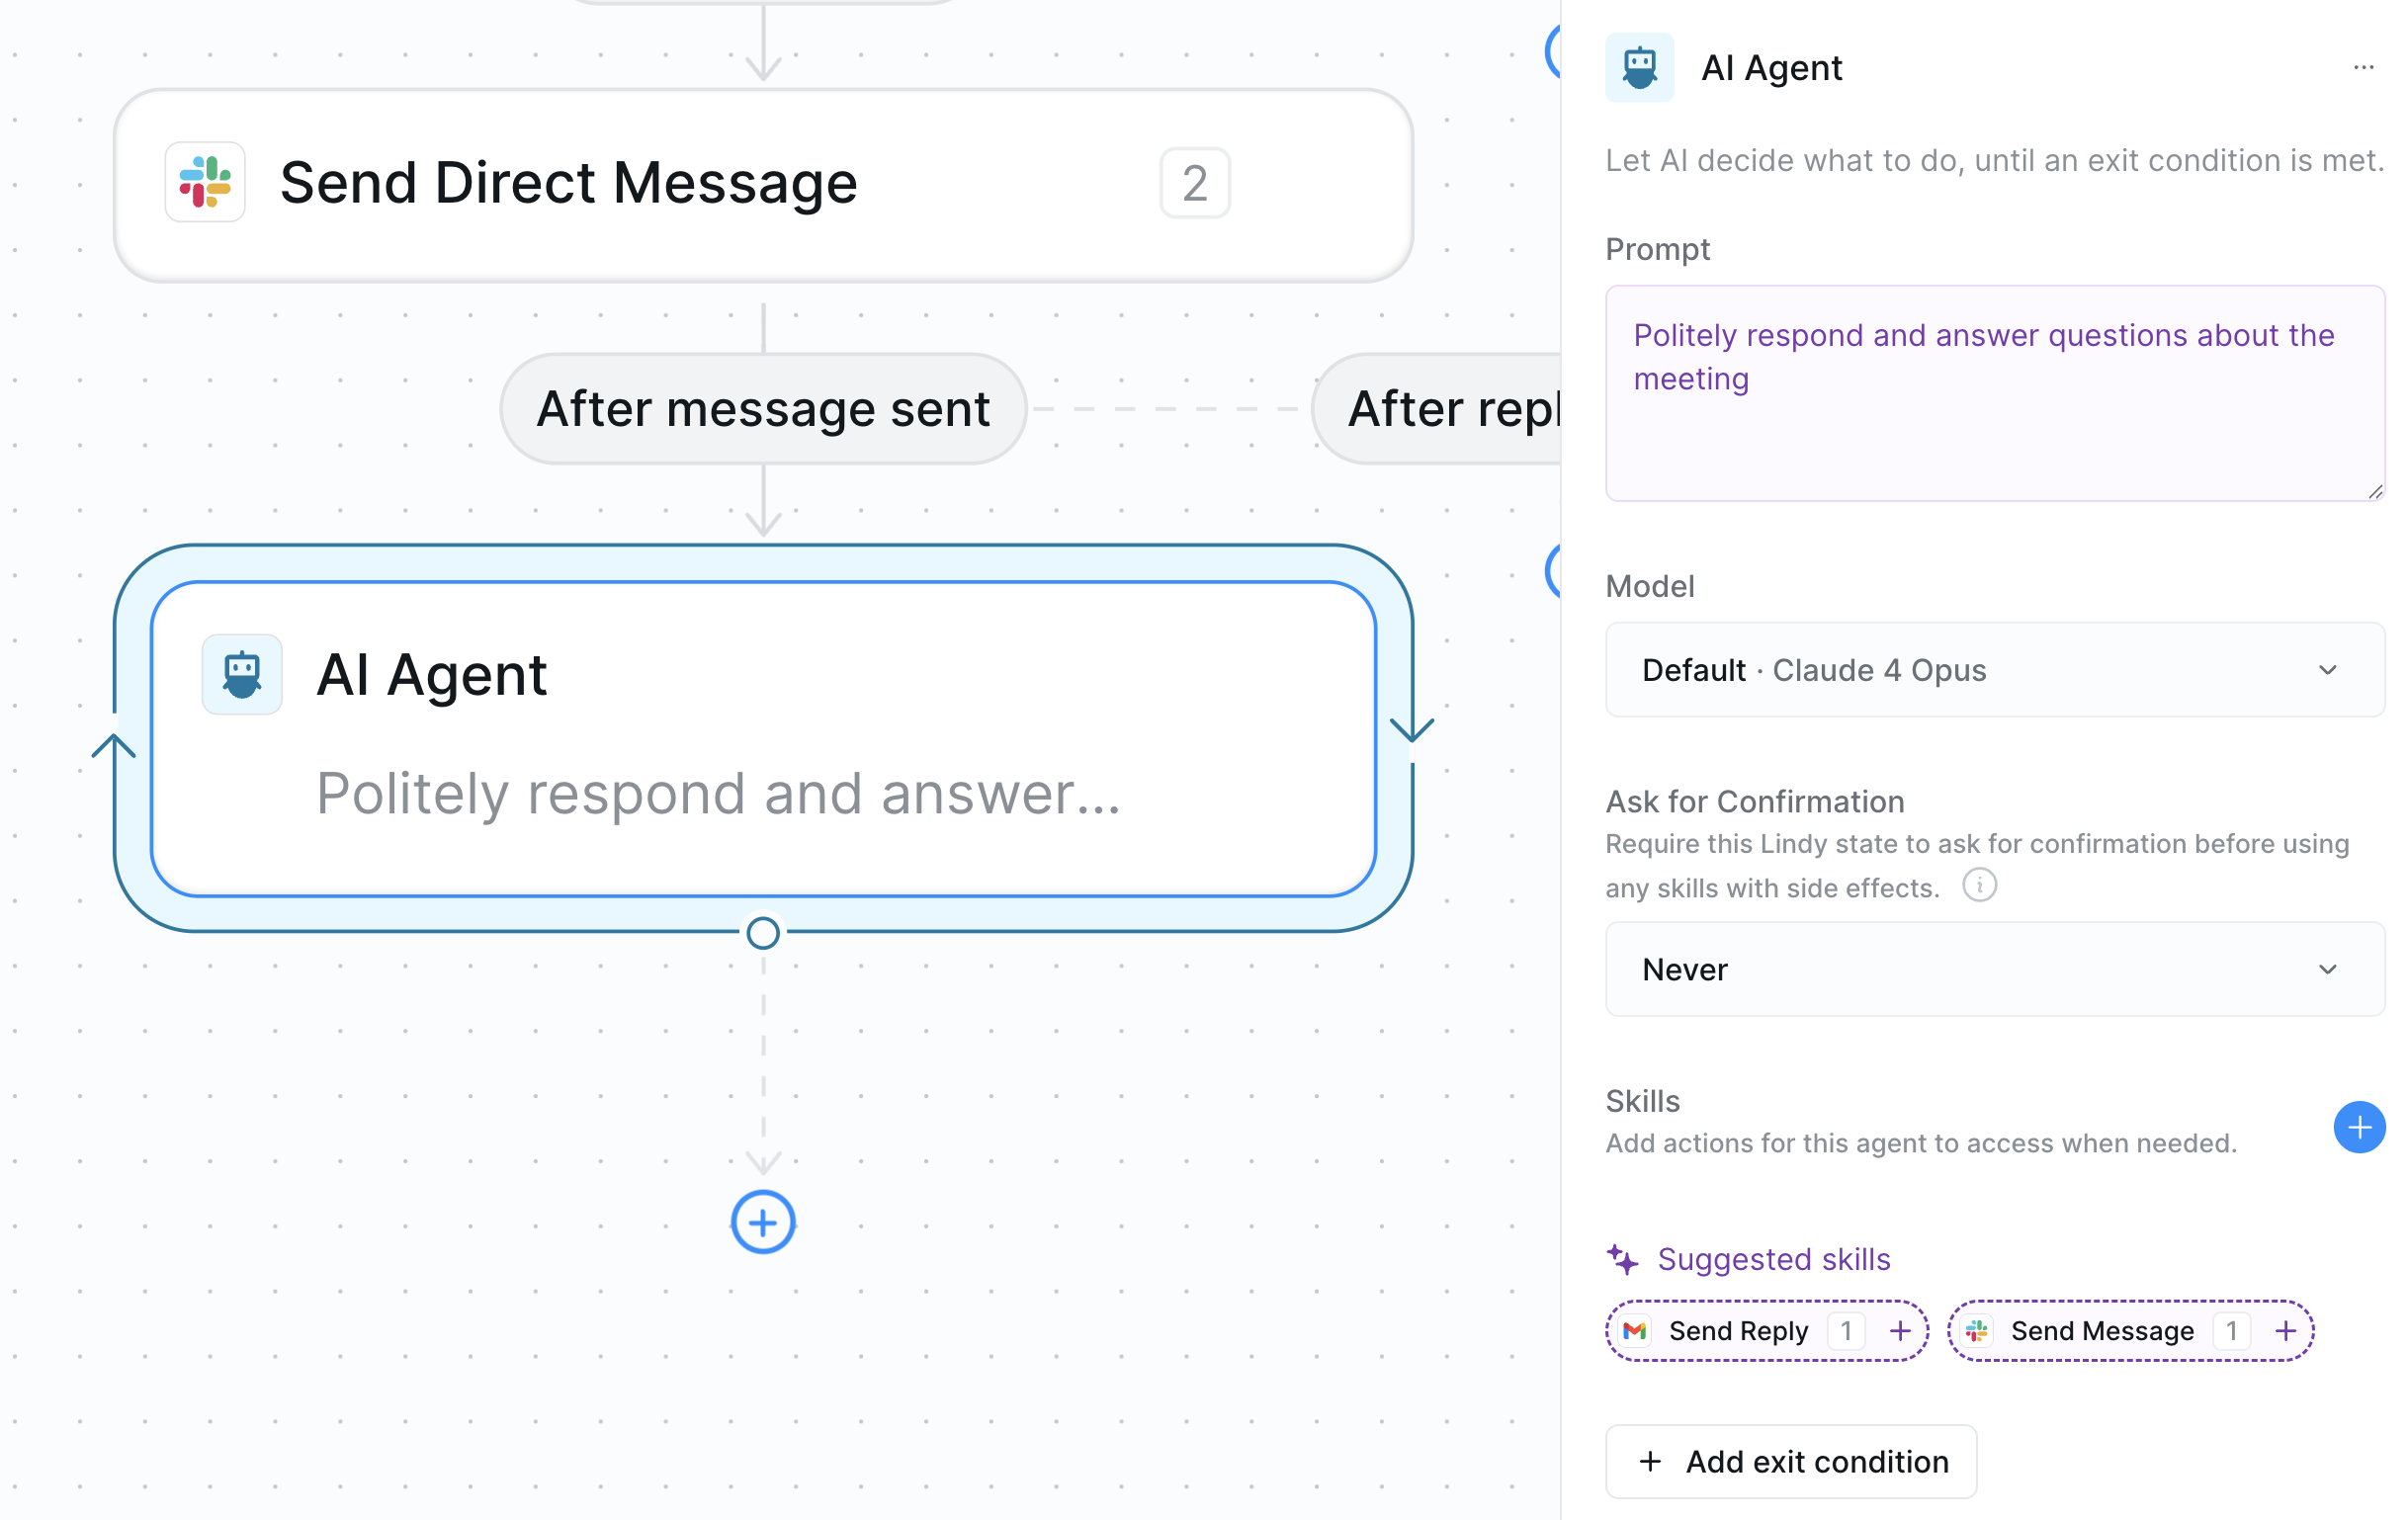
- Respond to questions
- Provide meeting context when asked
- Help with follow-up actions
Using Your Meeting Notetaker
Congratulations! Your Meeting Notetaker is now set up to:- ✅ Automatically join virtual meetings
- ✅ Record and transcribe conversations
- ✅ Send summaries to attendees
- ✅ Post summaries in Slack
- ✅ Answer follow-up questions
Accessing Meeting Content
You can view your meeting recordings by:- Clicking the task in your agent’s task view
- Clicking the task URL if added to a message via output reference
- Copying the transcript using the Copy icon
- Downloading the recording via the three dots menu
Advanced Customizations
Smart Meeting Categorization
Add conditions to route different meeting types:- “Client meetings” → Save to specific folder and notify sales team
- “Internal standup” → Create brief summary and post to team Slack
- “Board meetings” → Generate detailed minutes with confidential handling
CRM Integration
For sales teams, add actions to:- Update HubSpot or Salesforce records immediately after calls
- Create follow-up tasks and reminders
- Log competitor mentions and feature requests
Team Management Features
Enhance team workflows by:- Collecting action items and assigning them to team members
- Sending meeting summaries to relevant Slack channels
- Creating calendar events for follow-up meetings
Best Practices
Meeting Etiquette
Meeting Etiquette
Inform meeting participants that your agent will be taking notes. Consider adding a line to your calendar invites: “Note: An AI notetaker will join to capture meeting notes.”
Privacy Considerations
Privacy Considerations
Set up filters to exclude sensitive meetings like performance reviews or confidential discussions. Use calendar event titles or attendee lists as filter criteria.
Note Organization
Note Organization
Create a consistent folder structure in your cloud storage. Consider organizing by date, project, or meeting type for easy retrieval.
Review and Refine
Review and Refine
Periodically review the generated notes and refine your prompts. The more specific your instructions, the better your agent becomes at capturing what matters to you.
Next Steps
Now that your Meeting Notetaker is set up, explore these complementary workflows:Calendar Prep
Research attendees before your meetings
Scheduling Assistant
Let your agent coordinate and schedule meetings
Knowledge Base
Store meeting notes for easy searching
Monitoring Your Agents
Track meeting assistant performance