Quick Overview
Looping lets you process lists of items in parallel rather than one at a time. Think of it like a ‘for’ loop in programming, but with the power to handle multiple agentic workflows simultaneously. Instead of processing 100 emails sequentially (which could take hours), loops can handle them all at once. You define what happens to each item, and your agent executes those actions across the entire list concurrently. This is essential for bulk operations like lead enrichment, content processing, or research tasks. The loop collects results from all iterations and passes a summary to the next step in your workflow.When Should You Use Looping?
Use looping whenever you need to process multiple items with the same workflow. The key benefit: parallel processing means faster results. Perfect for:- Lead Research: Enrich dozens of leads from your CRM or spreadsheet simultaneously
- Content Creation: Generate social posts, emails, or descriptions for multiple products at once
- Data Processing: Update spreadsheet rows, validate entries, or send bulk notifications
- Research Tasks: Gather information on candidates, companies, or competitors in parallel
Loop Configuration Fields
When setting up your loop, you’ll configure several key fields:-
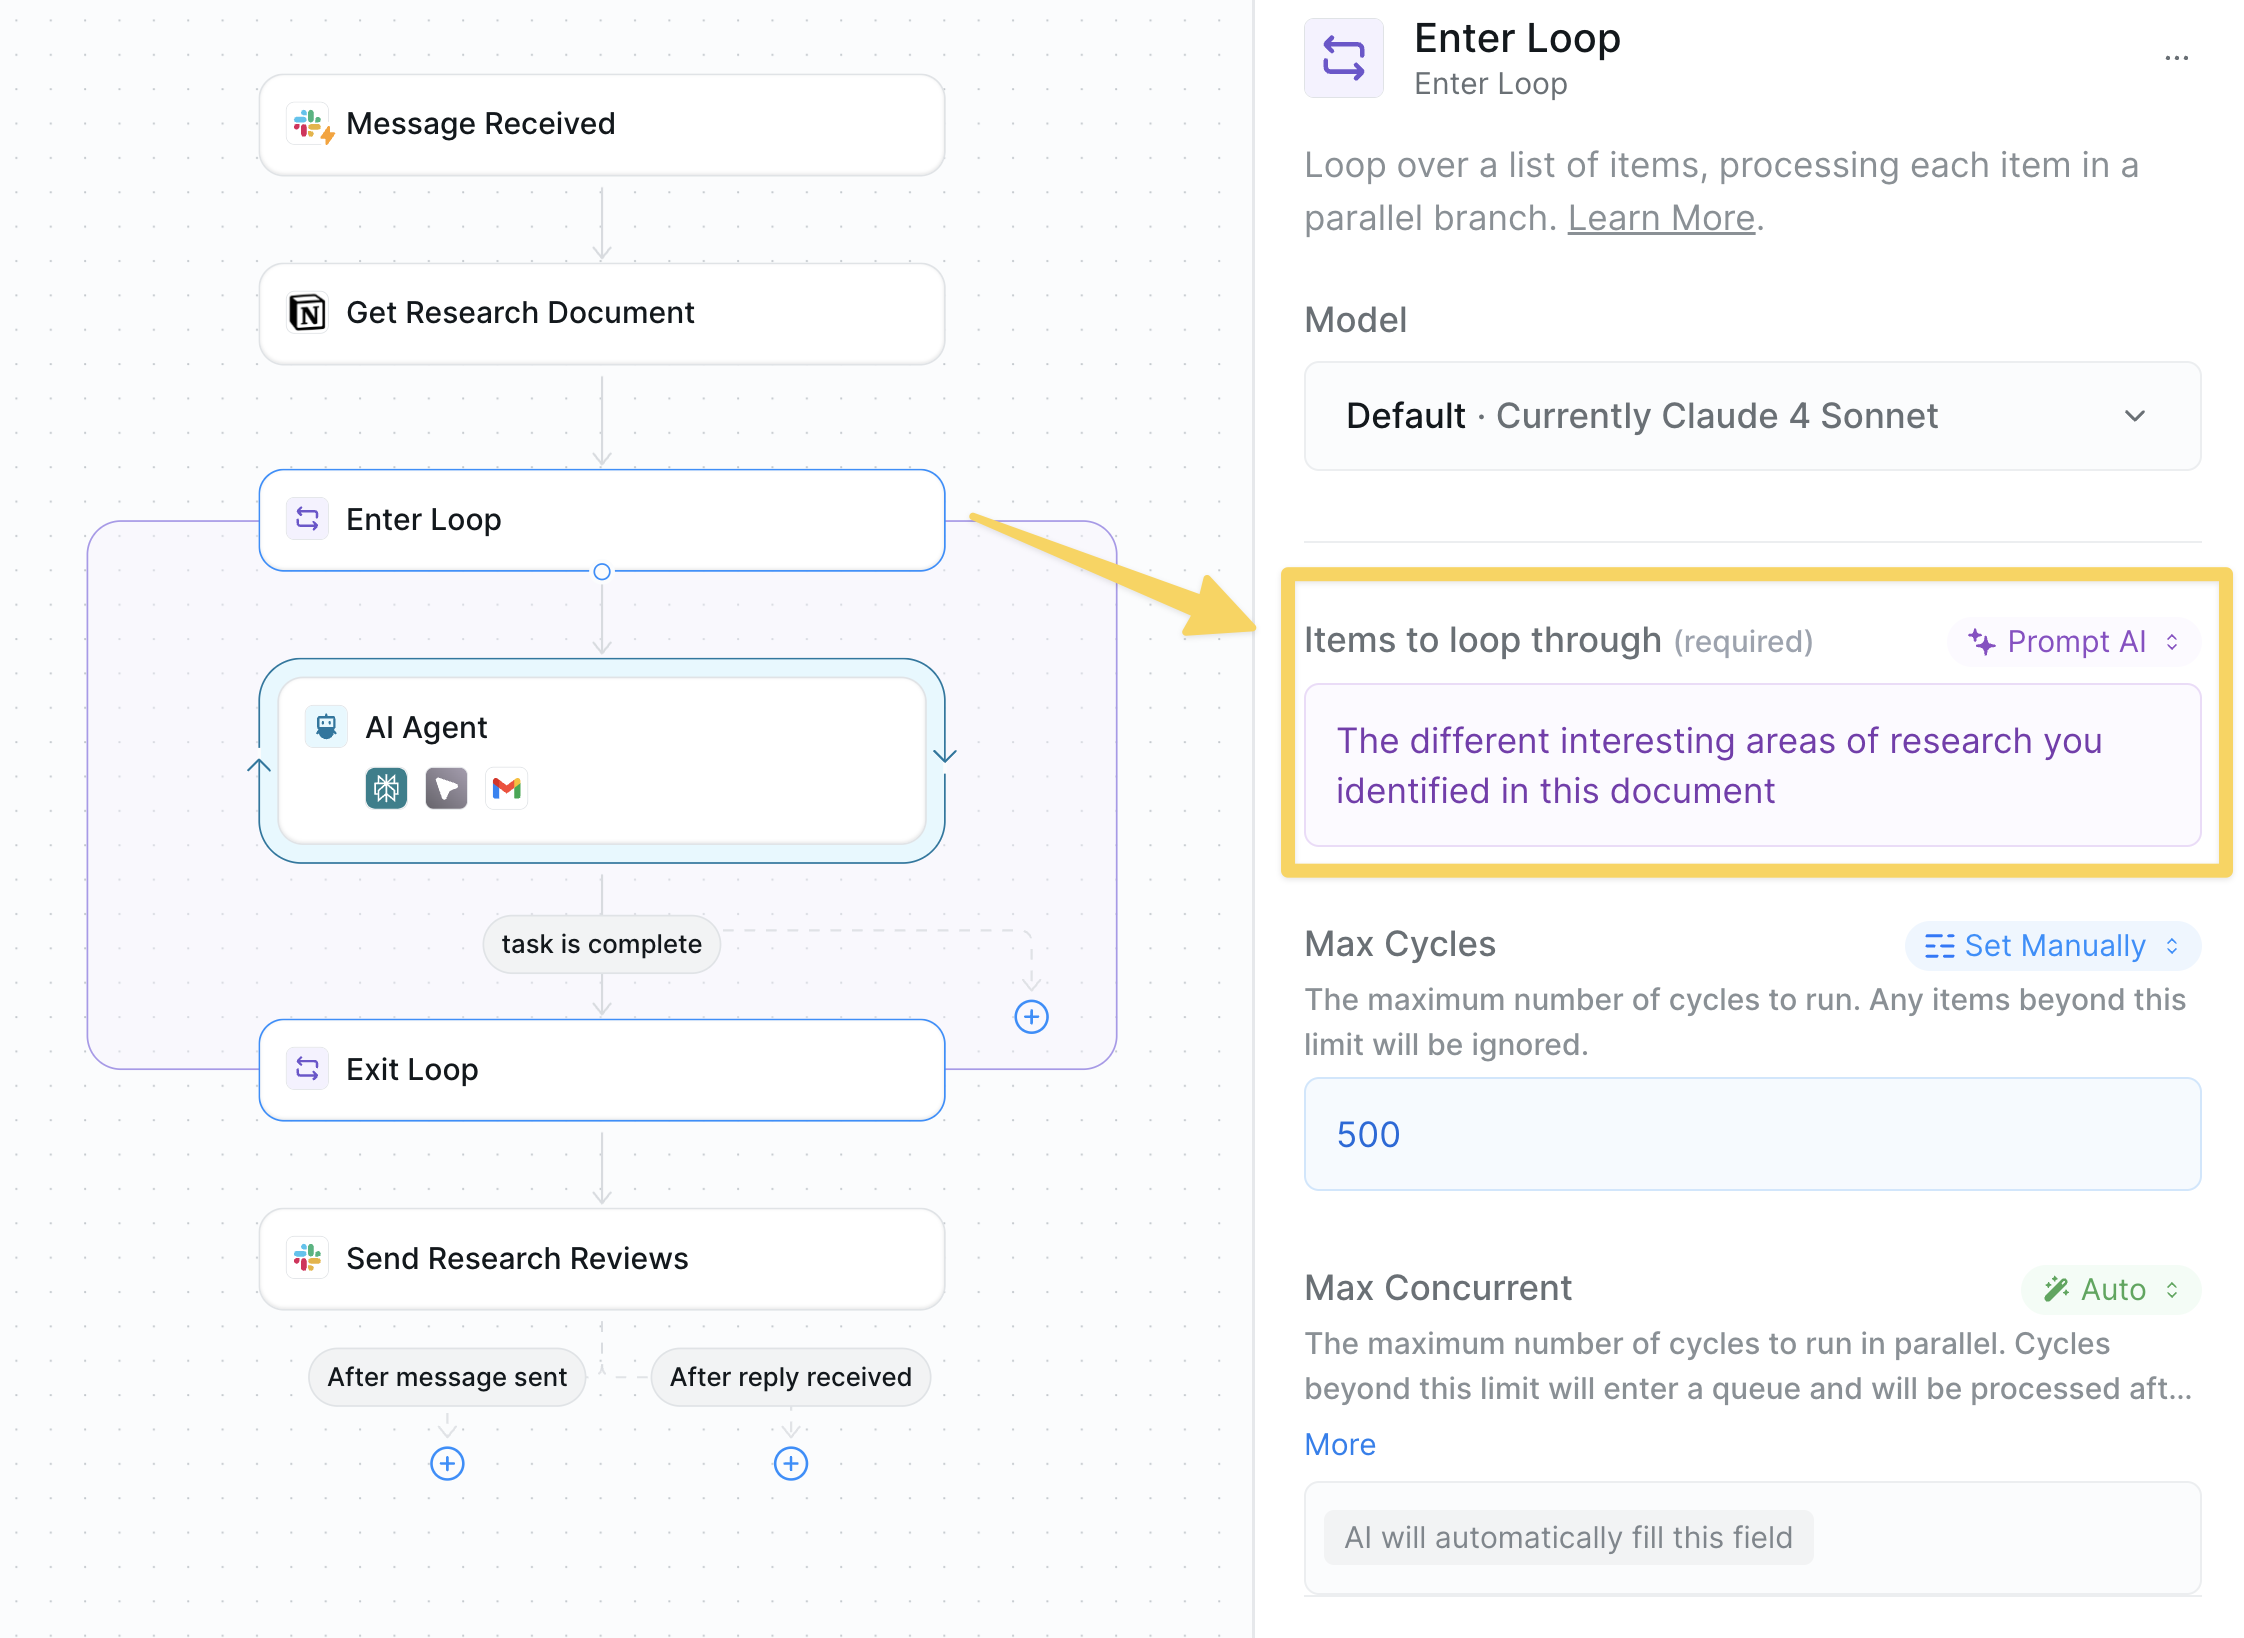
Items to Loop Through: The list of data that drives each loop iteration. This can be a static list, a reference to dynamic data from previous steps, or an AI prompt that generates the list for you.
For example, you can use an AI prompt to extract items dynamically:
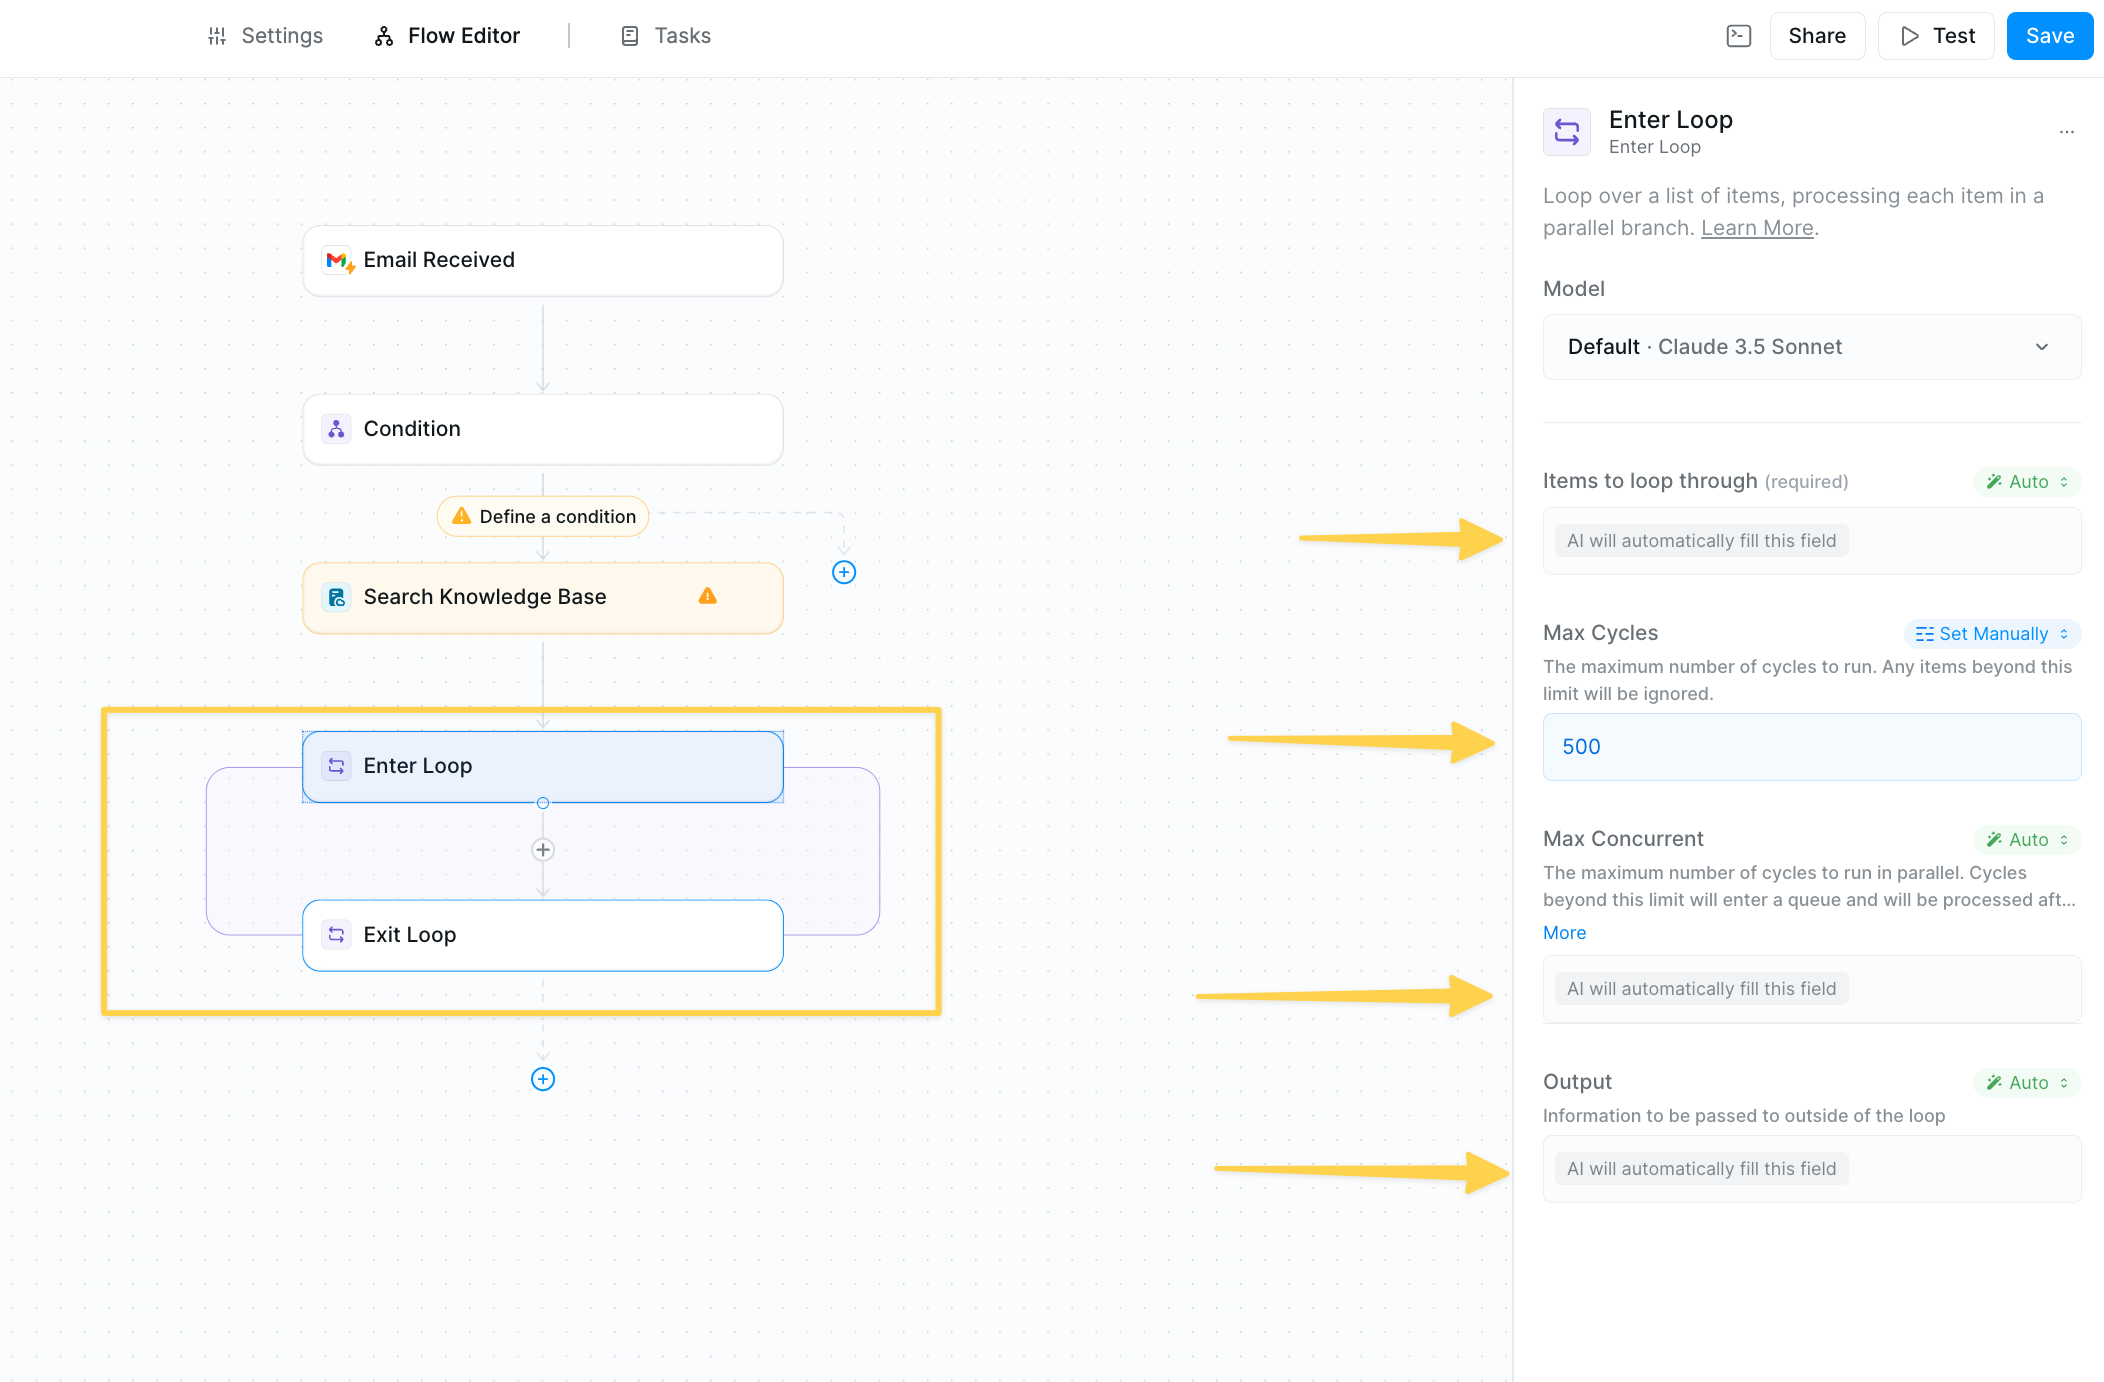
- Max Cycles: The maximum number of loop iterations that will run. This controls resource usage. Set this based on your expected list size plus a safety buffer (e.g., if you expect 50 items, set to 100)
- Max Concurrent: The maximum number of loop cycles that can run simultaneously in parallel. Choose “Auto” for optimization, or set a specific number.
- Output: The information passed from inside the loop to subsequent steps. This is the only data that survives the loop completion. Use “Auto mode” for AI summaries, “AI prompt” to specify exactly what data you need, or set to manual to select an output reference from inside the loop to expose to the outside.
Building Your First Loop
Let’s create a research assistant that loops through locations, researches each one, and summarizes findings. This pattern can be adapted for lead enrichment, candidate research, or any bulk processing task.Step 1: Planning Your Loop
Before building, define:- Items to process - What list will you loop through?
- Loop output - What information should be available after the loop?
- Actions per item - What happens to each item?
- Post-loop actions - What happens with the aggregated results?
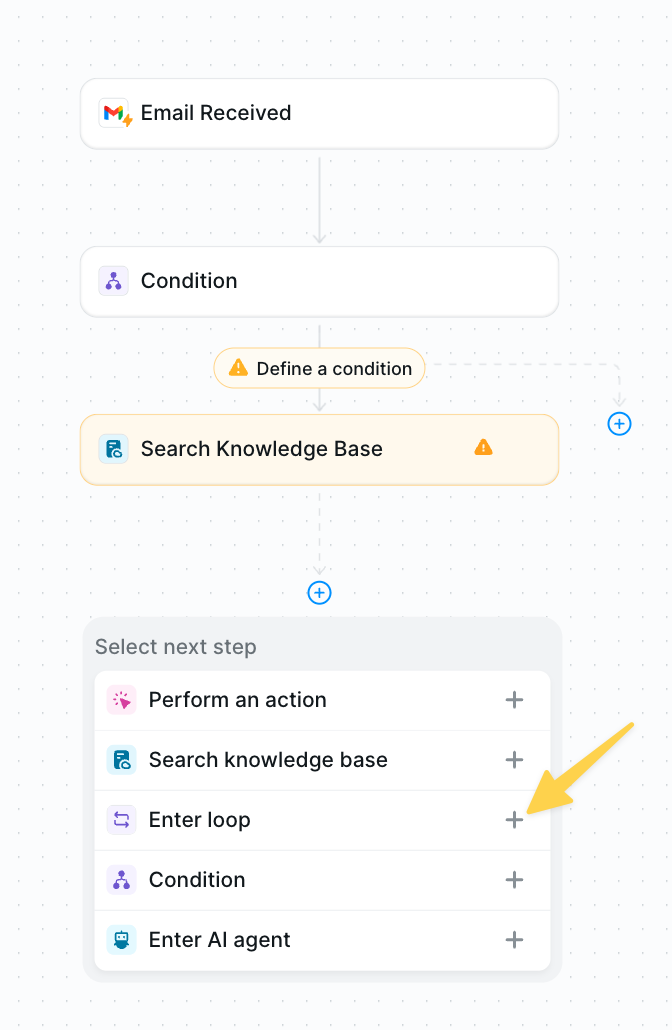
Step 2: Add the Loop
Configuring Your Loop
Setting Items to Loop Through
- Manual list - Type items directly (e.g.,
["New York", "Paris", "Tokyo"]) - Dynamic data - Reference data from previous steps
- AI-generated - Let AI extract or create the list
Research items from the knowledge base in the previous step
Defining Loop Output
Set what information should be available after the loop completes. In Prompt AI mode:Building Inside the Loop
Adding Loop Actions
For our research example:- Click the + icon inside the loop
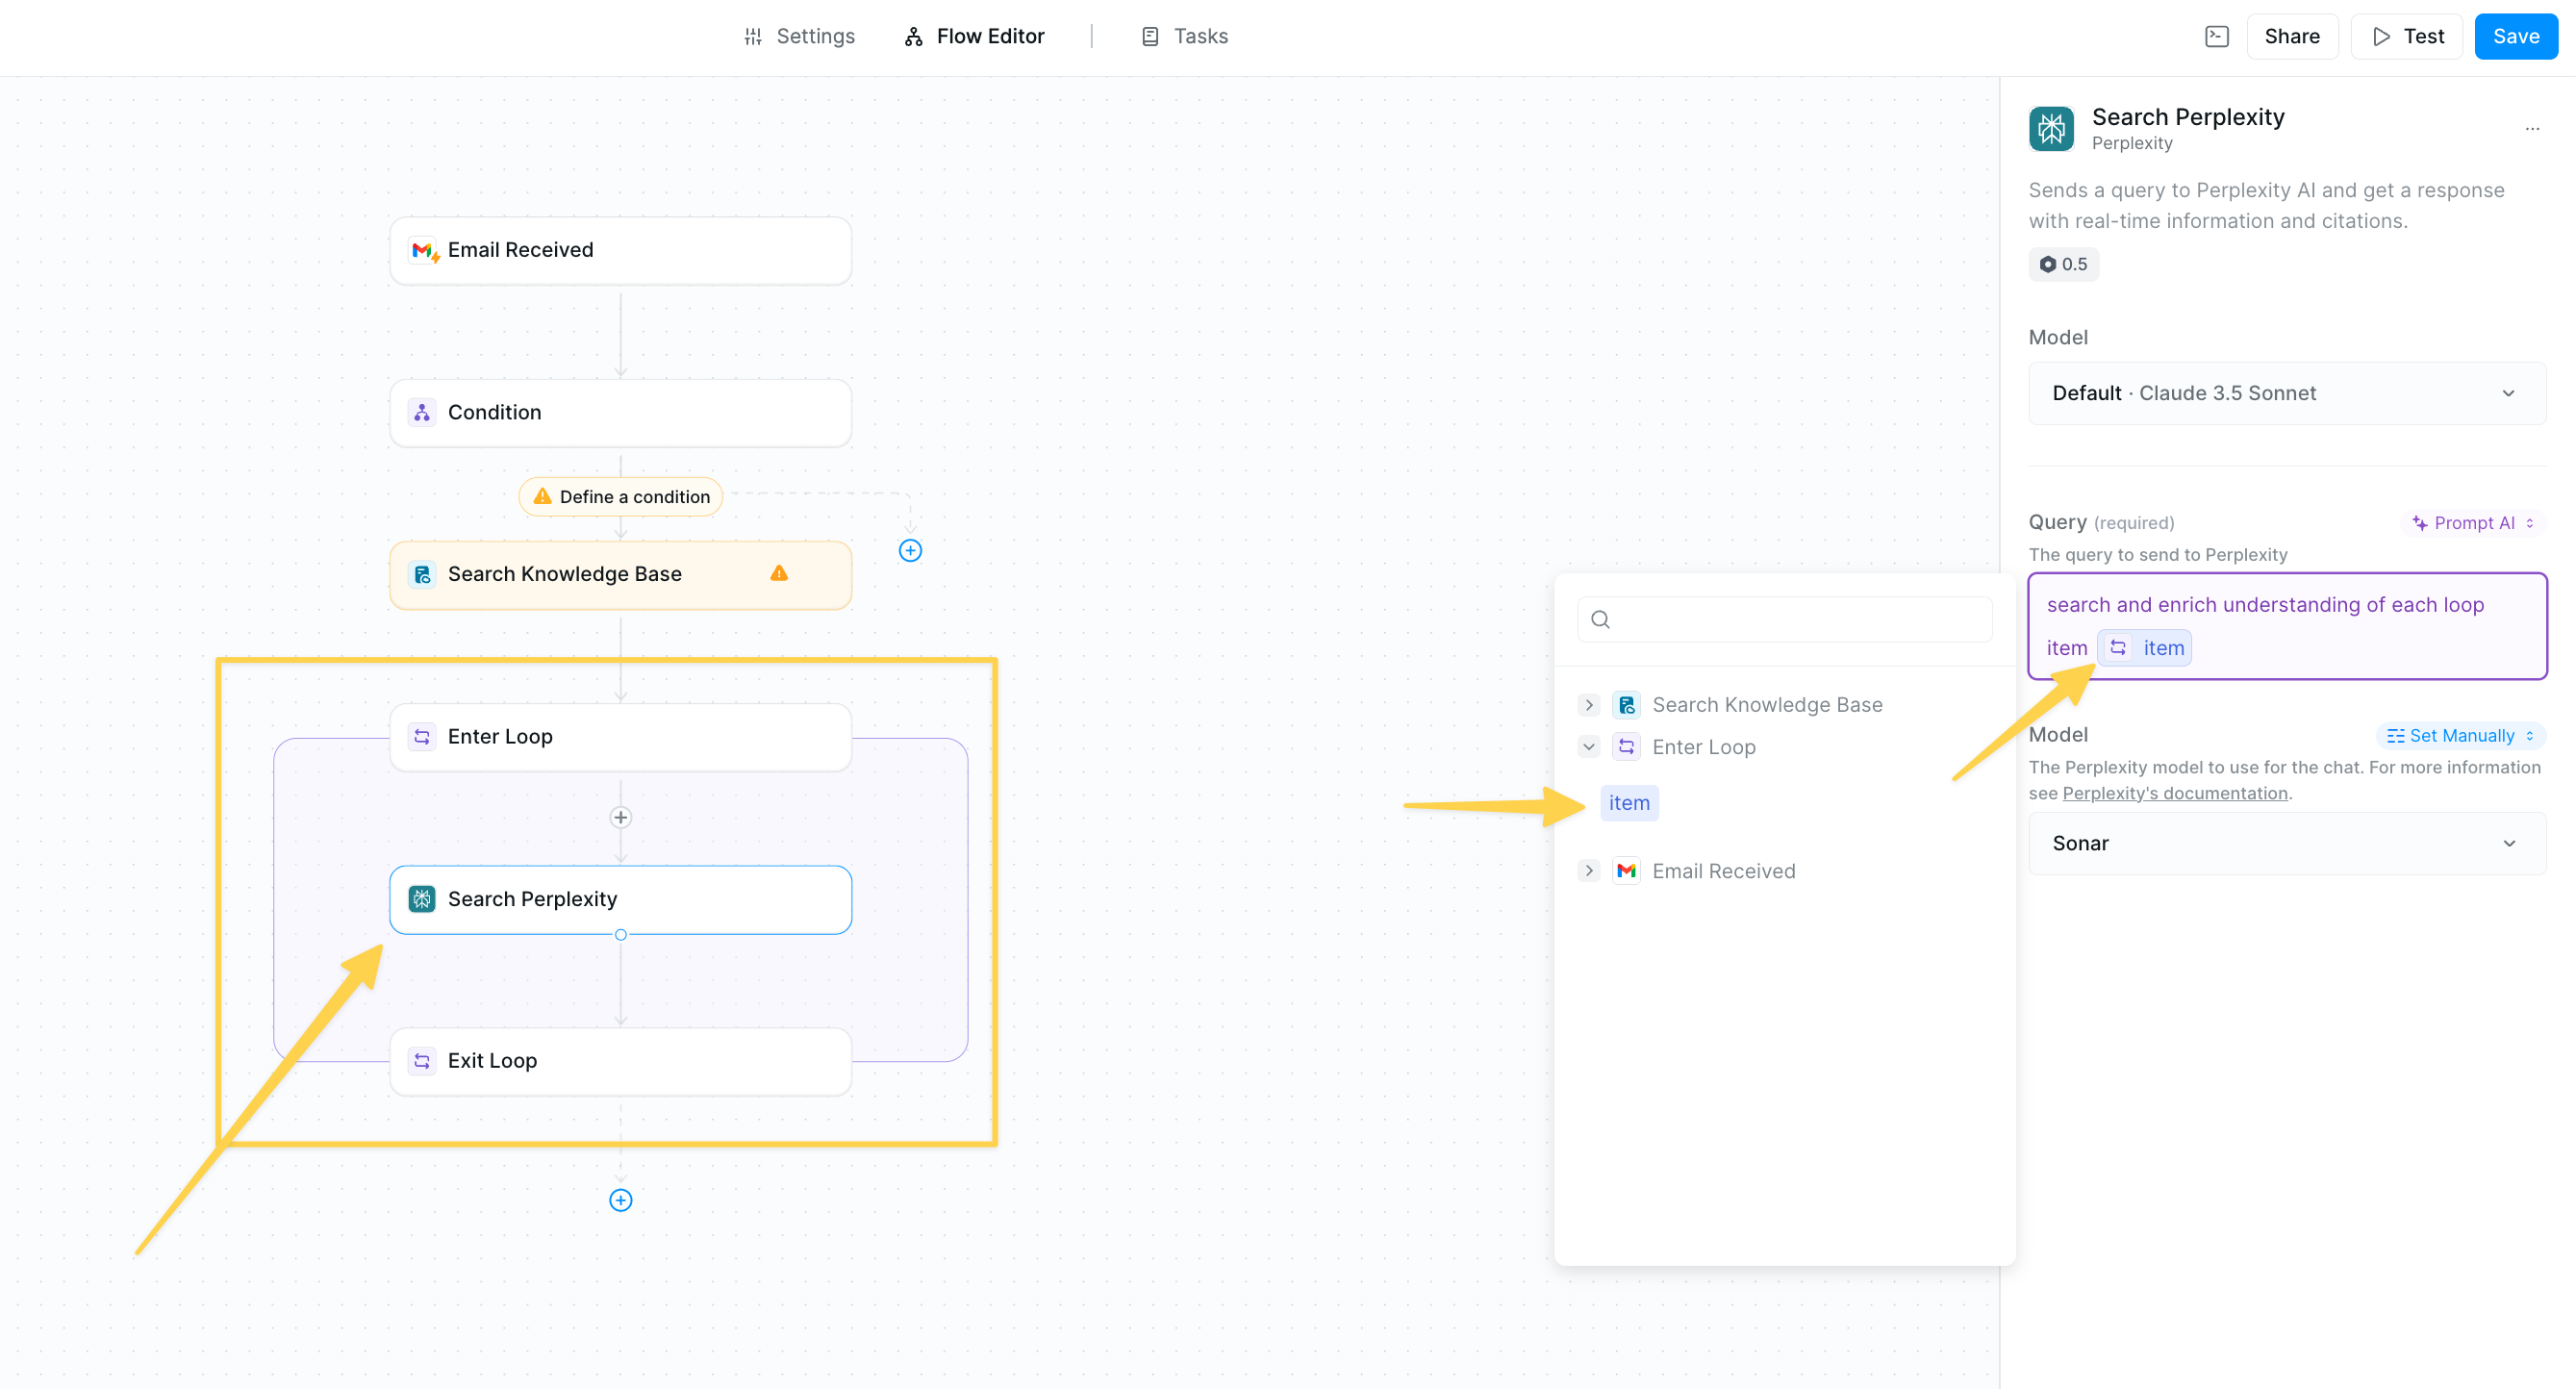
- Add a search action (Perplexity, Web Search, etc.)
- Configure it to research the current loop item
Best Practices
Test with Small Lists
Test with Small Lists
Debug with 3-5 items before processing hundreds. It’s easier to spot issues in smaller batches.
Troubleshooting
Loop Not Processing All Items
Loop Not Processing All Items
- Check Max Cycles setting
- Check your loop input configuration
- Look for rate limit errors
Missing Data After Loop
Missing Data After Loop
- Review output configuration
- Configure the loop “Output” field to include all data you’ll need in subsequent steps
- Check if actions inside loop are completing
Slow Performance
Slow Performance
- Reduce actions inside loop
- Check for rate-limited services
Errors in Specific Items
Errors in Specific Items
- Add error handling inside loop
- Use conditions to skip problematic items
- Log failures for manual review
Next Steps
Master these related concepts to build more sophisticated automations:Agent Steps
Combine loops with agent steps for intelligent bulk processing
Conditions
Add conditional logic inside loops for dynamic processing
Knowledge Base
Store loop outputs in knowledge bases for future reference
Tasks
Monitor and manage loop executions through the task interface