Quick Overview
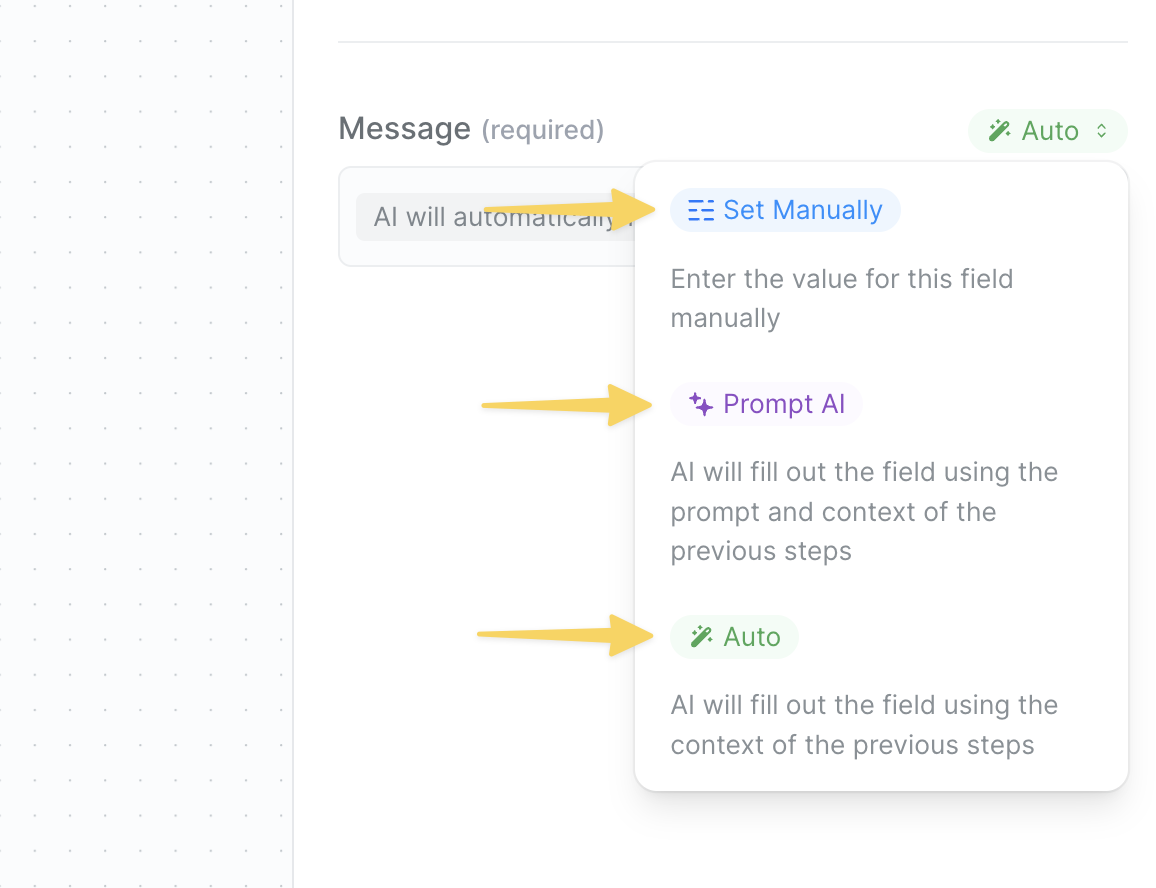
When you add an action, you’ll see fields to configure. Lindy gives you three ways to fill each field depending on how much control you want and how dynamic the value should be.- Auto: Let your agent intelligently determine the best value based on all previous data
- AI Prompt: Give natural language instructions for dynamic content generation
- Set Manually: Enter exact values or reference specific data from previous steps
Auto Mode
Auto mode is Lindy’s intelligent field completion system. It analyzes all previous steps in your workflow and automatically determines the most appropriate value for each field.How It Works
When set to Auto, your agent:- Examines all data from previous triggers and actions
- Matches field names with available data intelligently
- Infers the best value based on context and field type
Lindy’s Auto mode can pull from form submissions, API responses, search results, and other data from earlier steps. It’s useful when the right value depends on context.
When to Use Auto Mode
Auto mode excels in scenarios where:- Data mapping is predictable: Moving form data to spreadsheets
- Field names align: “Customer Name” automatically maps to “Name” column
- Context is clear: Updating CRM records with email data
- You want flexibility: Let Lindy adapt to varying data structures
Example Use Case
AI Prompt Mode
AI Prompt mode lets you give your agent natural language instructions to generate dynamic content. It’ll create text based on your directions and all available workflow data.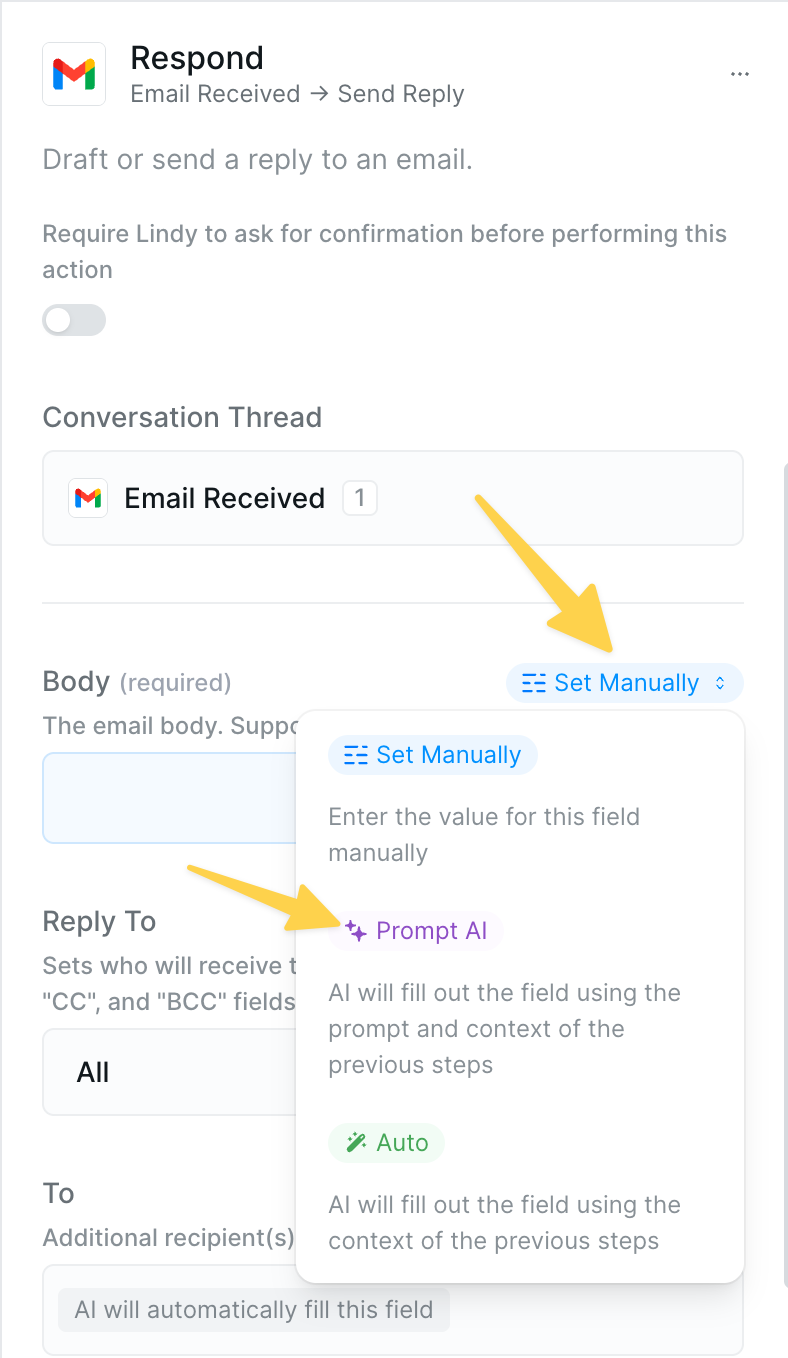
Writing Effective Prompts
The key to AI Prompt mode is clear, specific instructions:
When to Use AI Prompt Mode
Choose AI Prompt for:- Email composition: Subject lines, body content, personalized messages
- Content generation: Summaries, descriptions, social posts
- Data transformation: Reformatting dates, combining fields creatively
- Conditional text: Different messages based on context
💡 Learn more about writing effective prompts
Using References in AI Prompts
Advanced Example
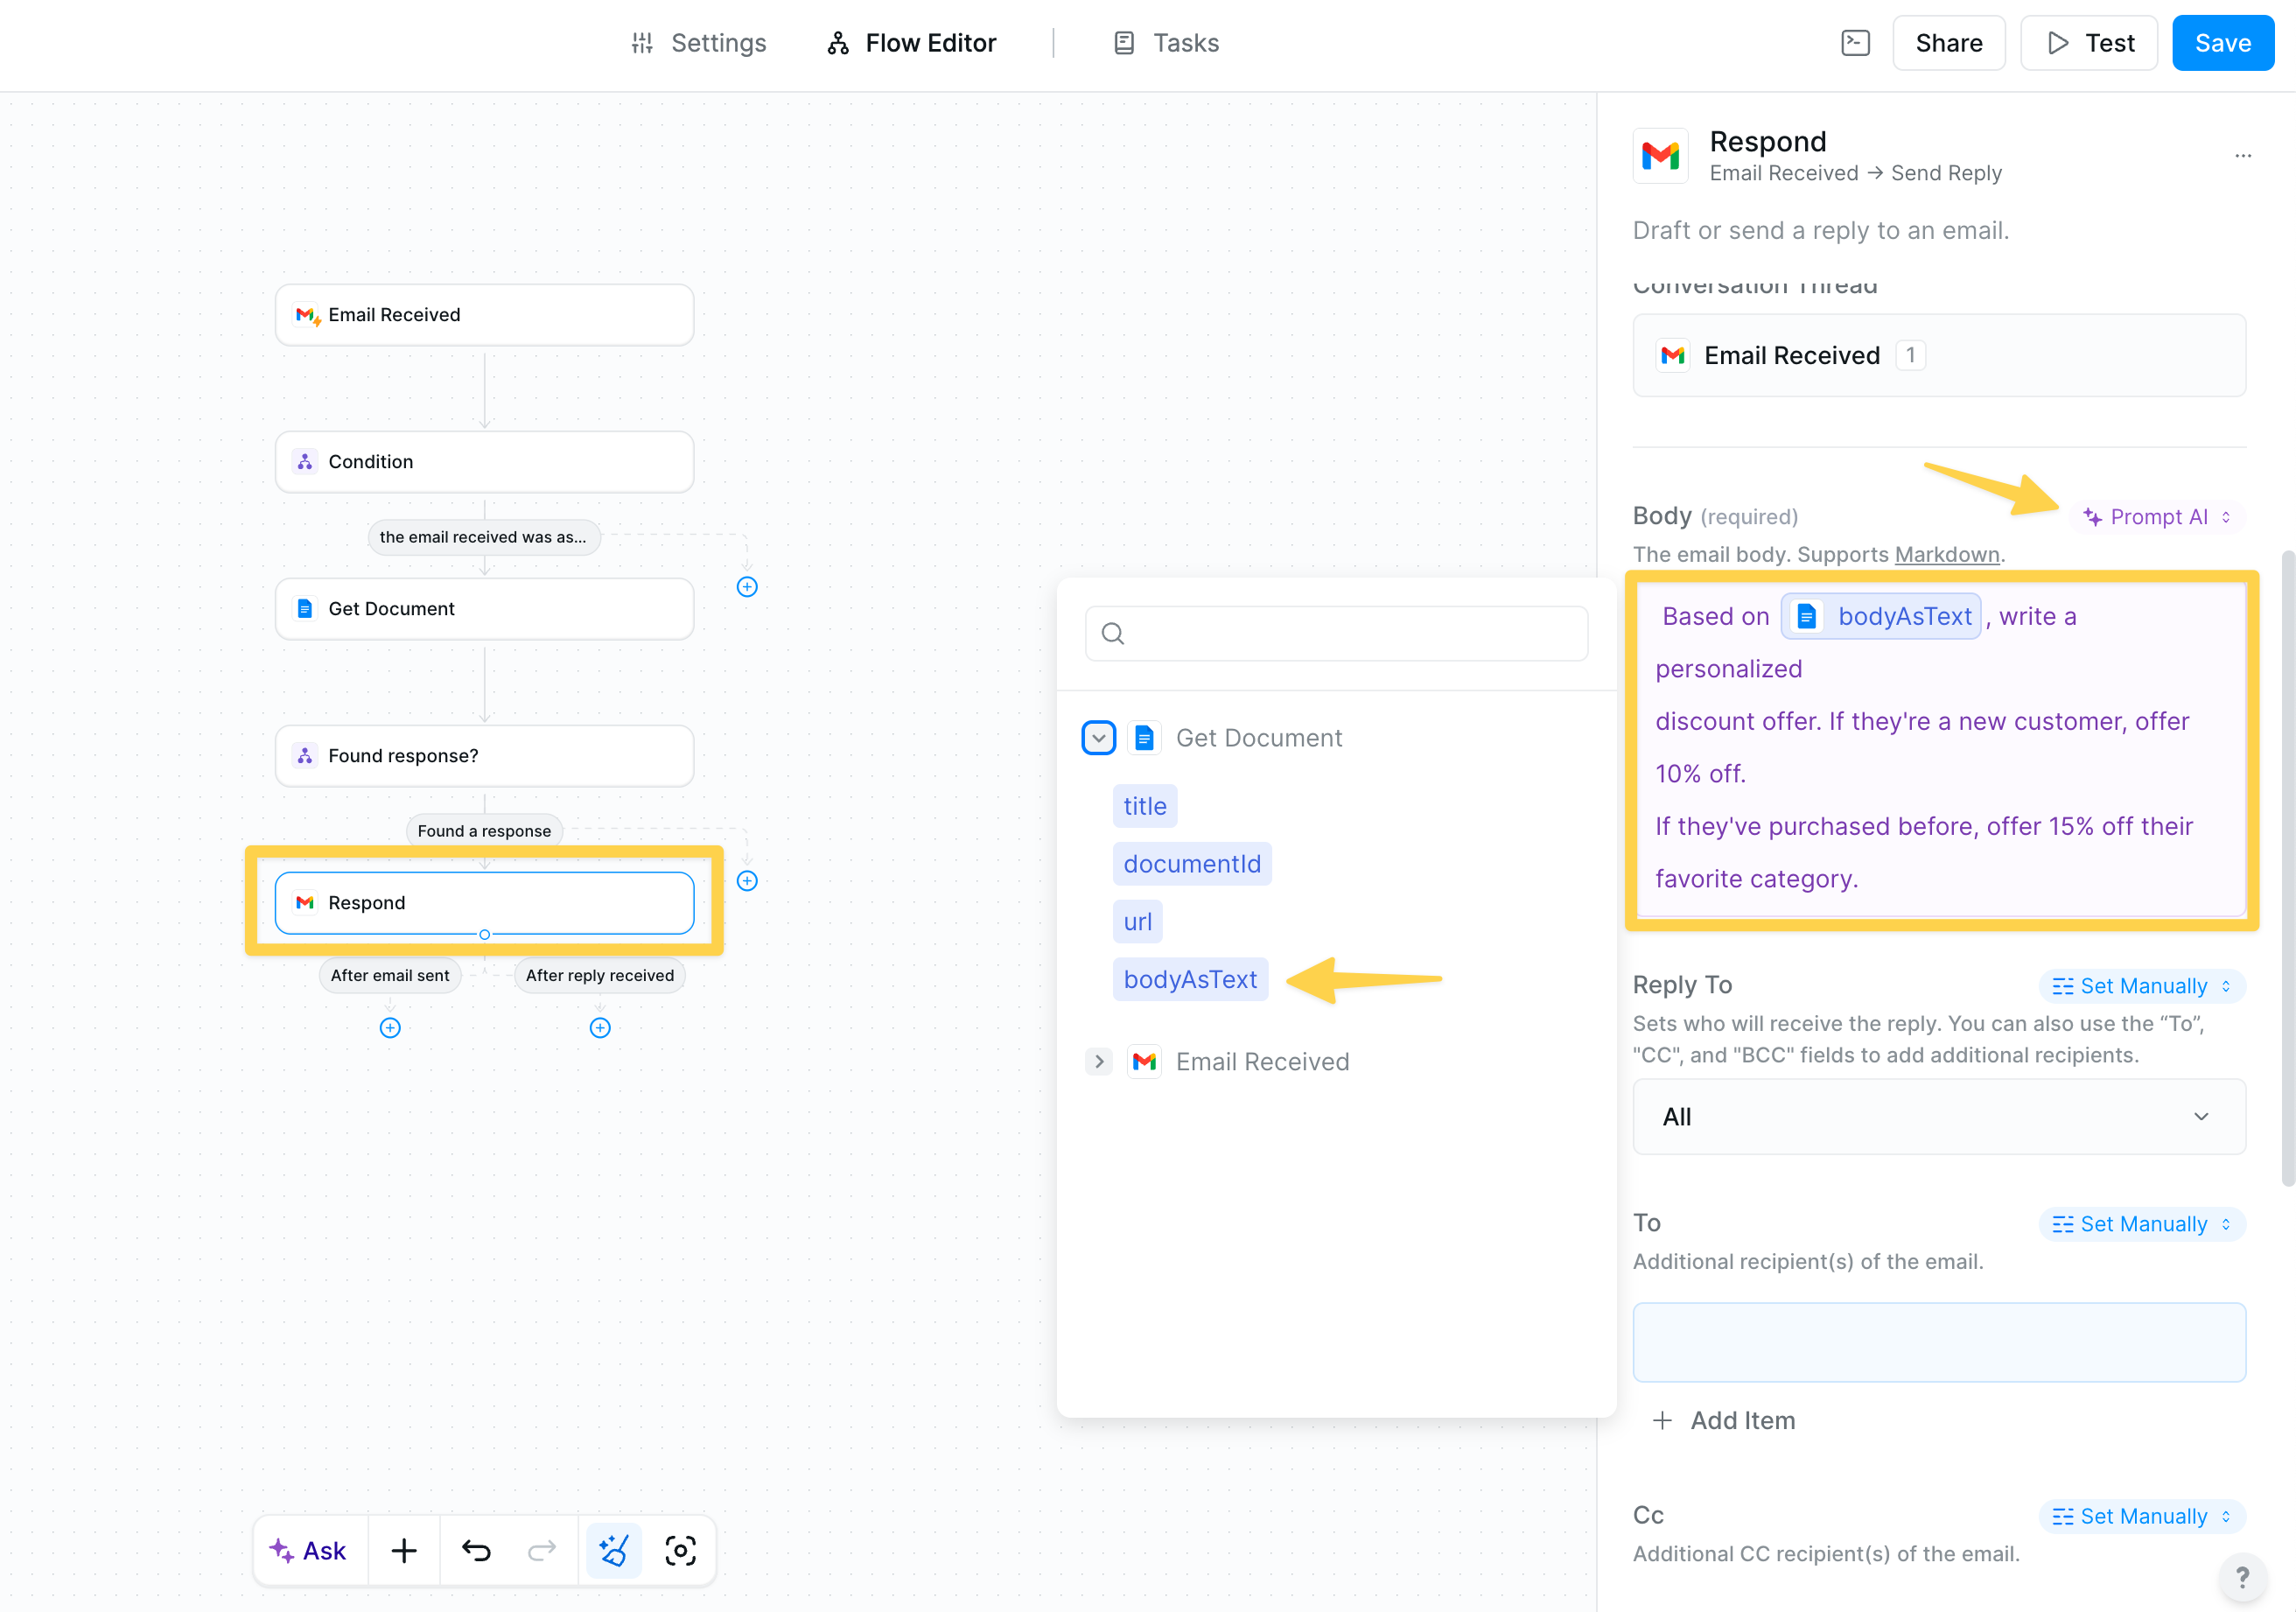
- Reference to previous data:
bodyAsTextpulls in the actual content from a previous step (like an email or document) - Contextual analysis: Your agent reads and understands the referenced content to determine if the person is new or returning
- Dynamic decision-making: Based on what it finds in the data, it generates different personalized offers
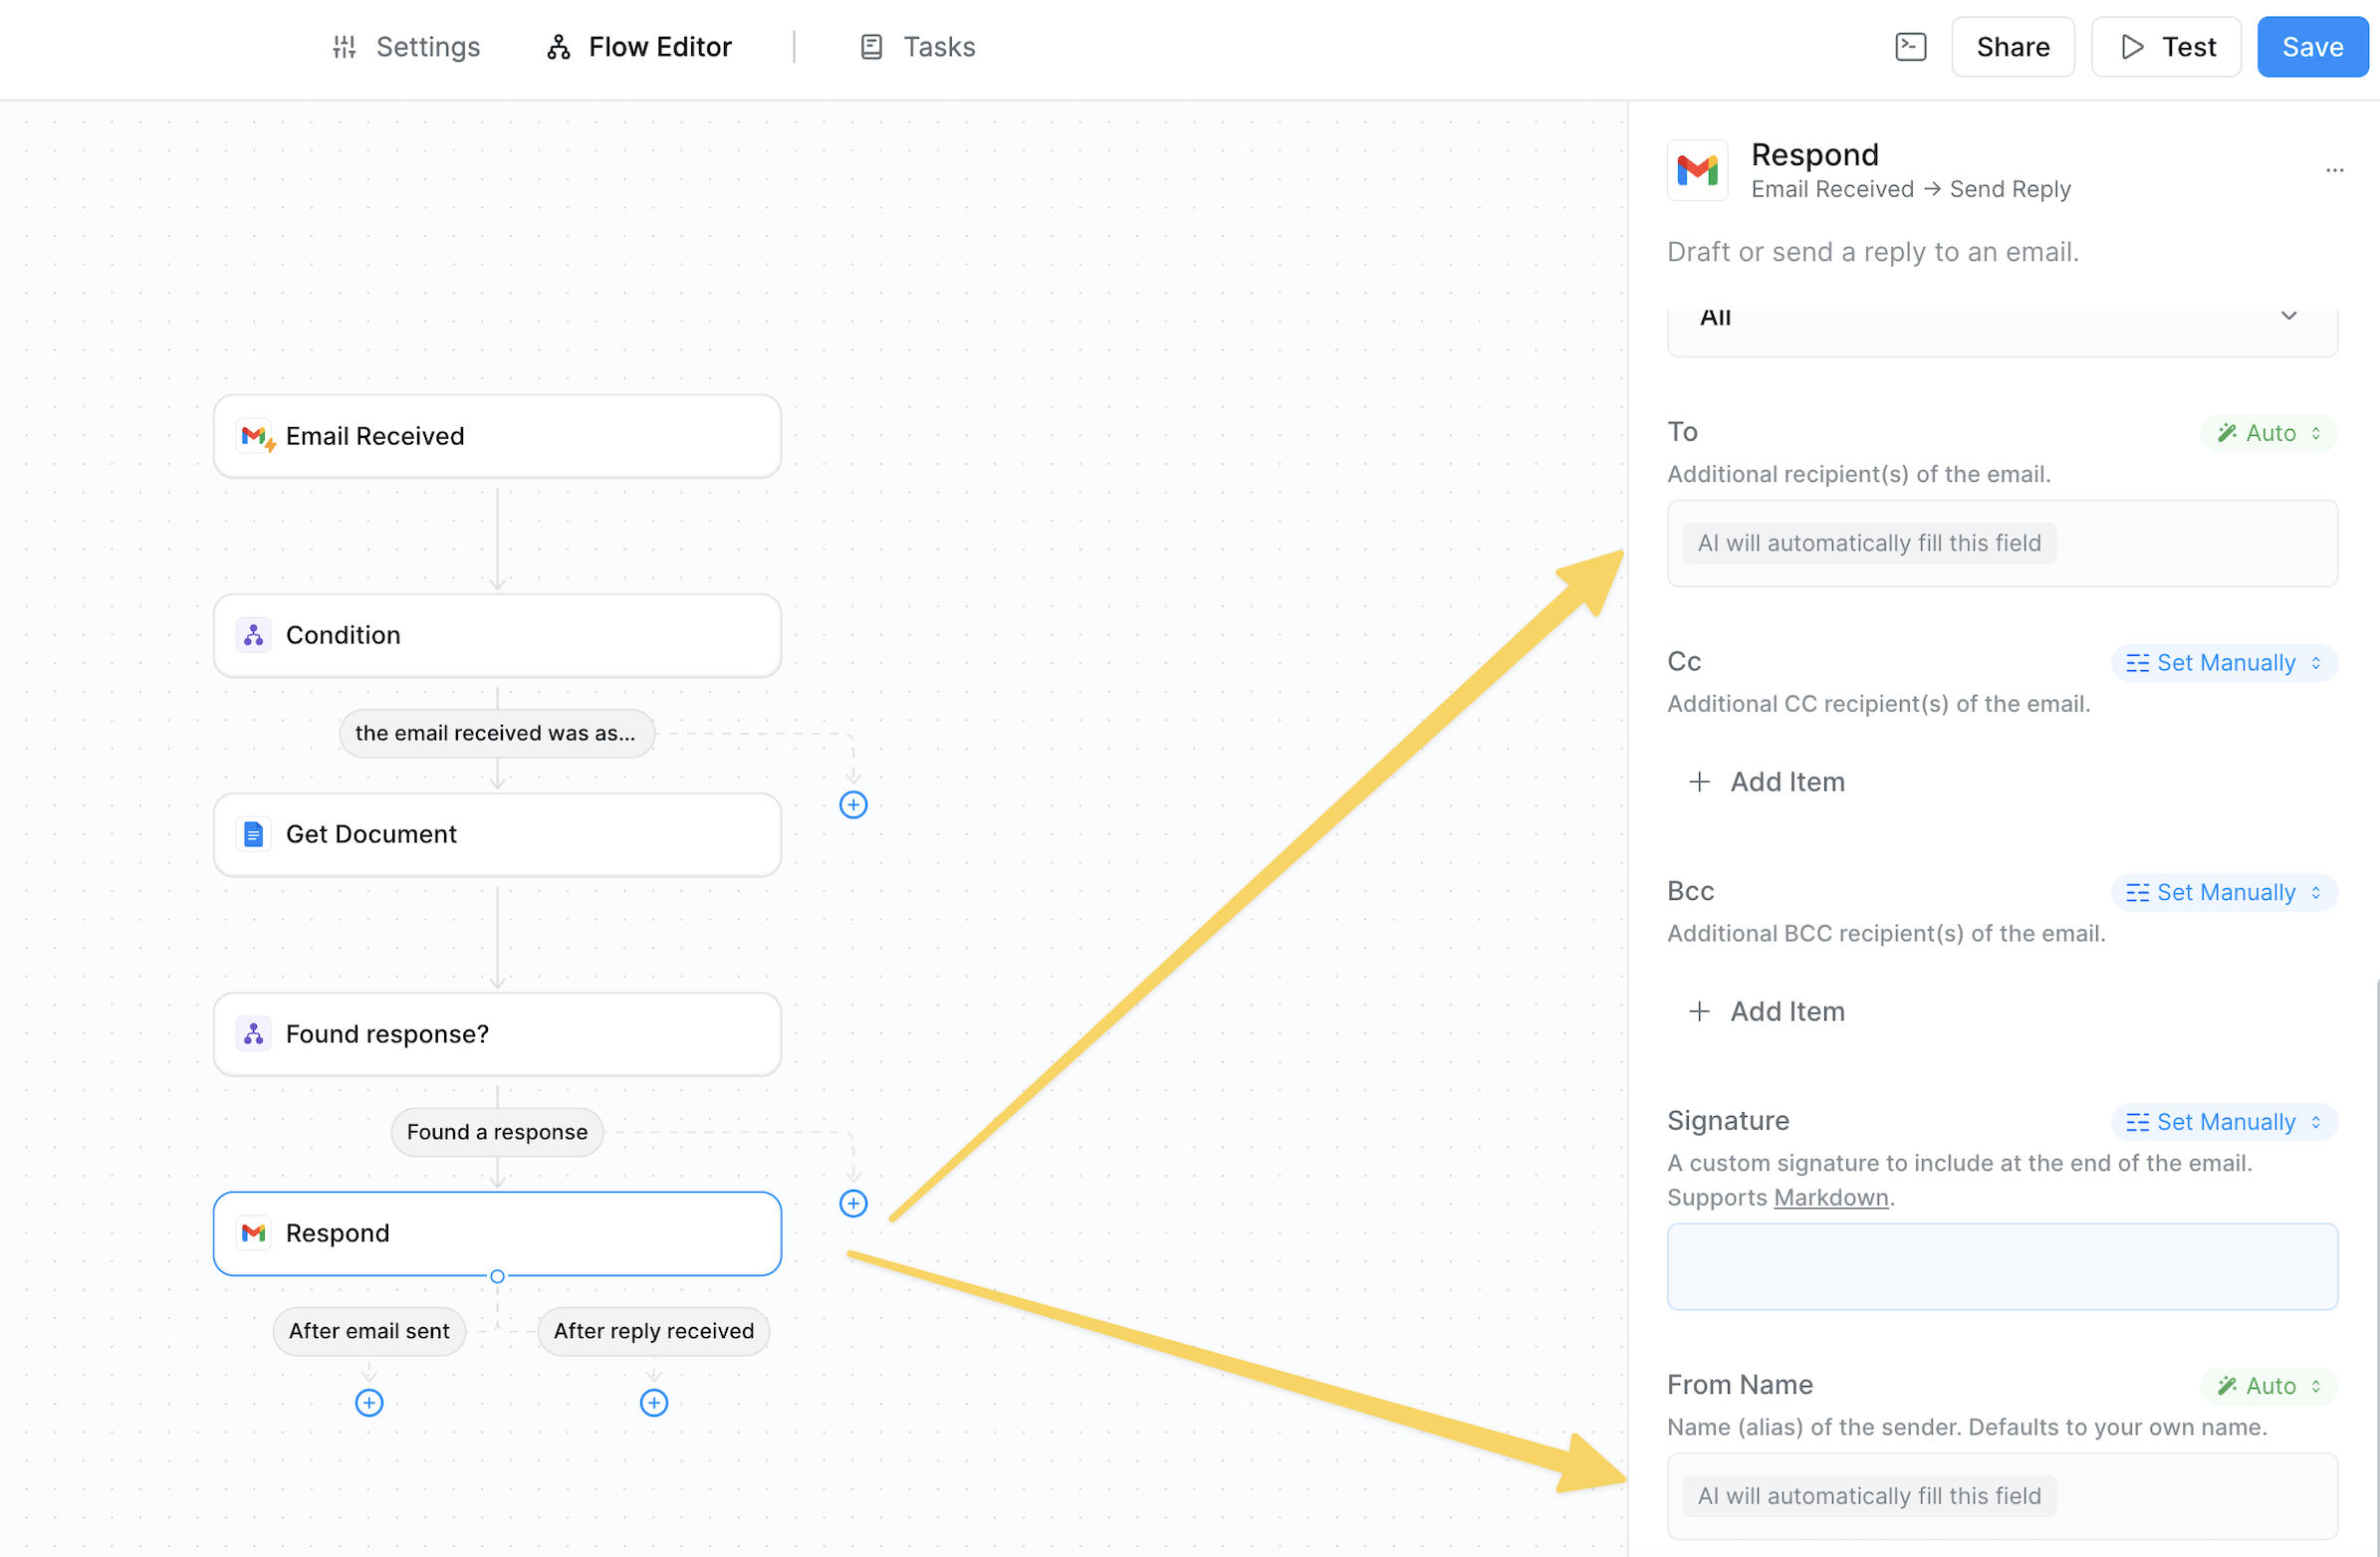
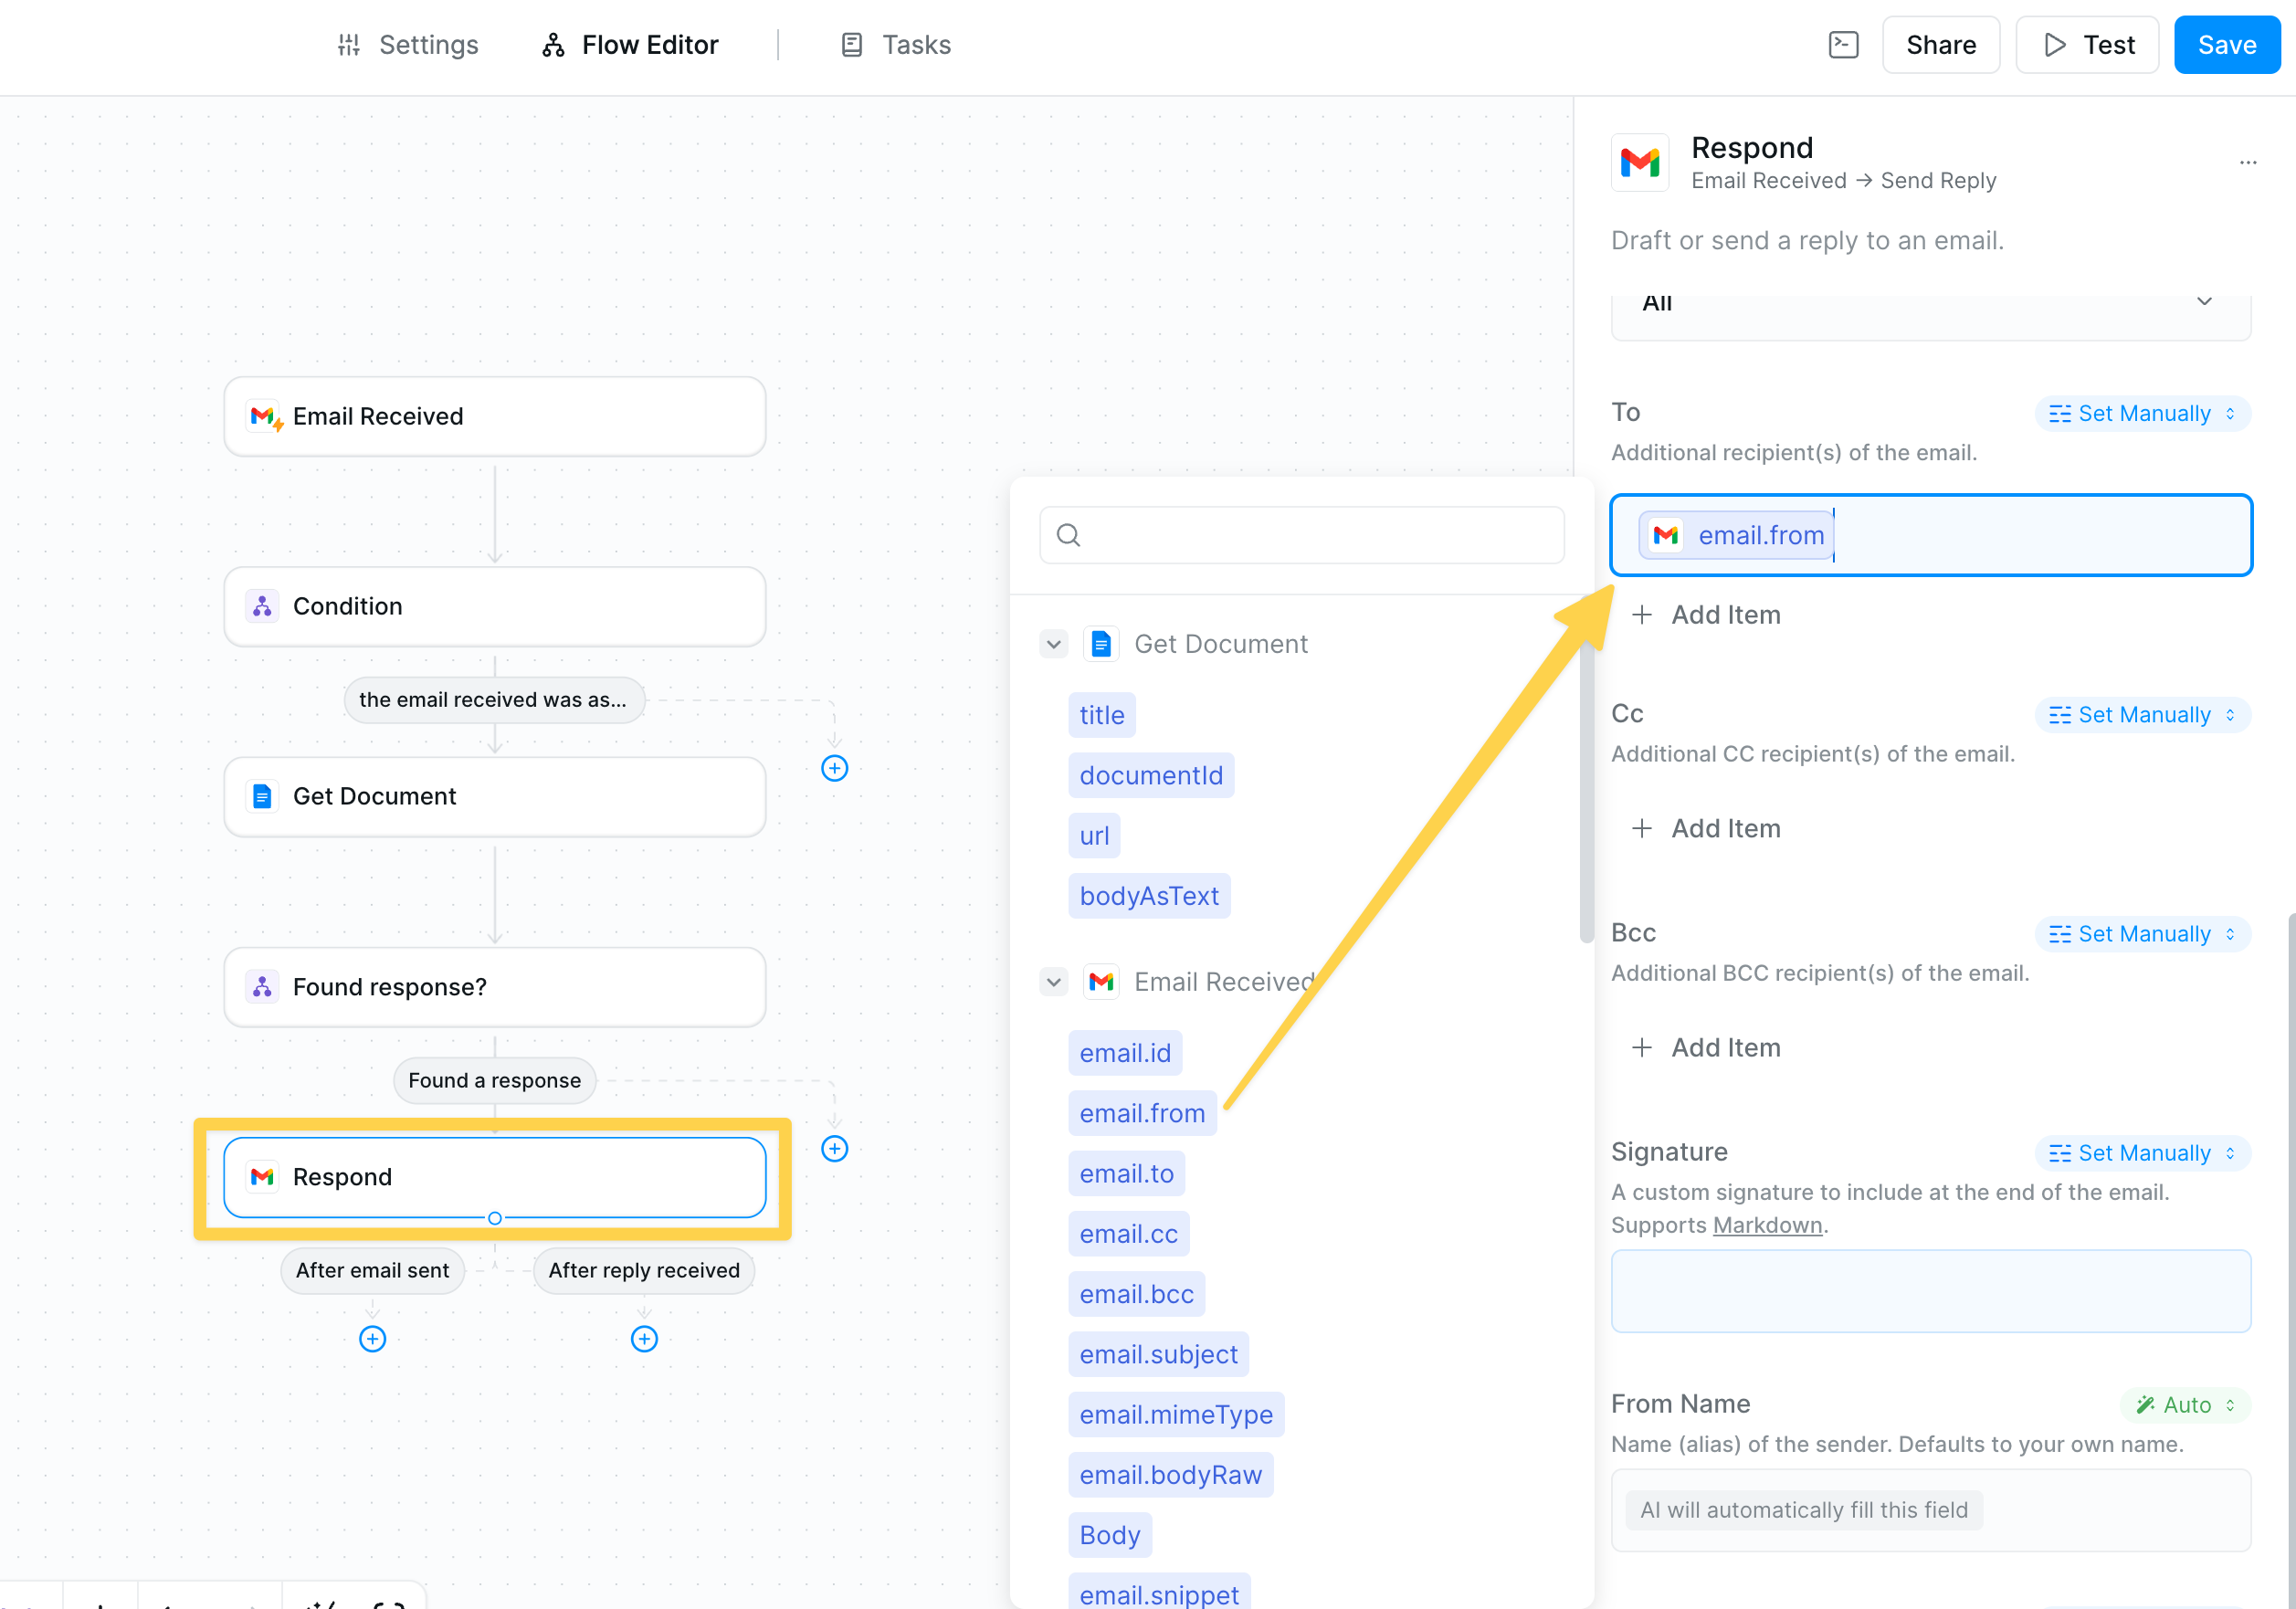
”Set Manually” Mode
Set Manually mode gives you complete control: what you type is exactly what appears. Perfect for fixed values and precise data references.Direct Value Entry
Two ways to use Set Manually:- Fixed text: Type exactly what should appear
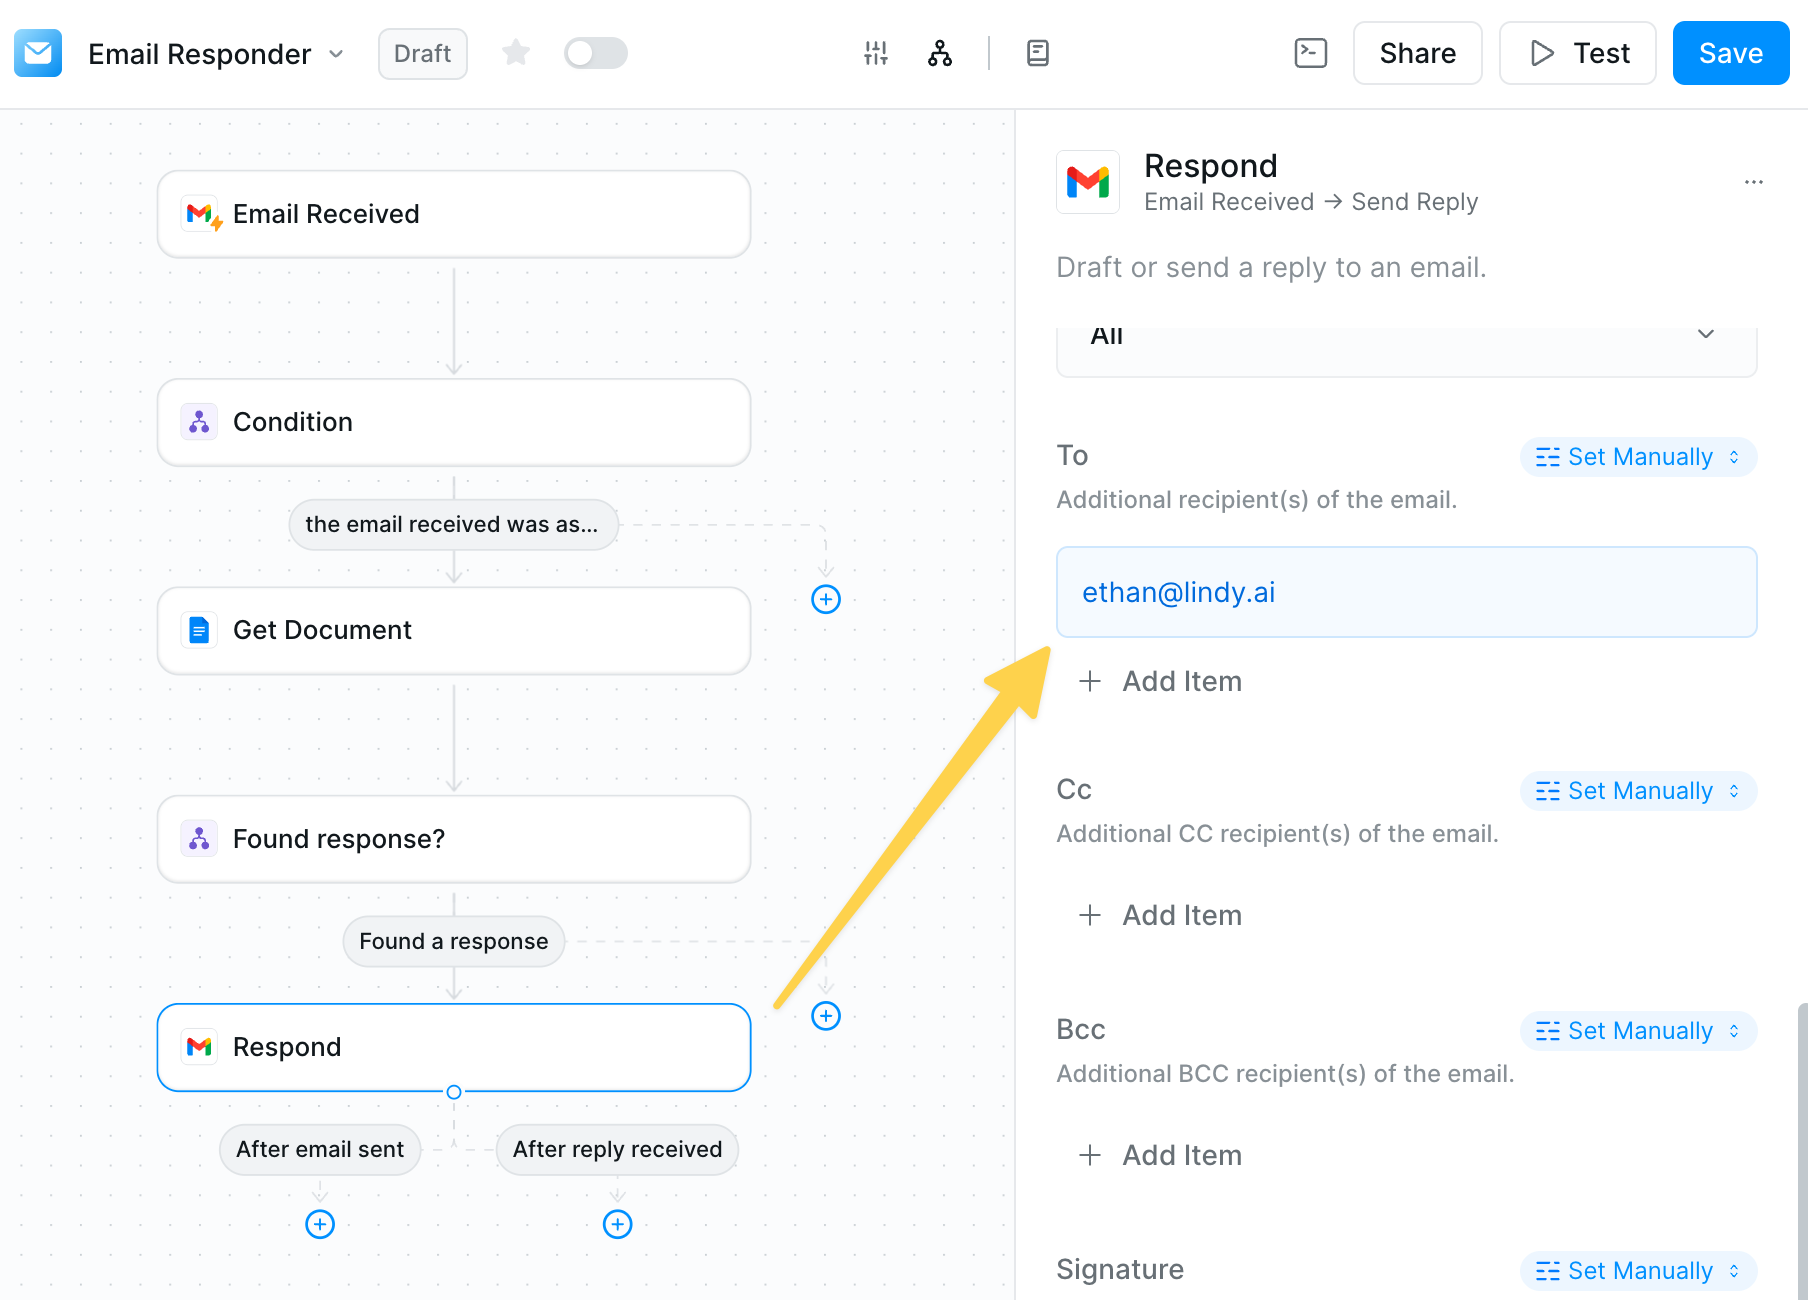
- Data references: Insert exact values from previous steps
Set Manually mode uses no AI processing = fewer credits consumed. It’s the most efficient option for fixed values.
When to Use Set Manually
Perfect for:- Fixed values: Email addresses, signatures, webhook URLs, API keys
- Exact references: Order IDs, customer names, timestamps
- Skip fields: Leave empty to skip a field entirely
- Combined text: Mix static text with data references
Using Output References
The field configuration dropdown gives you instant access to data from previous steps: forms, API responses, search results, and more. This lets you connect information across your workflow without retyping it.Reference Behavior by Mode
References behave differently in each mode:Best Practices
Start with Auto Mode
Start with Auto Mode
When unsure, try Auto first. Your agent often correctly infers what you need, saving configuration time.
Be Specific in AI Prompts
Be Specific in AI Prompts
Instead of “write an email”, use “write a 3-paragraph follow-up email thanking them for [Meeting: Topic] and proposing next steps”
Test with Real Data
Test with Real Data
Use the test panel to see how each mode handles your actual data before going live.
Combine Modes Strategically
Combine Modes Strategically
Use Set Manually for email addresses, AI Prompt for subject/body, and Auto for updating your CRM.
Common Pitfalls & Solutions
Troubleshooting Guide
-
Field shows as empty
- Check if Set Manually has content (empty = skip)
- Verify referenced data exists in previous steps
- Ensure Auto mode has clear context
-
Wrong data appears
- Review your mode selection
- Check reference syntax in Set Manually
- Refine AI Prompt instructions
-
Too many credits used
- Switch fixed values from AI Prompt to Set Manually
- Use Auto instead of AI Prompt for simple mapping
-
Inconsistent results
- Add examples to AI Prompts
- Use Set Manually for values that shouldn’t change
- Ensure field names are clear for Auto mode
Next Steps
Master these related concepts to build even more powerful workflows:Actions Overview
Explore all available actions and their field requirements
Prompt Engineering
Write better AI prompts for dynamic content generation
Testing Workflows
Test your field configurations with real data
Knowledge Base
Combine field references with knowledge base searches