Customize Your Chatbot For Your Website
Select the “Lindy Embed” trigger in the flow editor. Click Configure Embed Settings.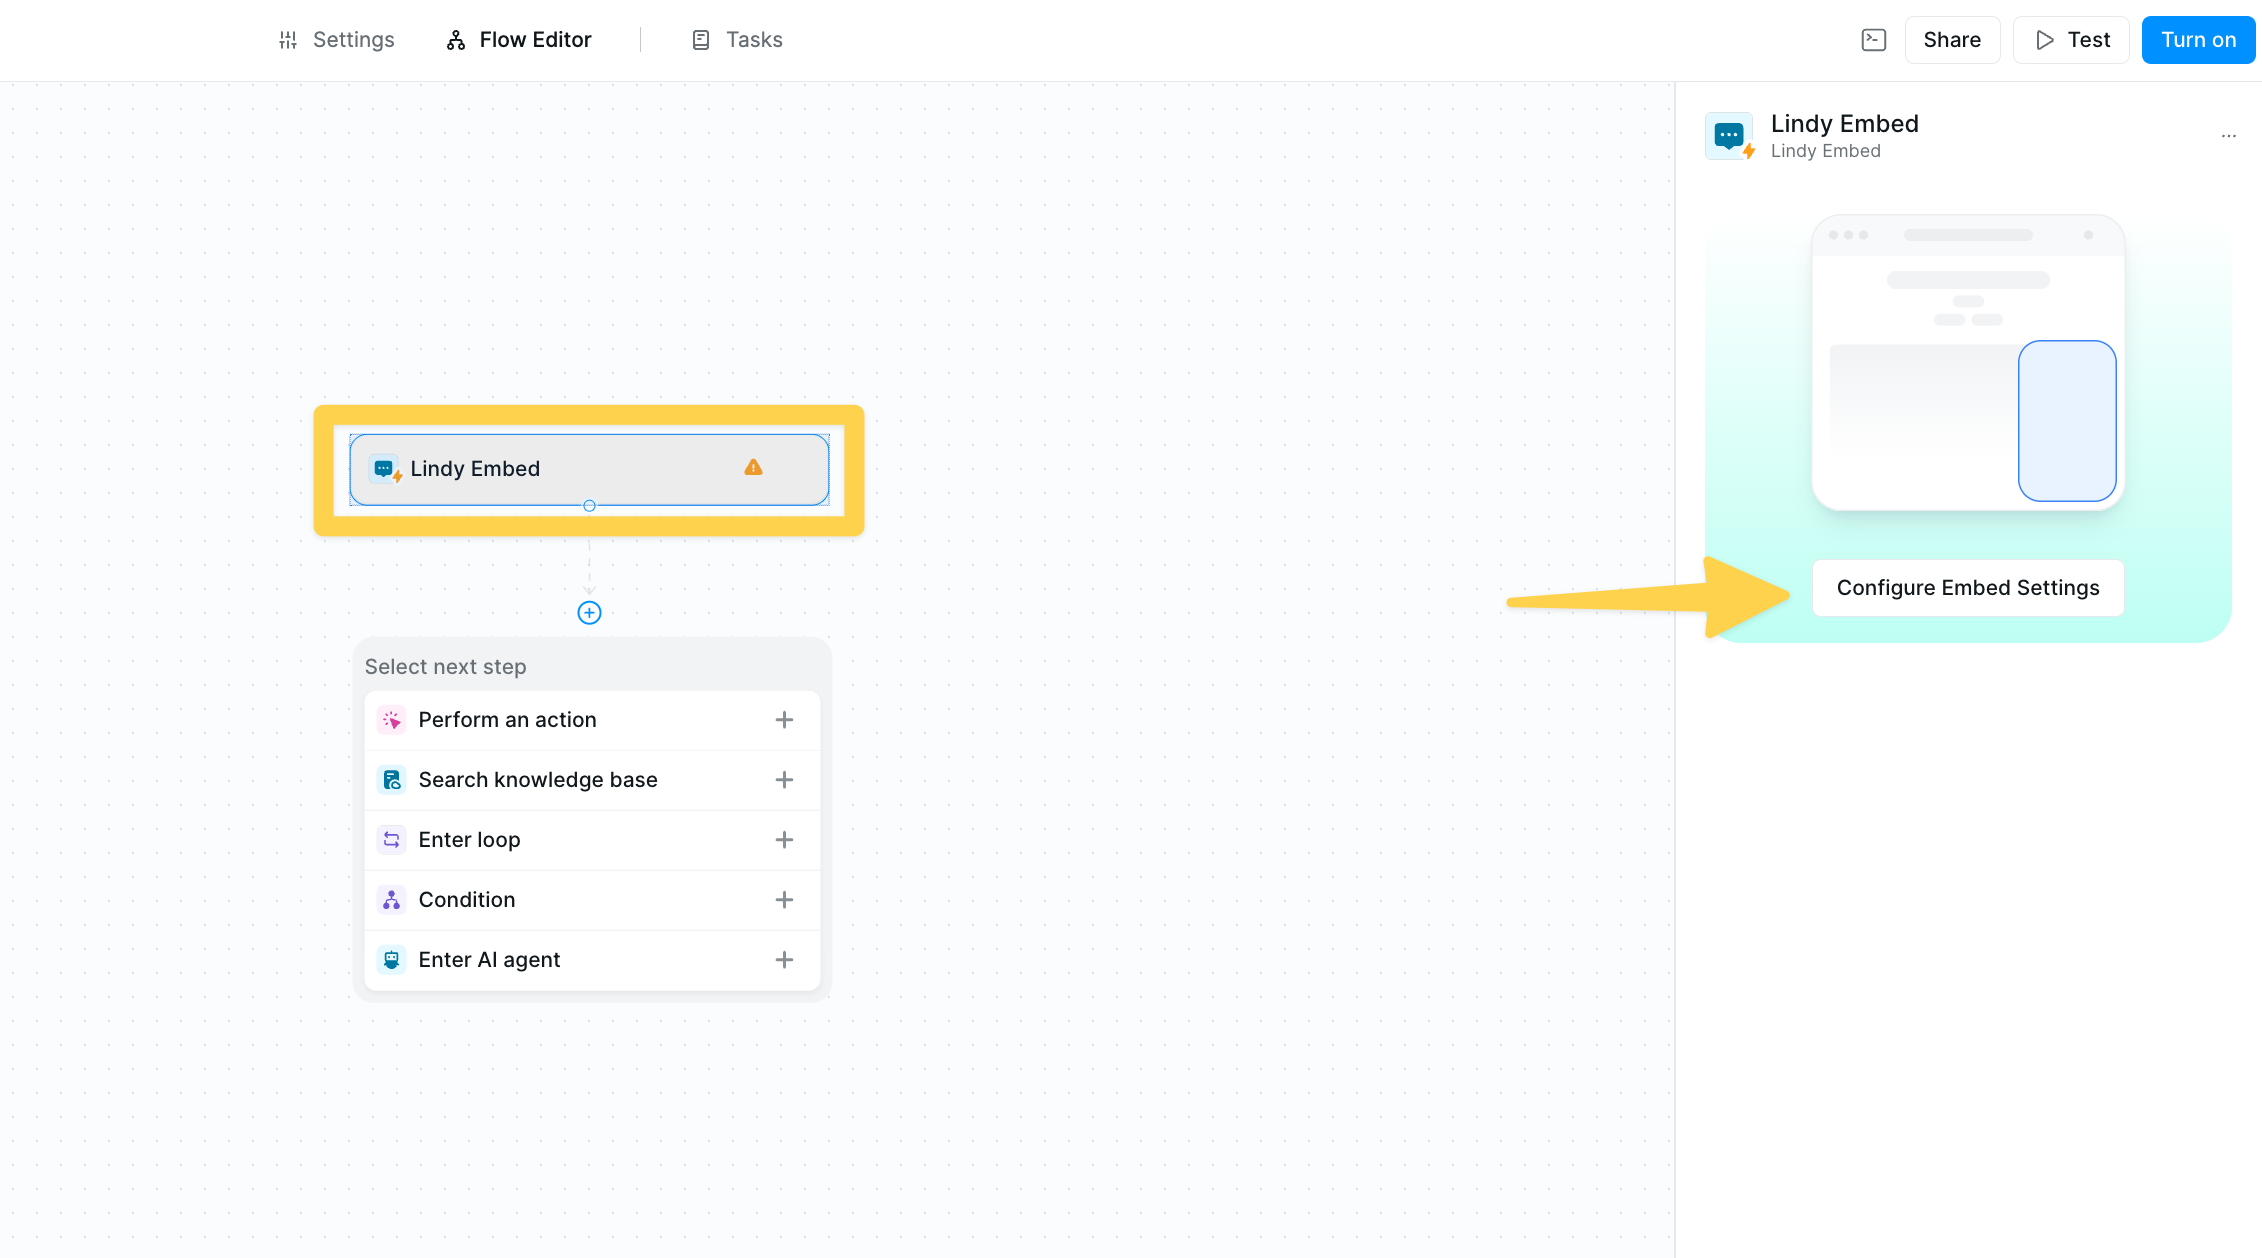
Access The Popup Code Snippet
Select the “Lindy Embed” trigger in the flow editor. Click Configure Embed Settings. Ensure you have the popup tab selected and copy the “Code Snippet” to your clipboard.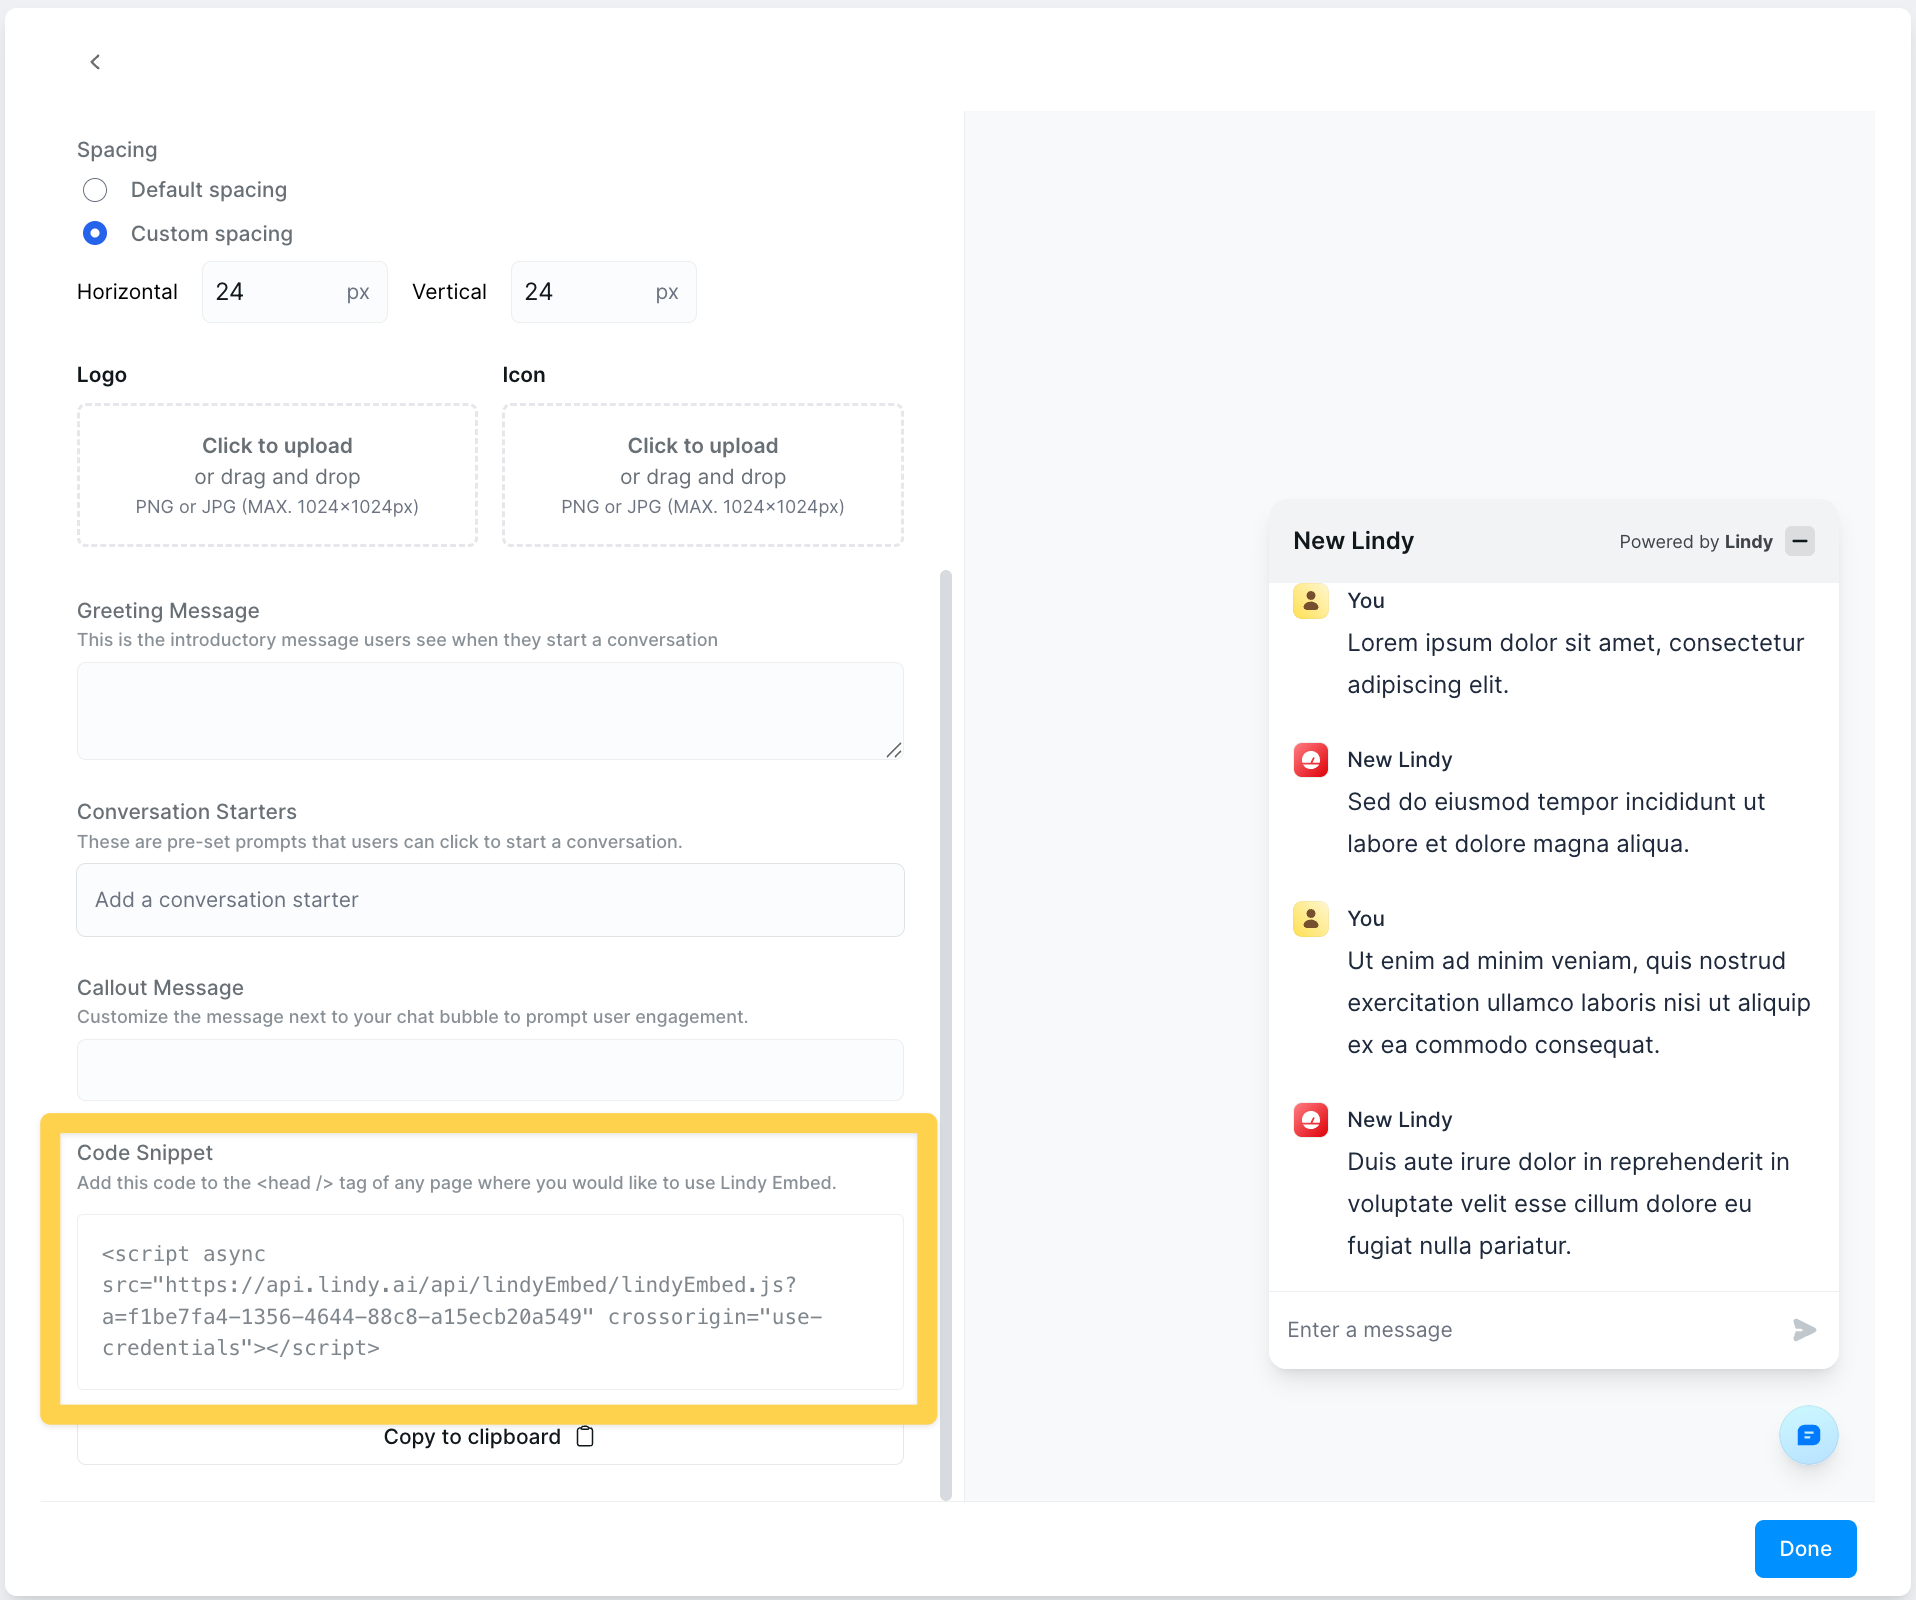
Webflow
- Access your Site Settings.
- Navigate to “Custom Code”.
- Paste the Code Snippet at the bottom of your “Head Code” section.
- Publish your changes!
Wix
- Choose the site you want to embed Lindy on and click Settings.
- Scroll down until you see Custom Code.
- You will see an option in the top right corner to Add Custom Code.
- Click this and paste your Lindy Code Snippet here.
- Click Apply.
Squarespace
- Access your Site Settings then click Advanced.
- Select Code Injection.
- Paste your Lindy Code Snippet into the Header section.
- Remember to Save and Publish your changes.
WordPress
- Install and activate the free Insert Headers and Footers plugin by WPCode.
- In your WordPress dashboard, navigate to Code Snippets → Header & Footer.
- Paste the Lindy Code Snippet into the Header box.
- Click Save Changes.
Embedding Lindy as an iFrame
You can also embed Lindy as an iFrame. On the Configure Embed Settings modal, select the iFrame tab and copy the code snippet to your clipboard. You can then paste this code anywhere your website builder accepts iFrames.
When embedding Lindy as an iFrame, it is important to set the height on the element containing the Embed iFrame.
You can also change the height property of the iFrame itself to a specific pixel value (e.g., 100px, 500px) instead of using “100%”.
When using iFrame embedding, ensure your container element has a defined height. The iFrame will inherit the height of its container, so setting this correctly is crucial for proper display.
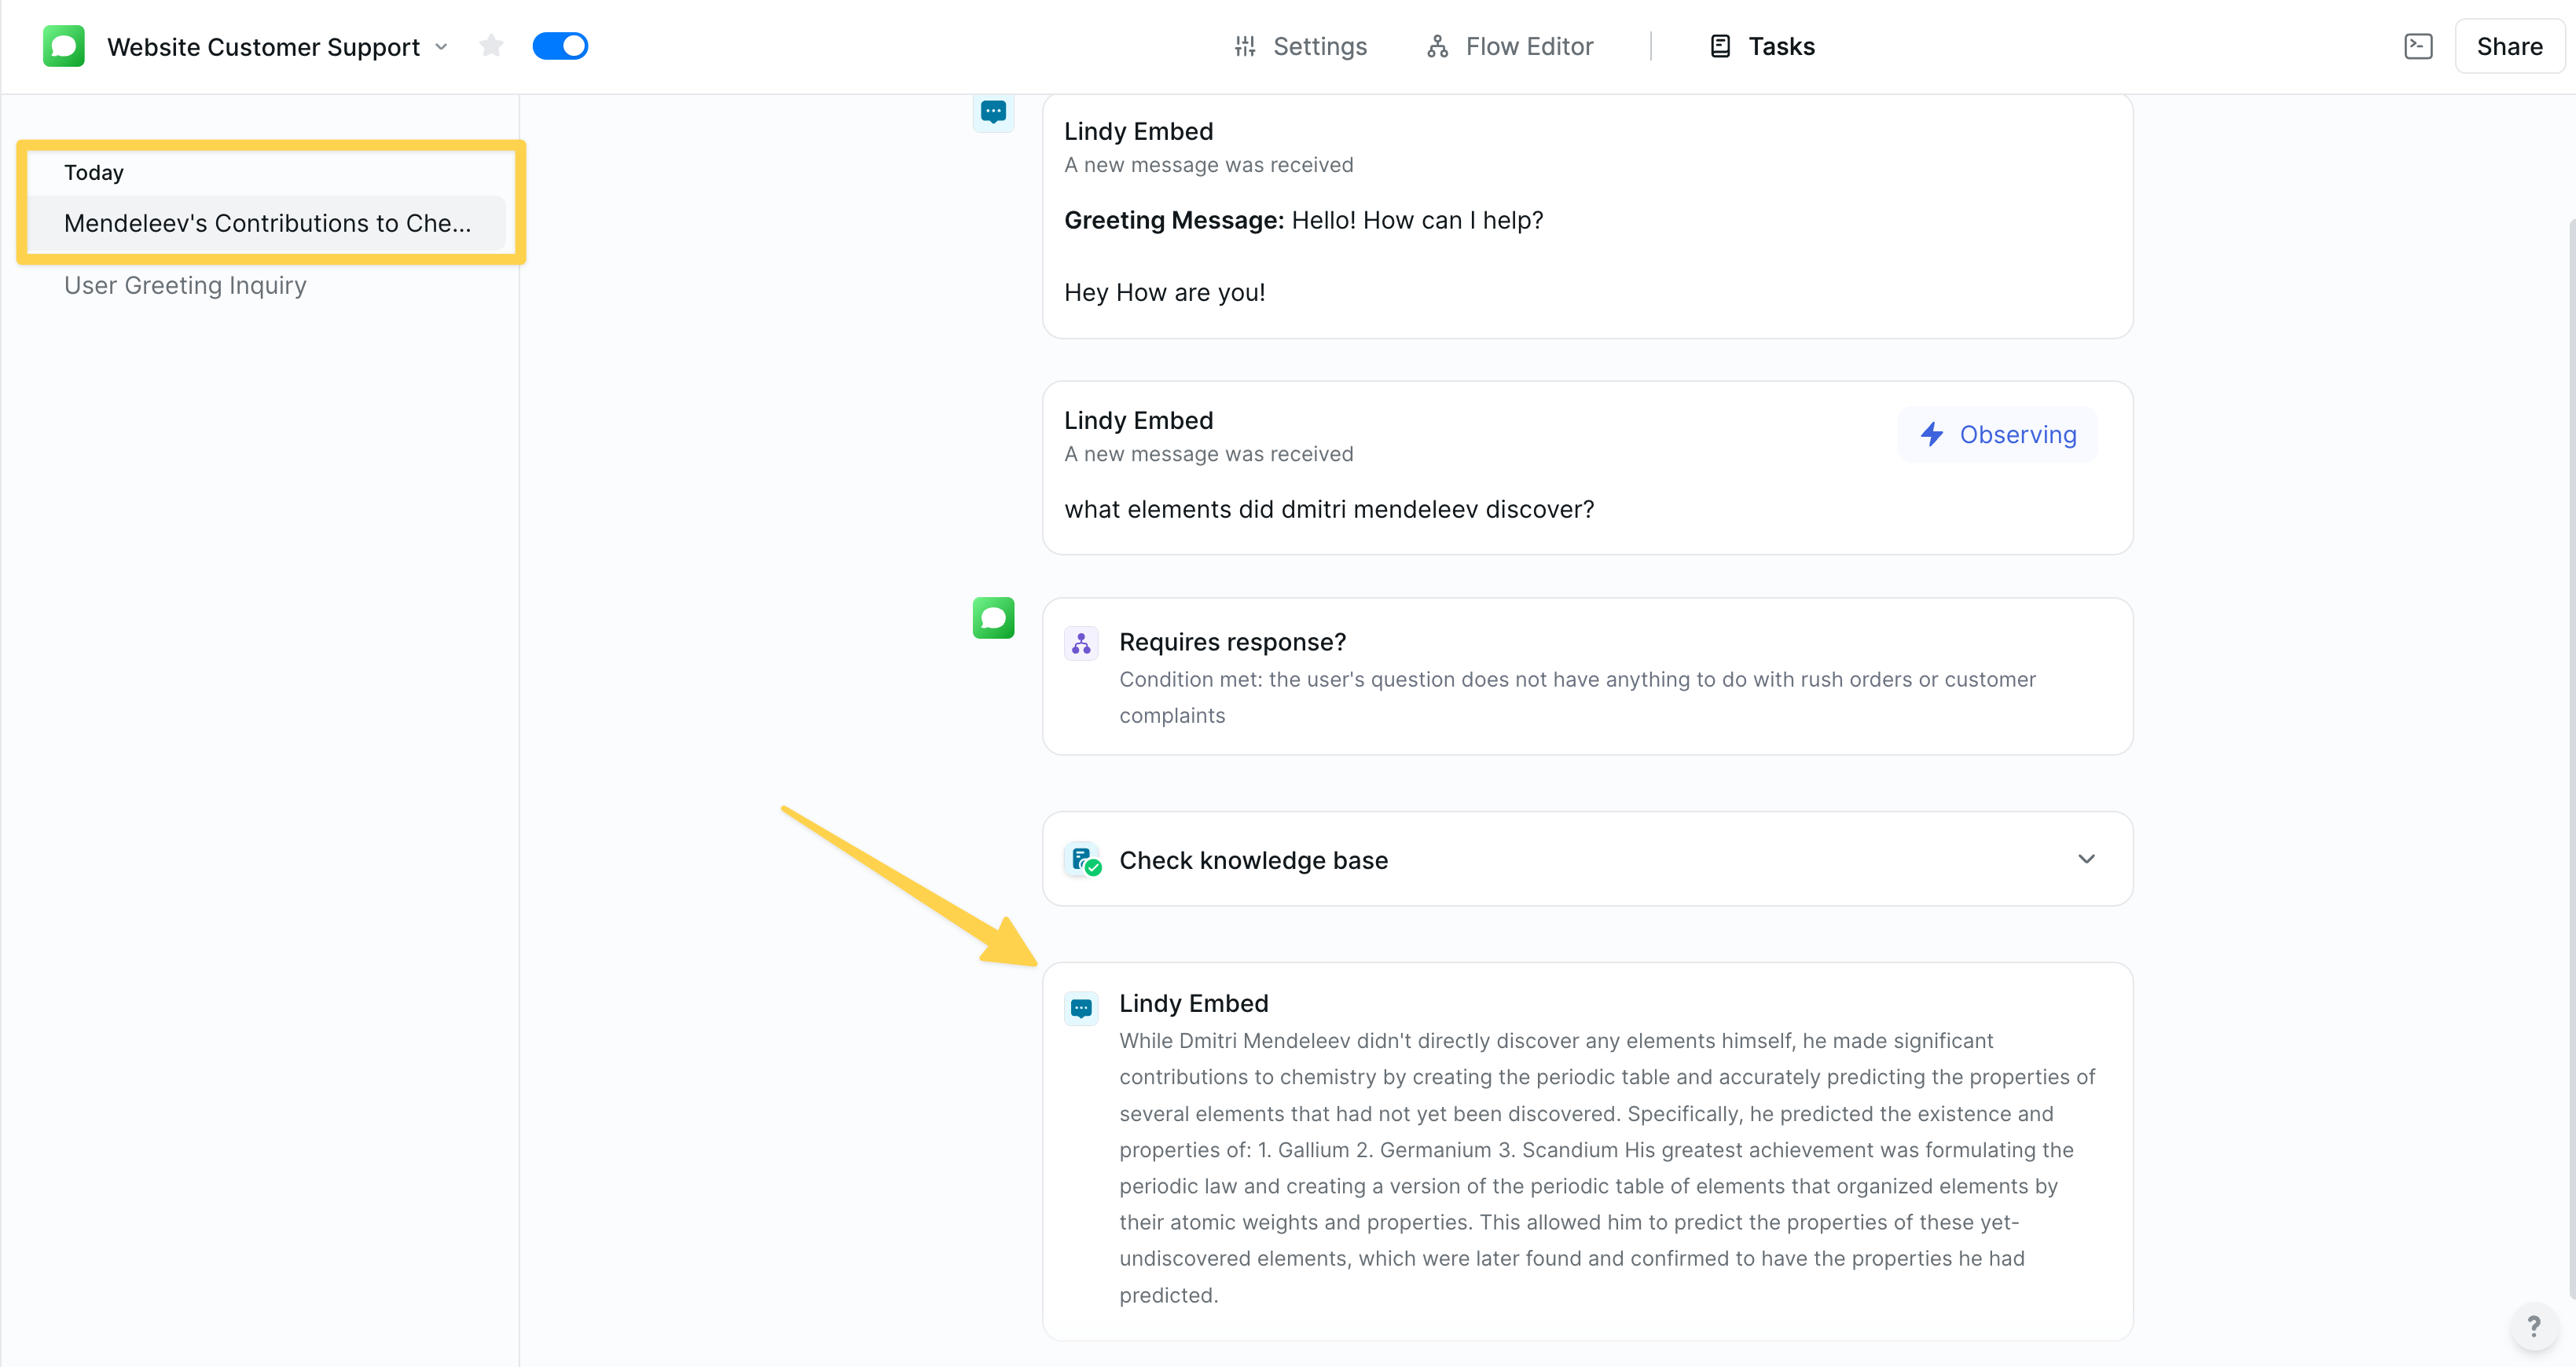
Testing Your Embed
Before deploying your Lindy Embed to production, it’s essential to test the chatbot functionality and user experience.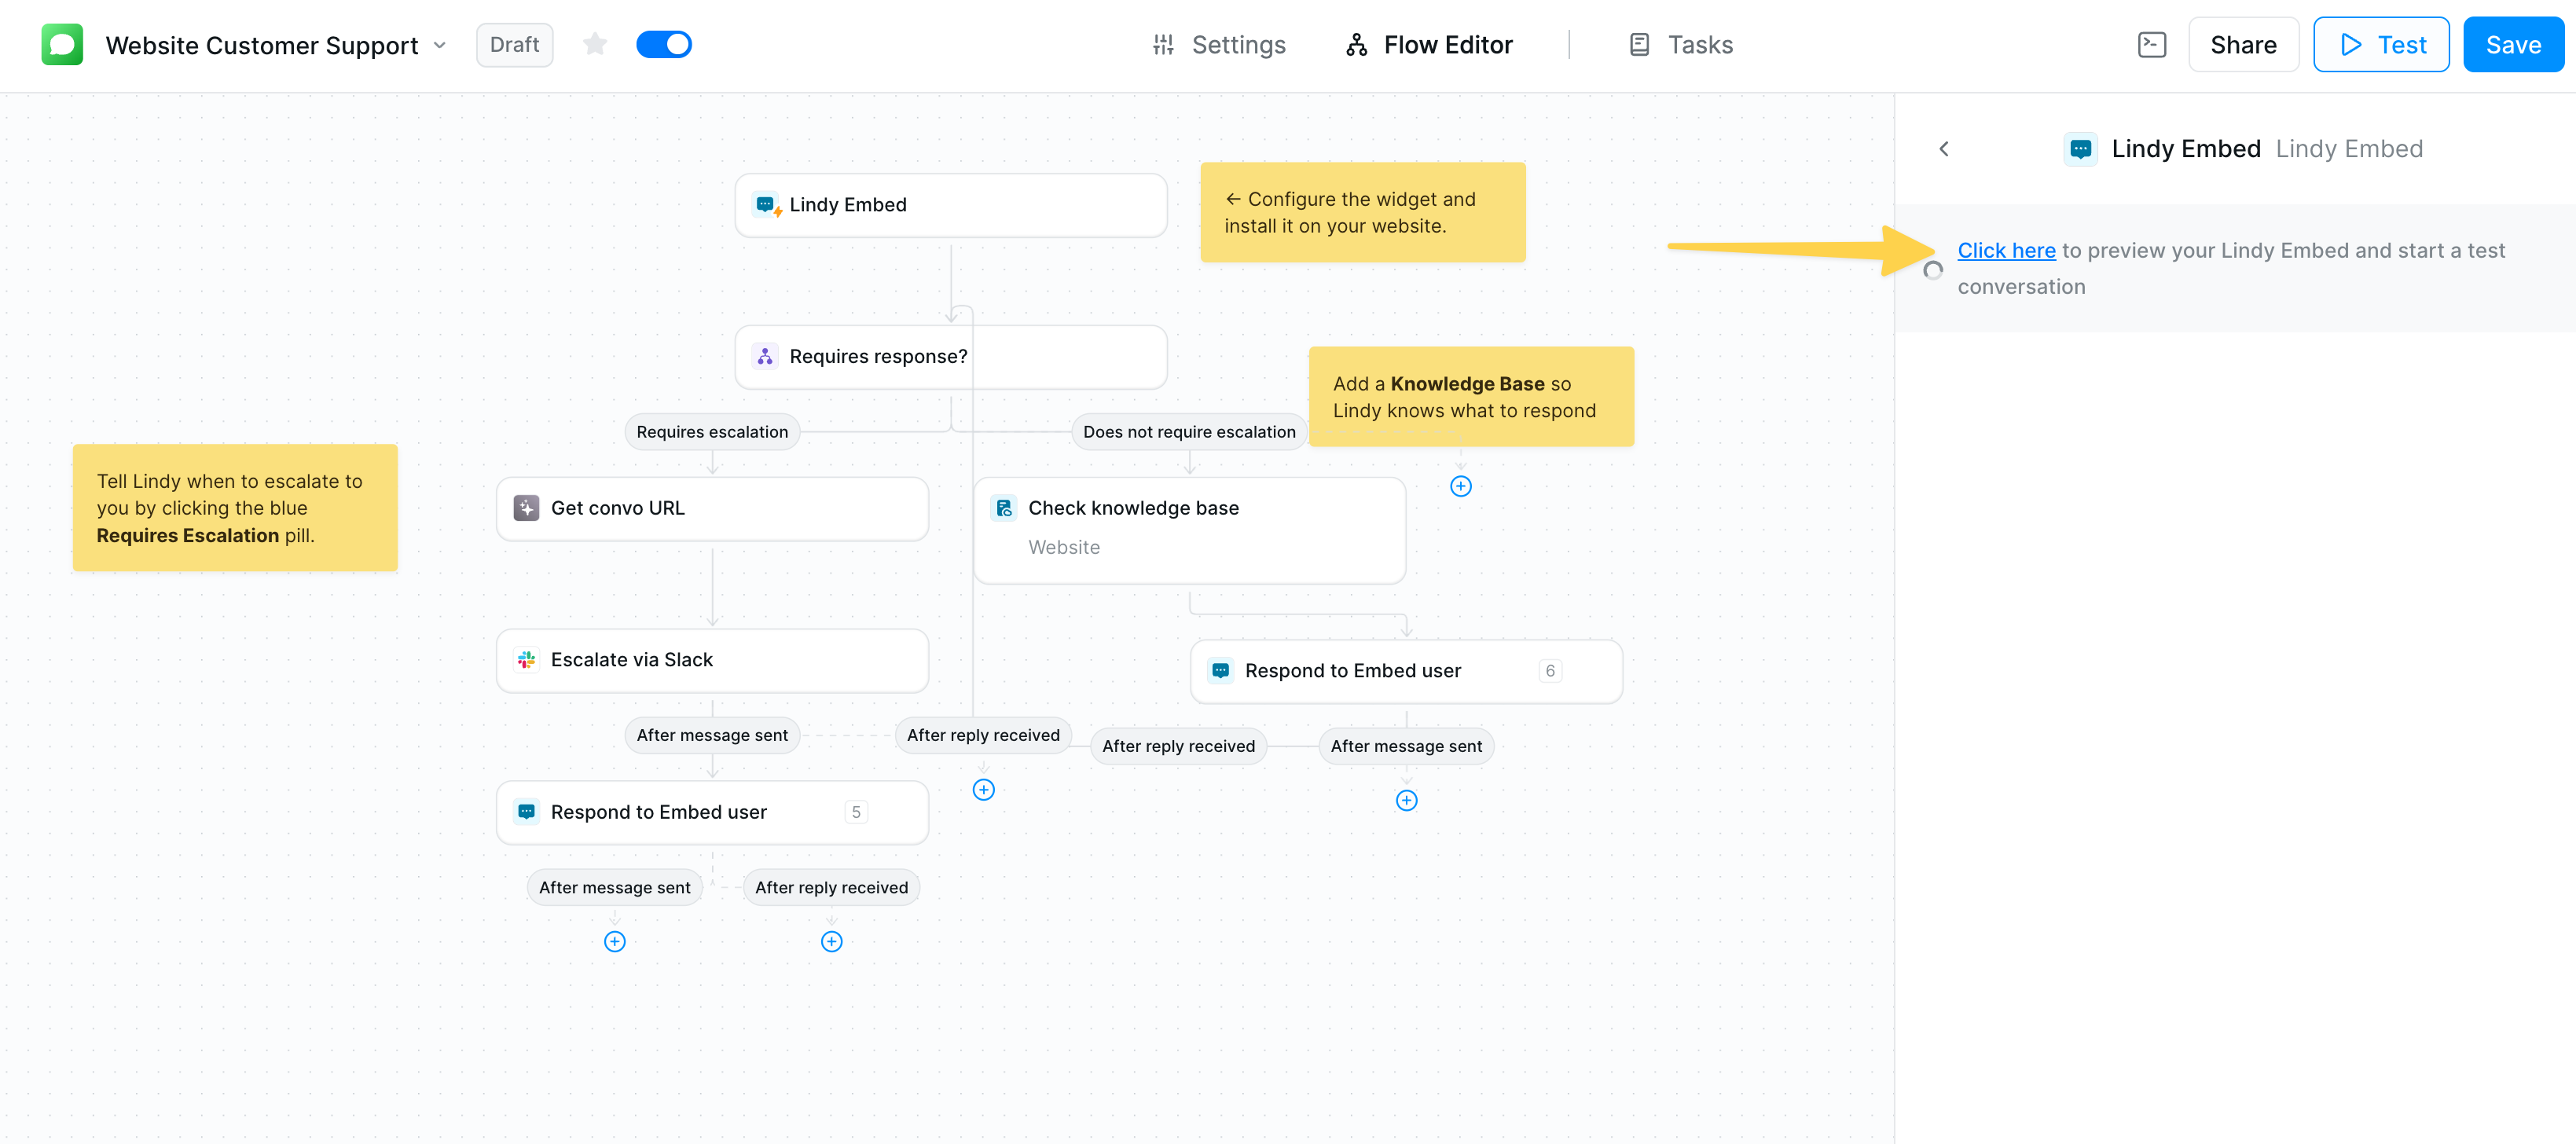
Preview Your Chatbot
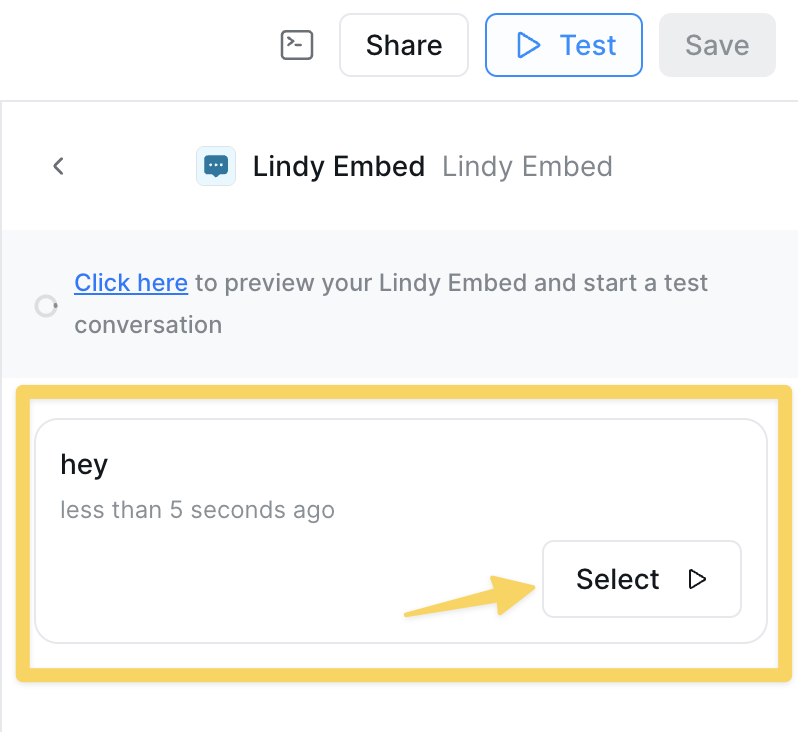
Use the “Click here to preview your Lindy Embed and start a test conversation” link in the configuration panel to test your chatbot in a realistic environment. This allows you to:- Verify the visual appearance matches your brand
- Test conversation flows and responses
- Check knowledge base integration
- Validate escalation workflows
Monitor Chatbot Conversations
- Analyze user questions and interaction patterns
- Identify knowledge gaps or areas for improvement
- Monitor escalation triggers and response quality
- Optimize conversation starters and greeting messages
Best Practices
- Test on Multiple Devices: Ensure your embed works well on desktop, tablet, and mobile
- Match Your Brand: Use your brand colors and logo for a cohesive experience
- Clear Purpose: Make the chatbot’s purpose obvious through the display name and greeting
- Domain Security: Always specify allowed domains for production sites
- Performance: Monitor loading times and optimize as needed
Troubleshooting
Widget not appearing on my website
Widget not appearing on my website
- Verify the code snippet is placed in the correct location (usually
<head>section) - Check browser console for JavaScript errors
- Ensure your domain matches the domain restriction if set
- Clear browser cache and try again
- Make sure the Lindy agent is published and active
iFrame height issues
iFrame height issues
- Set explicit height on the container element
- Use pixel values instead of percentages for better control
- Test different heights to find optimal size
- Consider responsive breakpoints for mobile devices
Styling conflicts
Styling conflicts
- Use more specific CSS selectors if needed
- Consider using the iFrame option for complete style isolation
- Check for z-index conflicts with other page elements
Code snippet not copying
Code snippet not copying
- Try using a different browser
- Copy the code manually by selecting all text
- Ensure JavaScript is enabled in your browser
- Check if browser extensions are blocking functionality
Next Steps
Test Panel
Test your embedded agent before going live
Agent Steps
Fine-tune your agent’s behavior and responses
Knowledge Base
Enhance your agent with specific knowledge
Monitoring Your Agents
Track usage and optimize your embed